The easy recipe for gluten-free pie crust that you will definitely love! Whether you crave a sweet or savory pie, this gluten-free crust is the perfect match. It’s easy to work with and can be prepared ahead of time or frozen for later use. Make your holiday special with this easy gluten-free pie crust. Now you can enjoy all your beloved pie flavors without worrying about gluten. Don’t miss out on the joy of homemade pies during festive occasions!
In this post, I’ll share a simple and foolproof recipe, expert tips, ingredient information, variations, and substitutions to help you create the perfect gluten-free pie crust. Whether you’re a seasoned baker or new to gluten-free baking, this recipe will ensure your pie crust turns out flaky, flavorful, and absolutely delightful. Let’s get started!
Ingredients
- The perfect combination of almond flour, oat flour, and rice flour gives the best results and there is no need to use a xanthan gum. Ensure the oat flour used is certified gluten-free.
- Cold butter is essential for achieving a flaky and tender crust. It adds richness, flavor, and moisture to the crust. Butter also helps to create distinct layers when it melts during baking, resulting in a flaky texture. For the vegan option, use vegan butter.
- Flax seed meal acts as a binder in this gluten-free pie crust recipe. When combined with water, it thickens and creates a gel-like consistency, mimicking the texture of eggs.
- Water is used to hydrate the flax seed meal and create a flax egg mixture. It helps bind the ingredients together and contributes to the overall texture of the crust.
- Salt plays a role in strengthening the gluten-free dough, adding structure to the crust.
- Sugar (for sweet pies). Adding sugar to the crust is optional, but it enhances the flavor when making sweet pies. It balances the other flavors and adds a touch of sweetness.

Step-by-Step Instructions
- Prepare the flax egg: In a small bowl, combine the flaxseed meal and water. Stir well and let it thicken for about 5 minutes. This flax egg will act as a binder in our gluten-free crust.
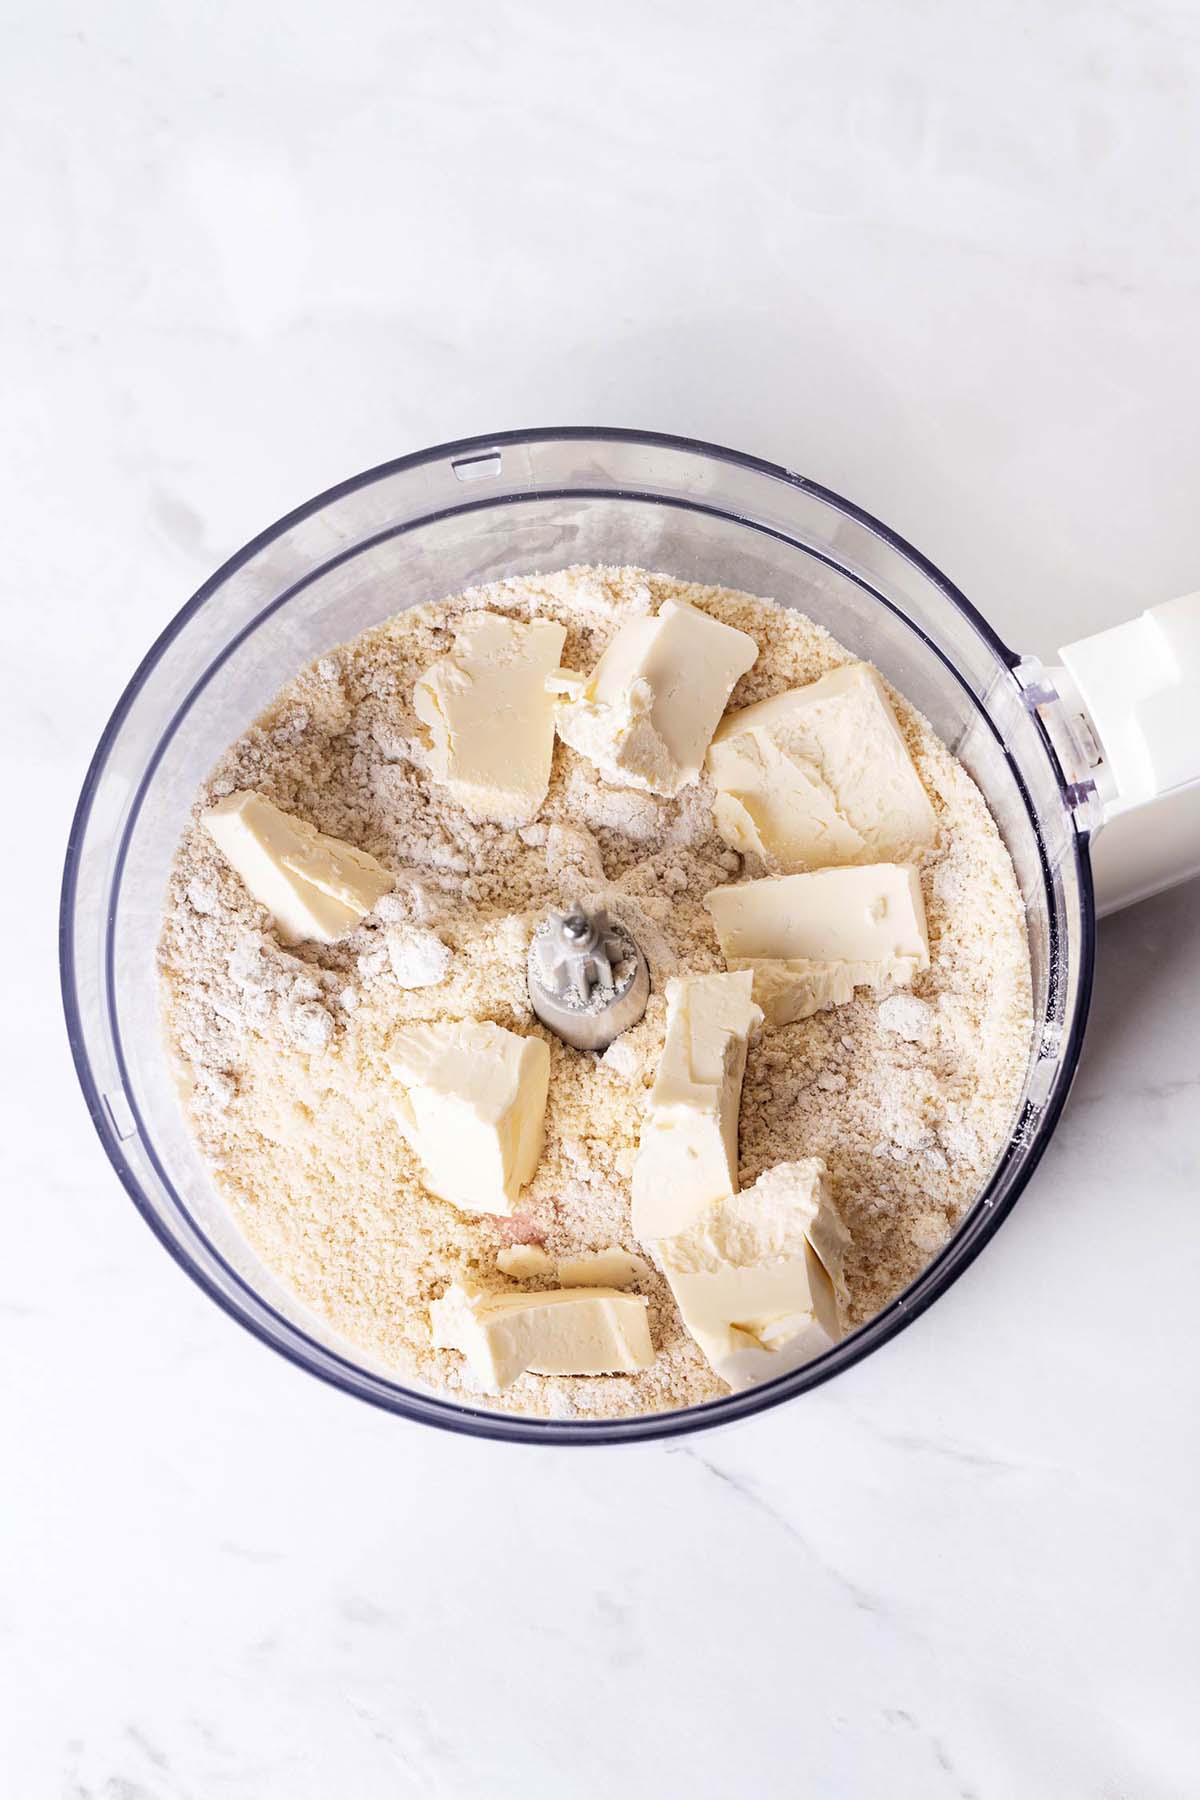
- Add dry ingredients: Place the almond flour, oat flour, rice flour, salt, and sugar (if making a sweet pie) into a food processor.
- Incorporate cold butter: Add the cold diced butter to the food processor. Pulse the mixture until coarse crumbs form. This should take approximately 15 seconds. The cold butter will create a flaky texture in the crust.
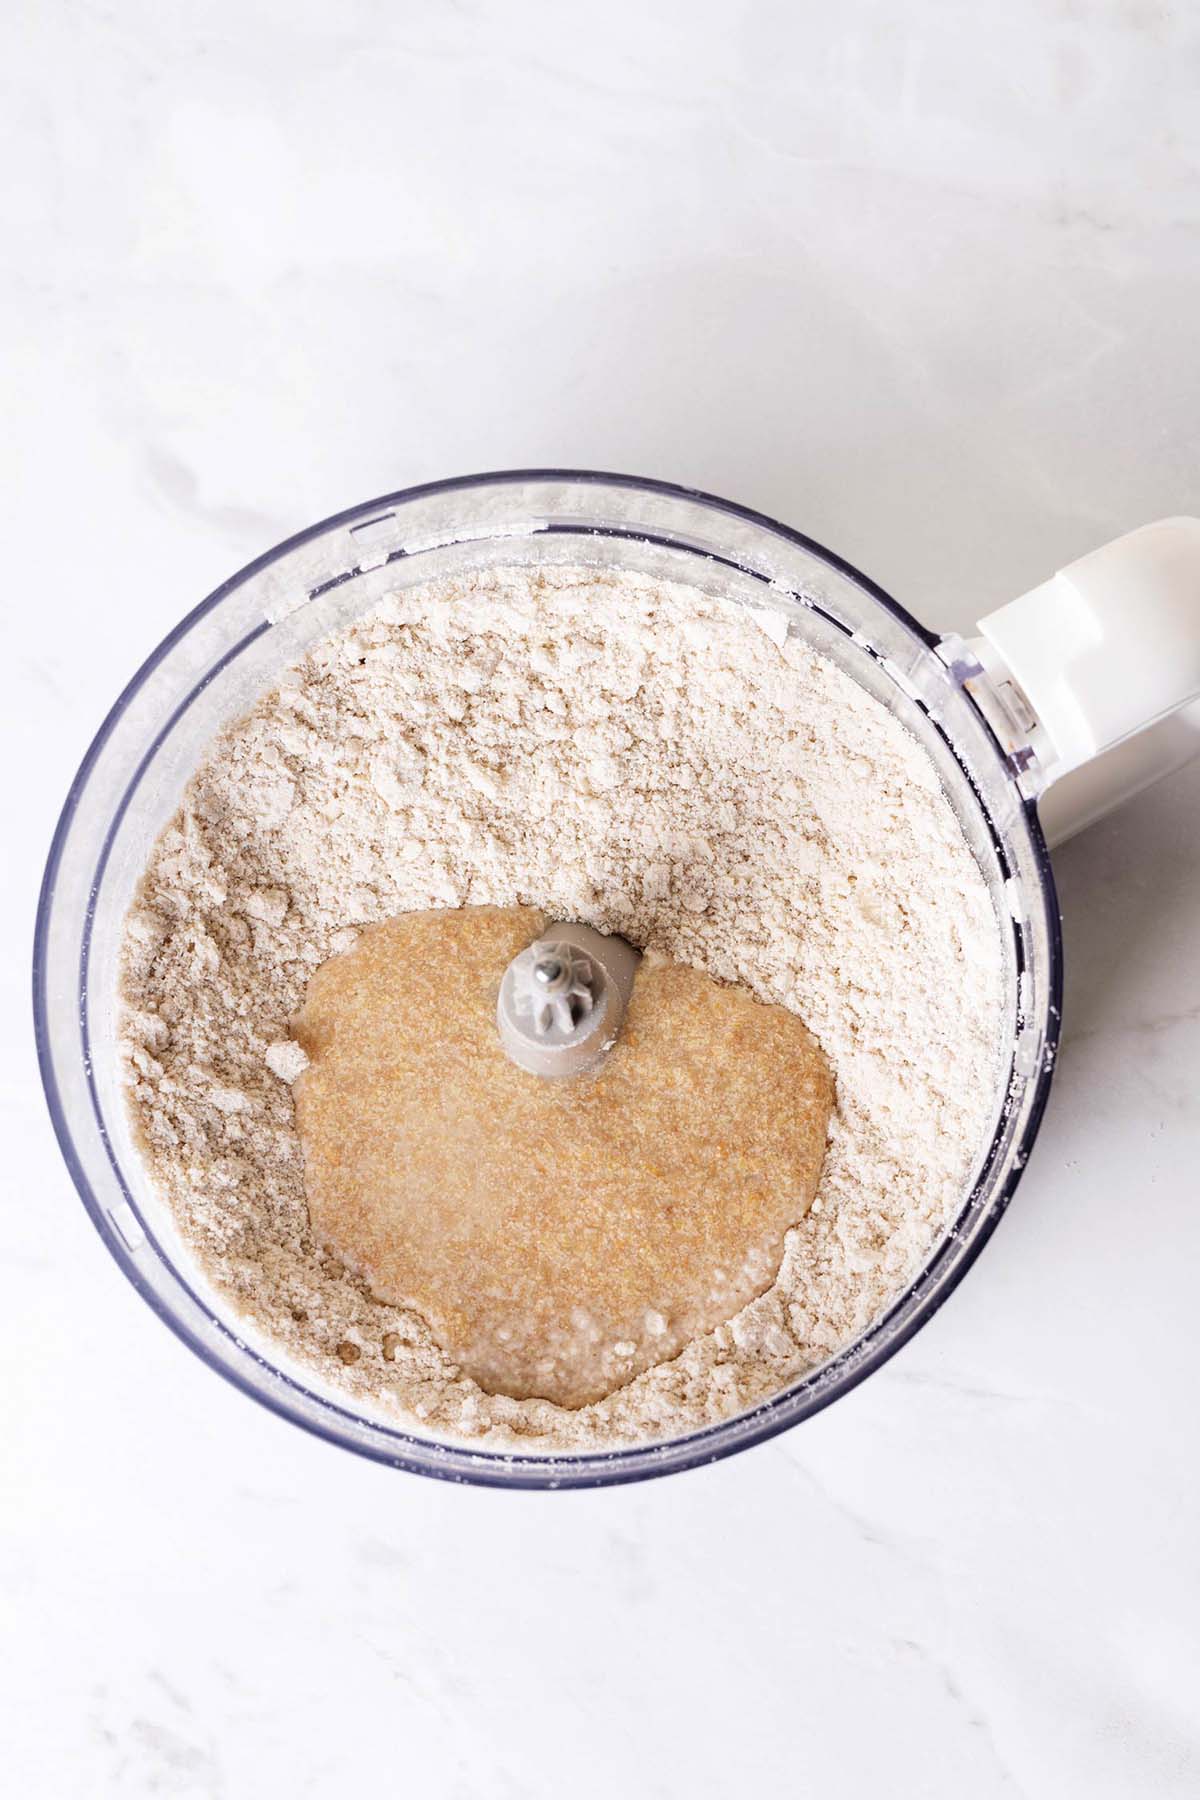
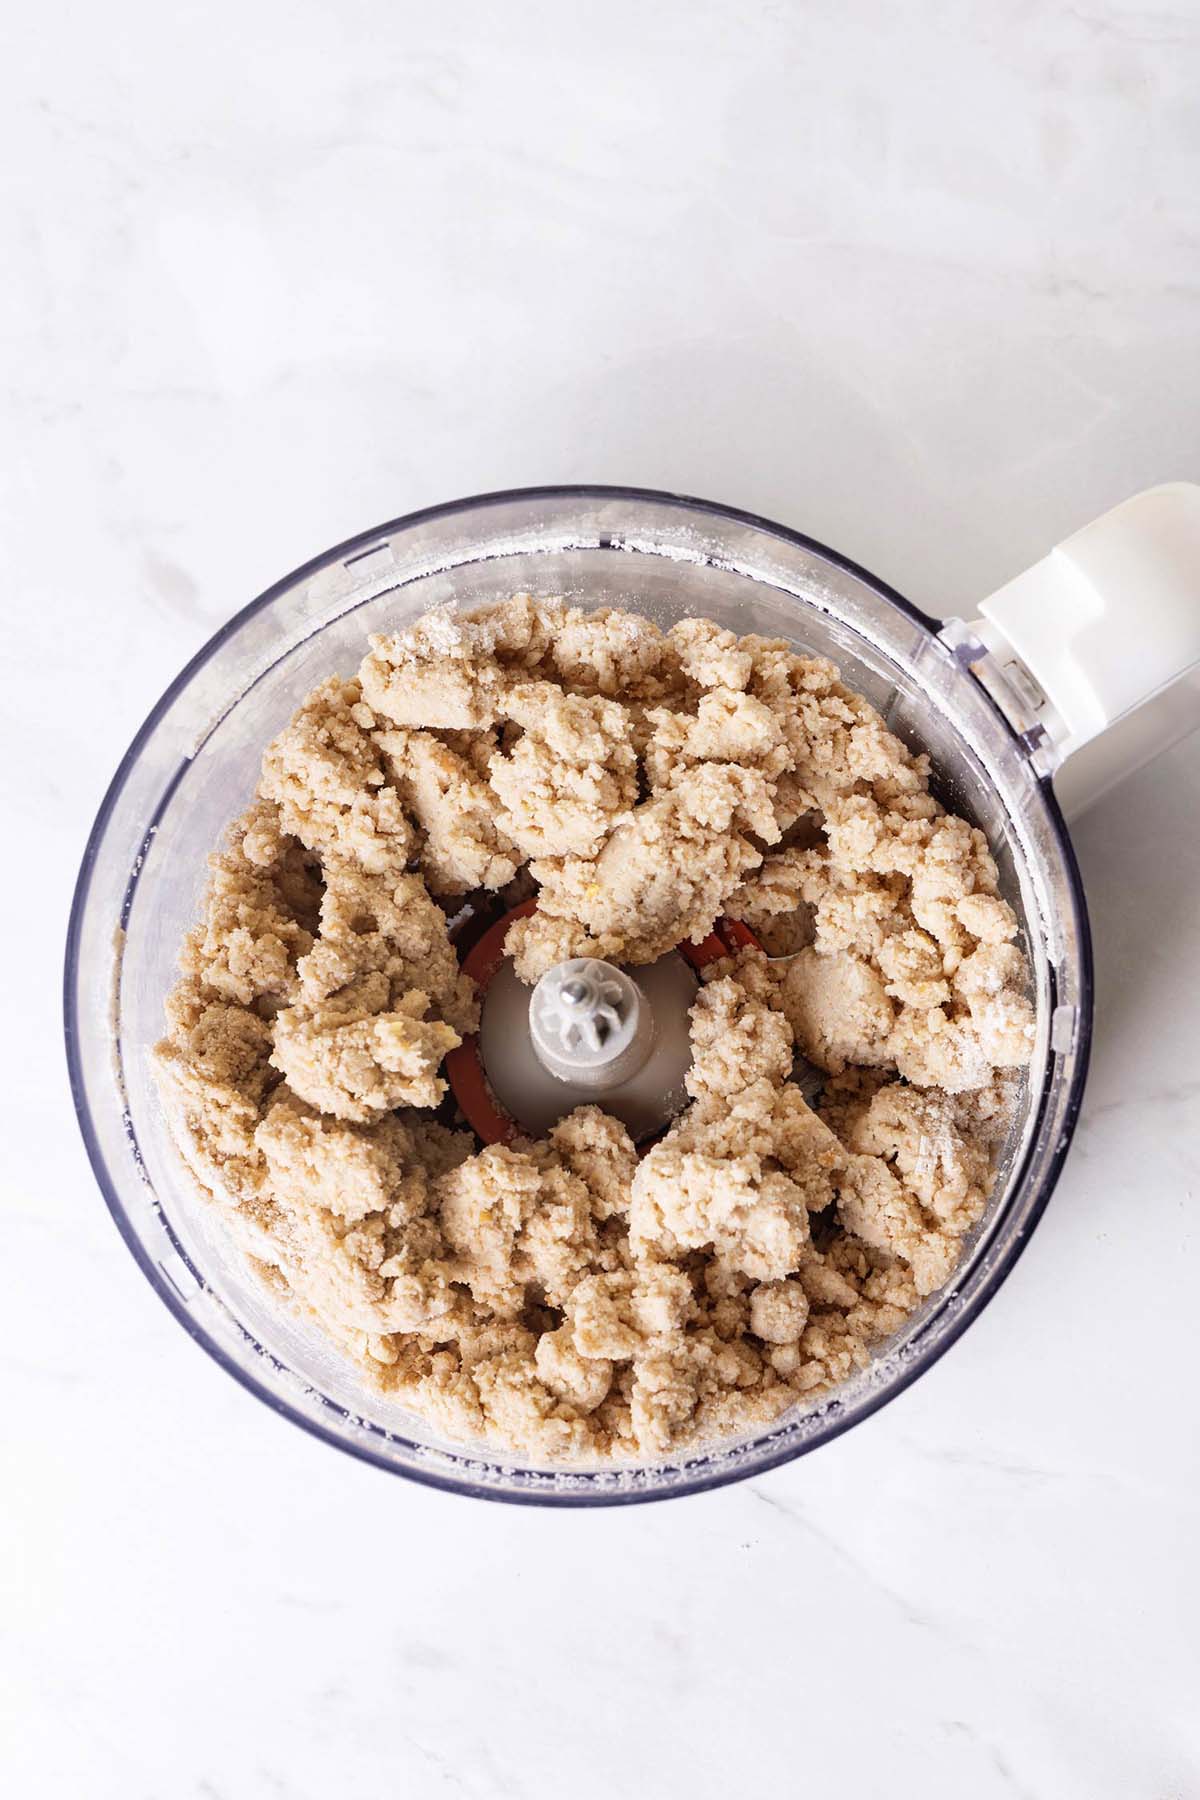
- Add flax egg mixture: Pour the flax egg mixture into the food processor. Pulse again until the dough forms big clumps. This should only take a few seconds. If the dough remains crumbly, add 1 tablespoon of cold water and pulse again. Be cautious not to add too much water, as it can make the dough too soft.

- Chill the dough: Shape the dough into a disk and cover it with plastic wrap. Refrigerate for at least 30 minutes. This chilling time allows the dough to rest and become easy to work with.
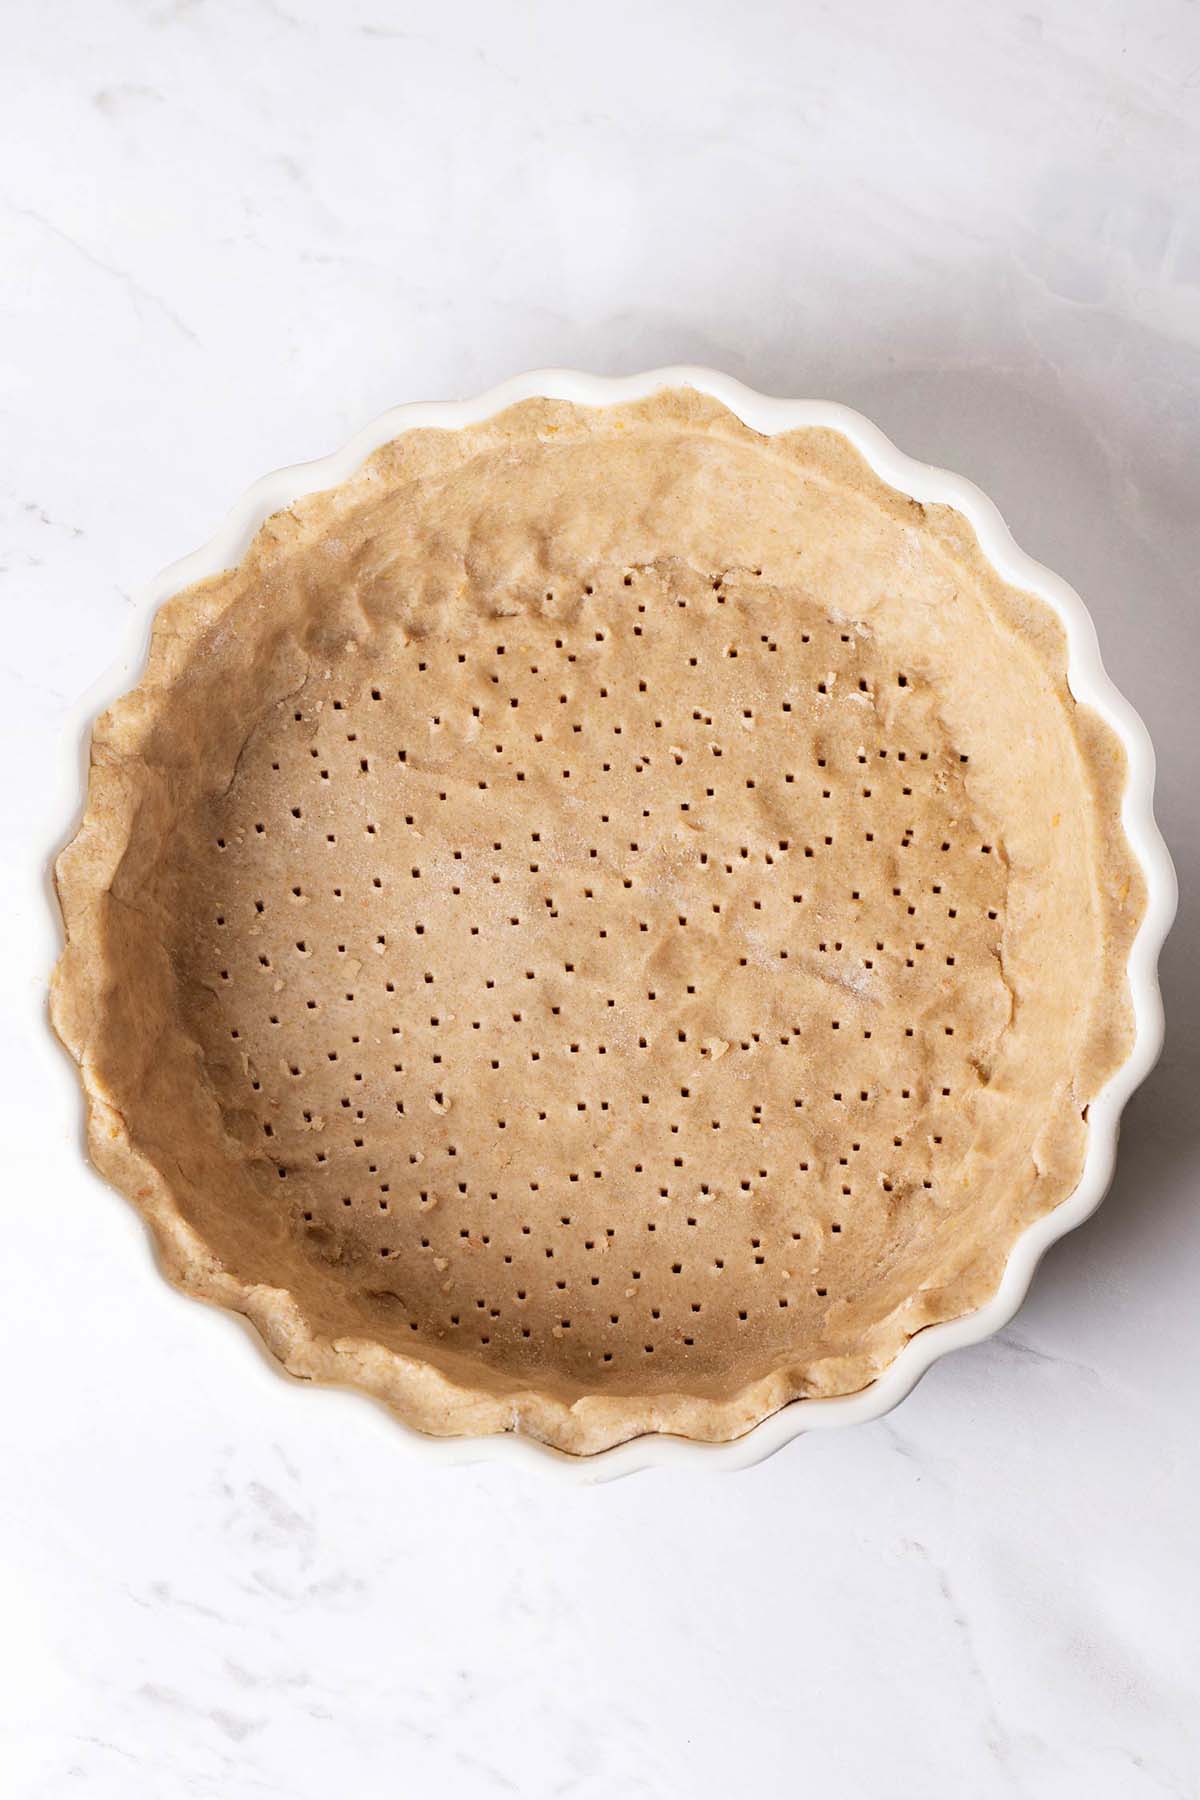
- Roll and transfer the dough: On a lightly floured parchment paper dusted with rice flour, roll the dough into a 14-inch circle. Carefully flip the dough into a 9-inch pie dish and remove the paper. If the dough breaks, don’t worry – simply press it back together and form an even layer in the pie dish.
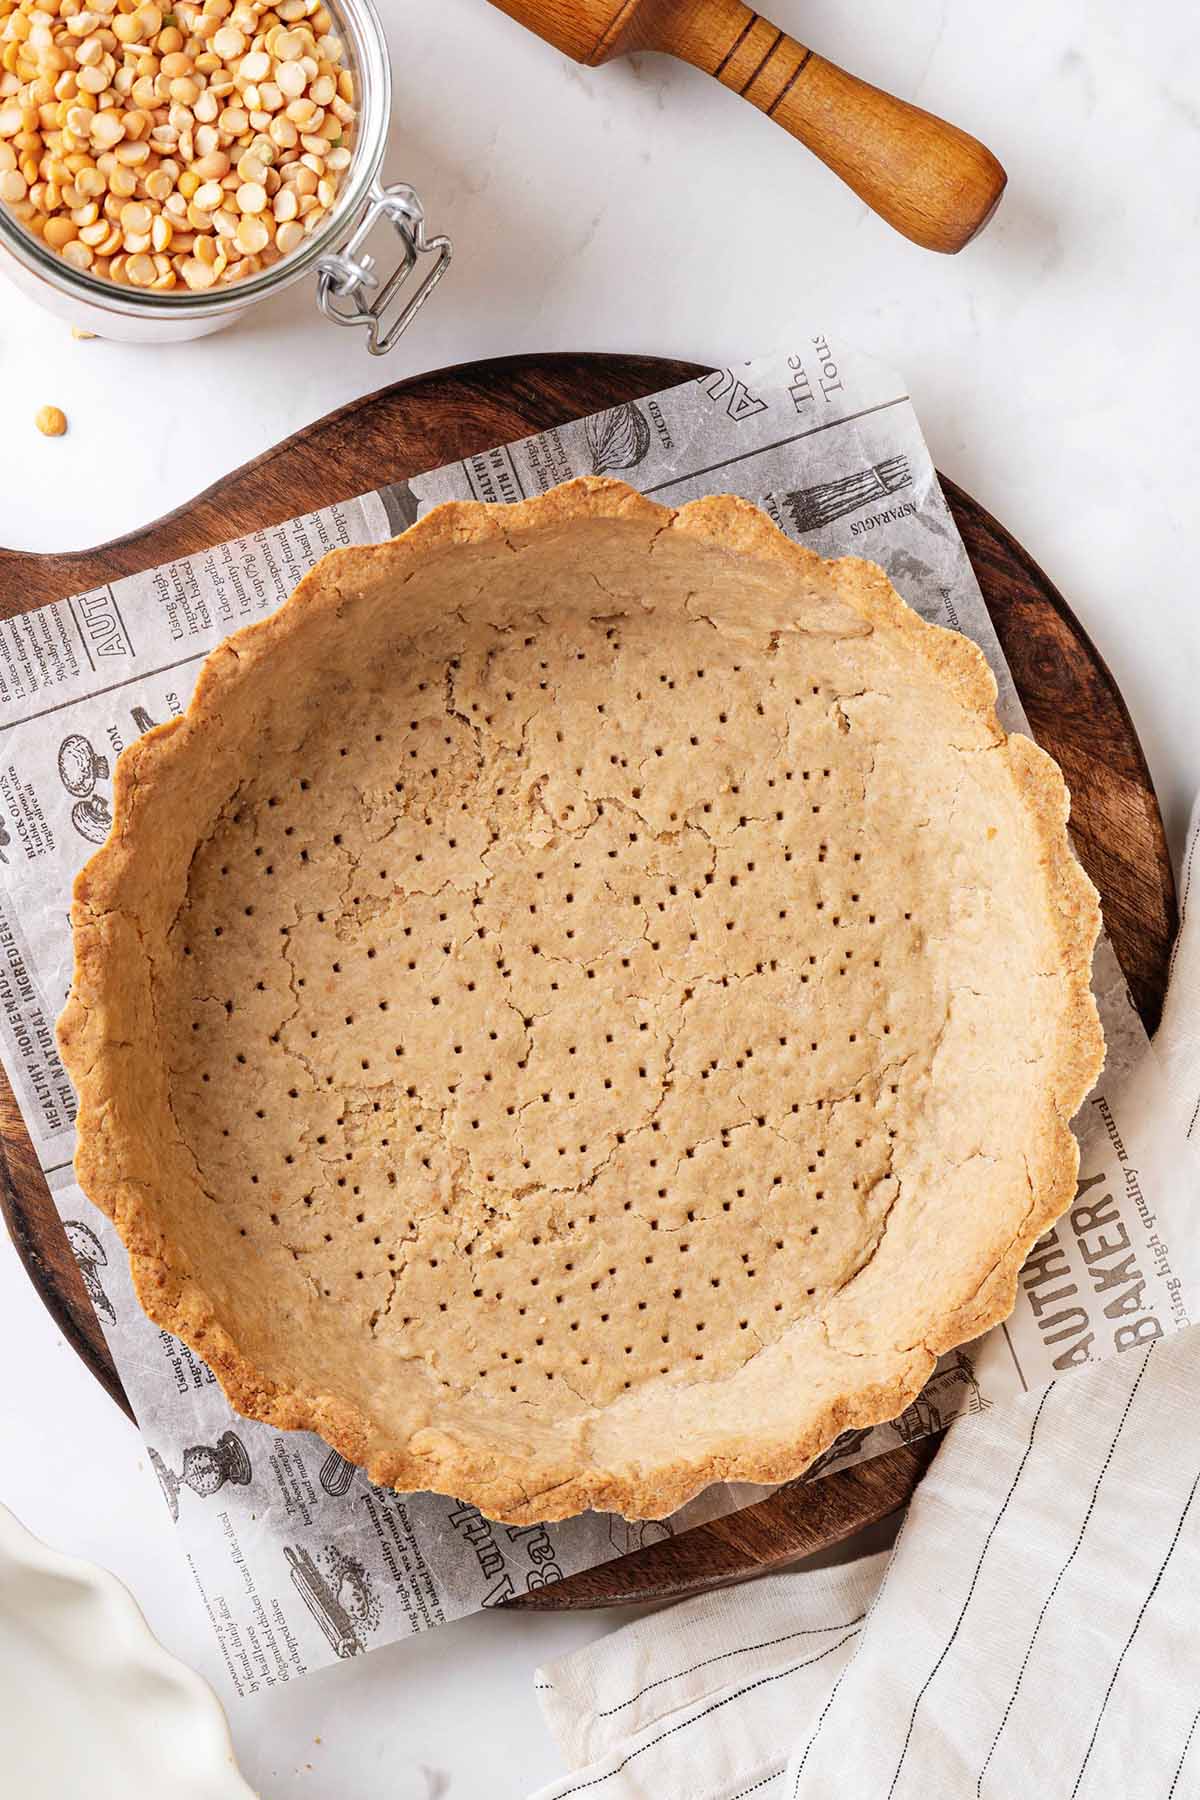
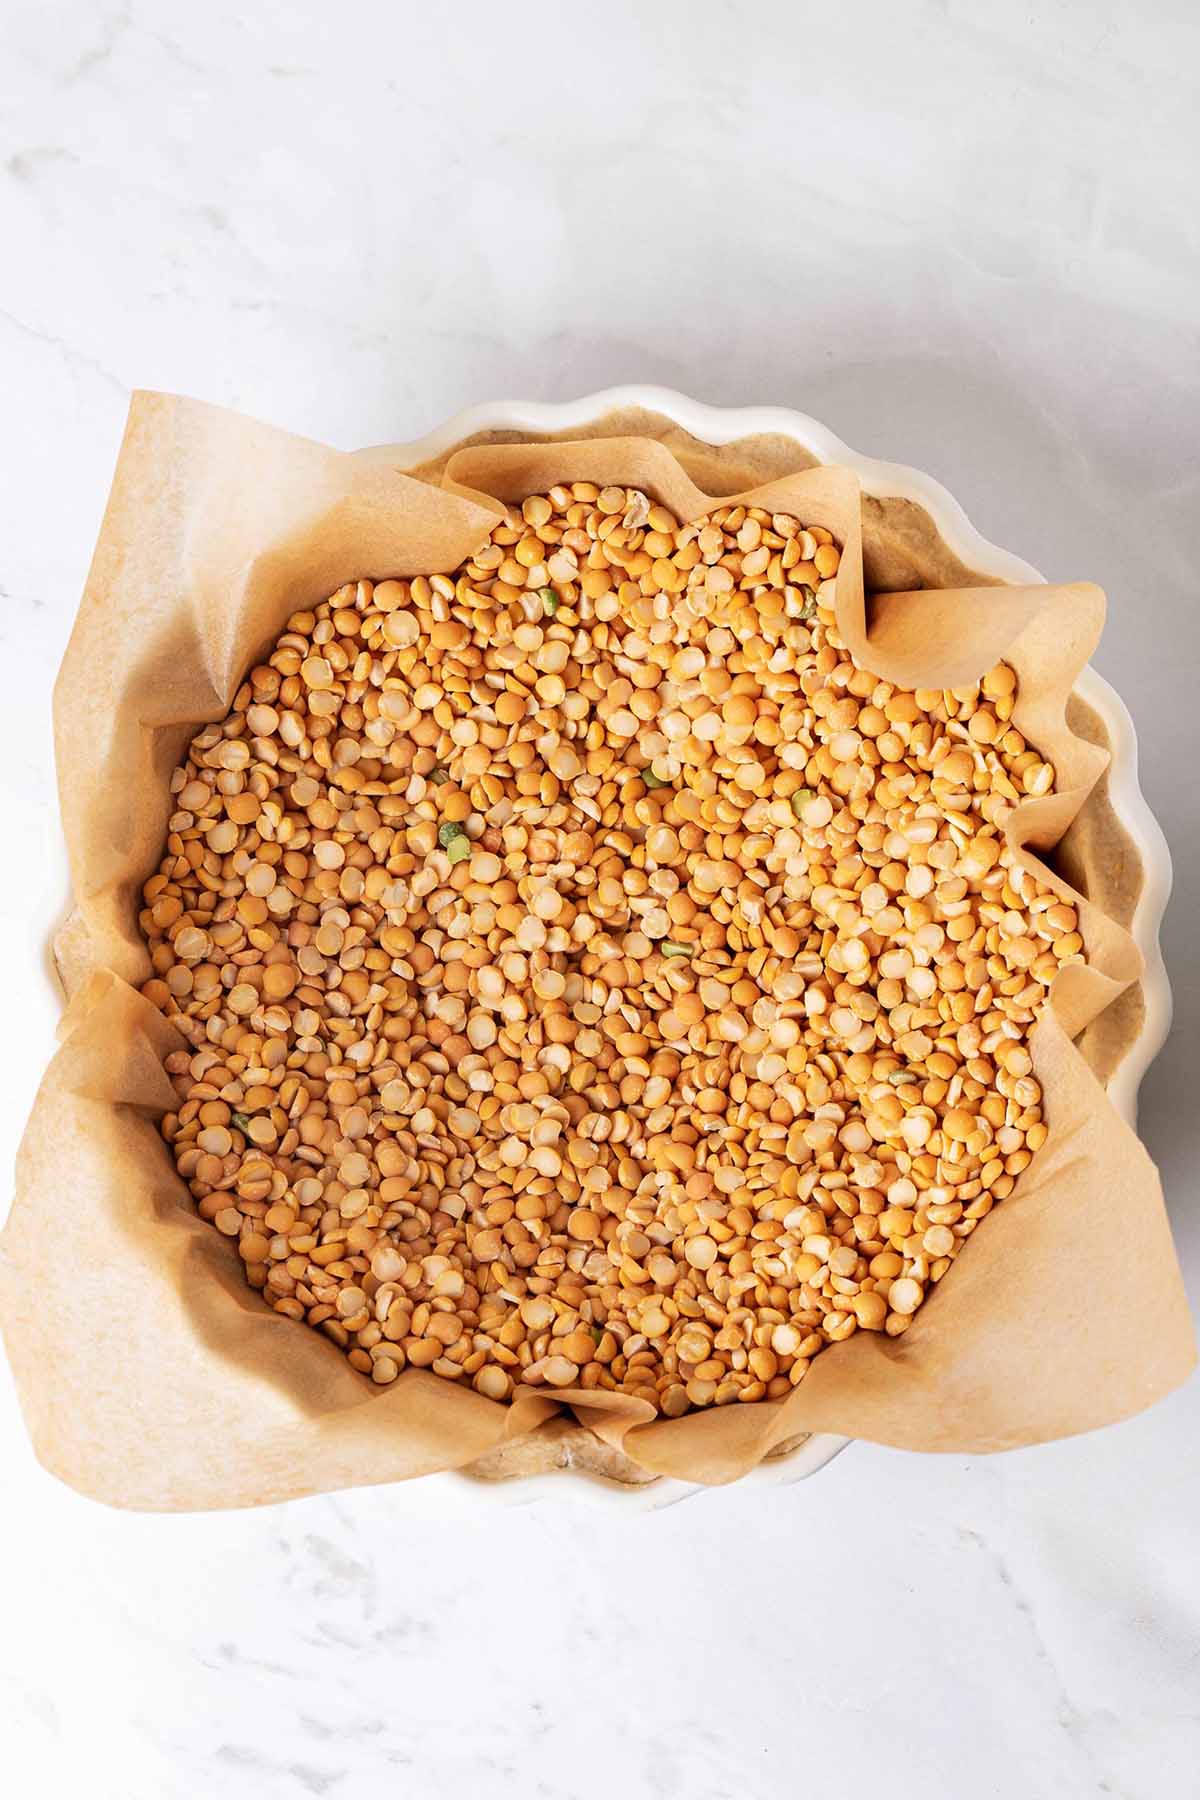
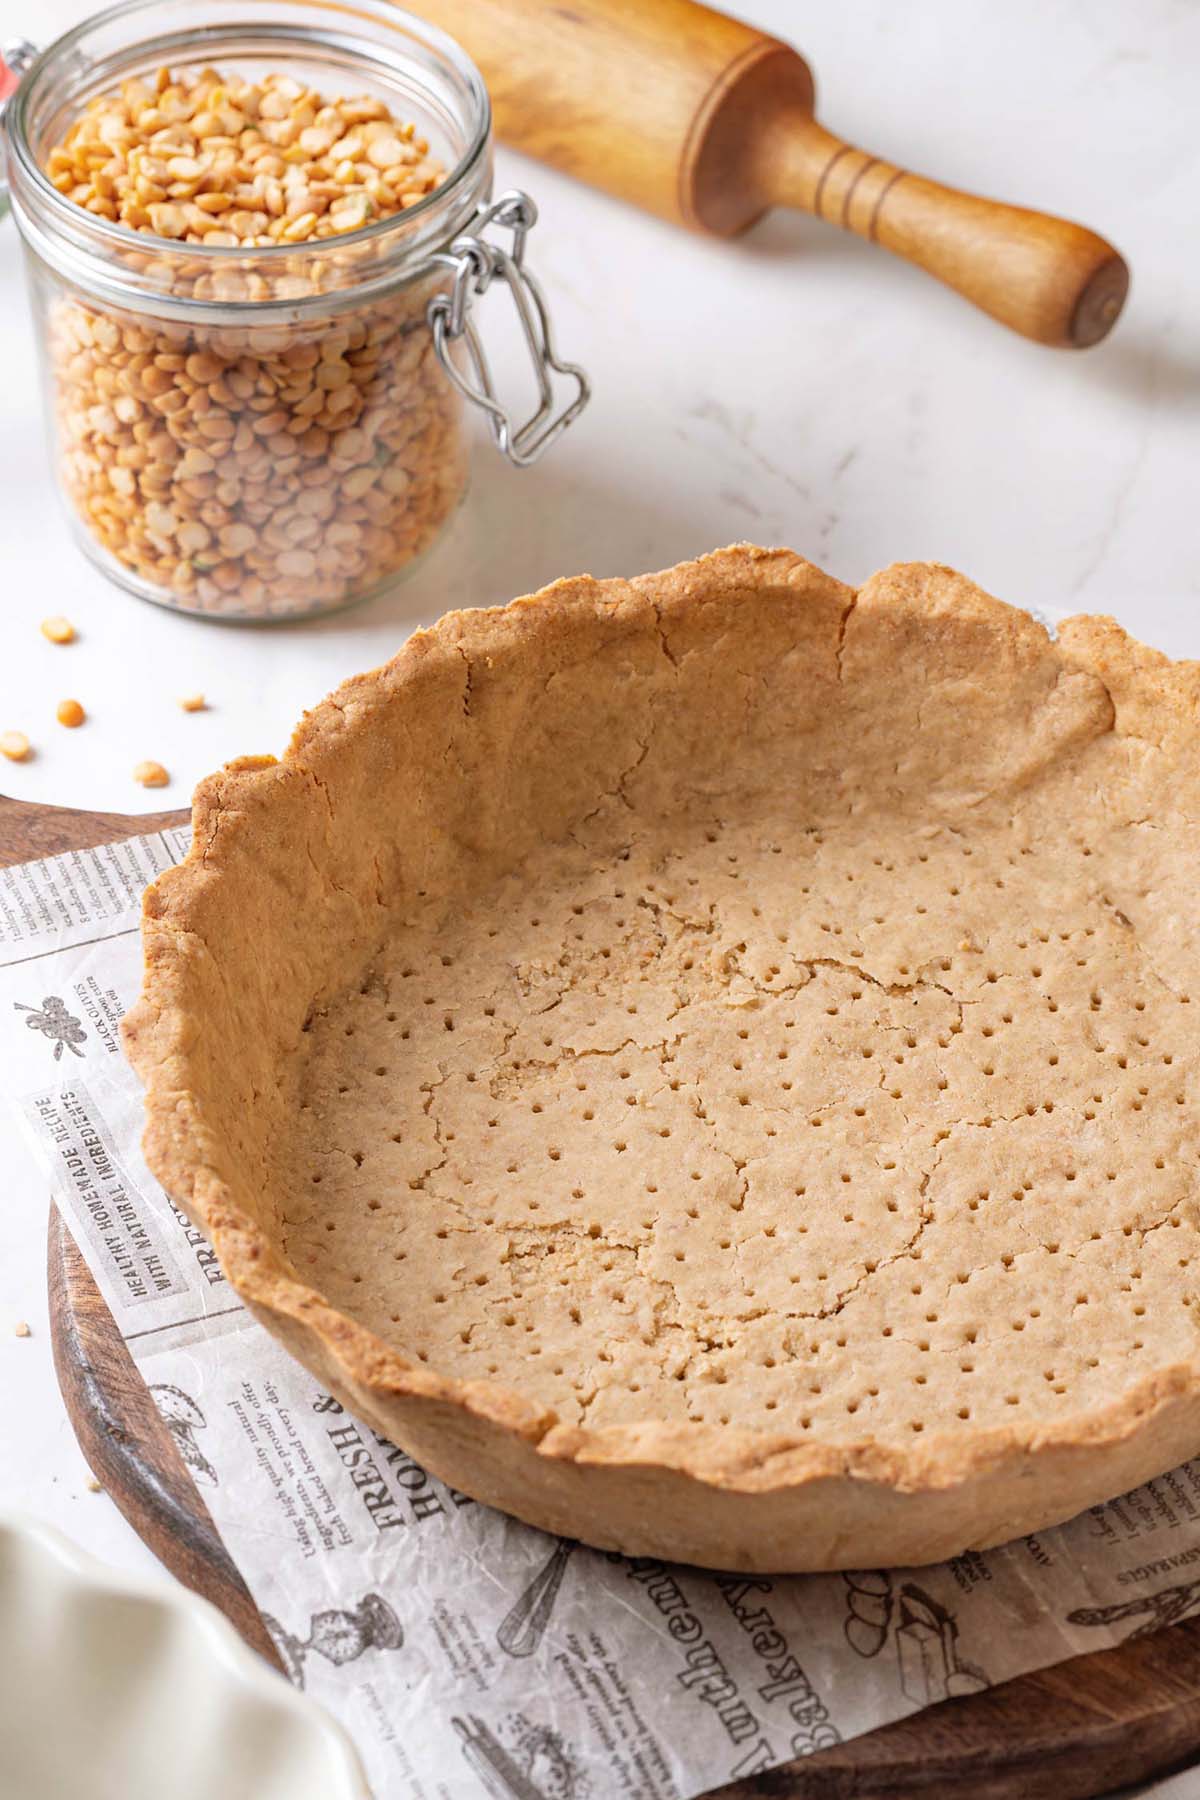
- Pierce and prebake the crust: Prick the bottom of the crust with a fork to prevent it from puffing up during baking. To prebake the crust, preheat the oven to 425°F (220°C). Line the crust with parchment paper and fill it with pie weights or beans. This ensures the crust maintains its shape. Bake for 20 minutes, until the edges begin to golden.
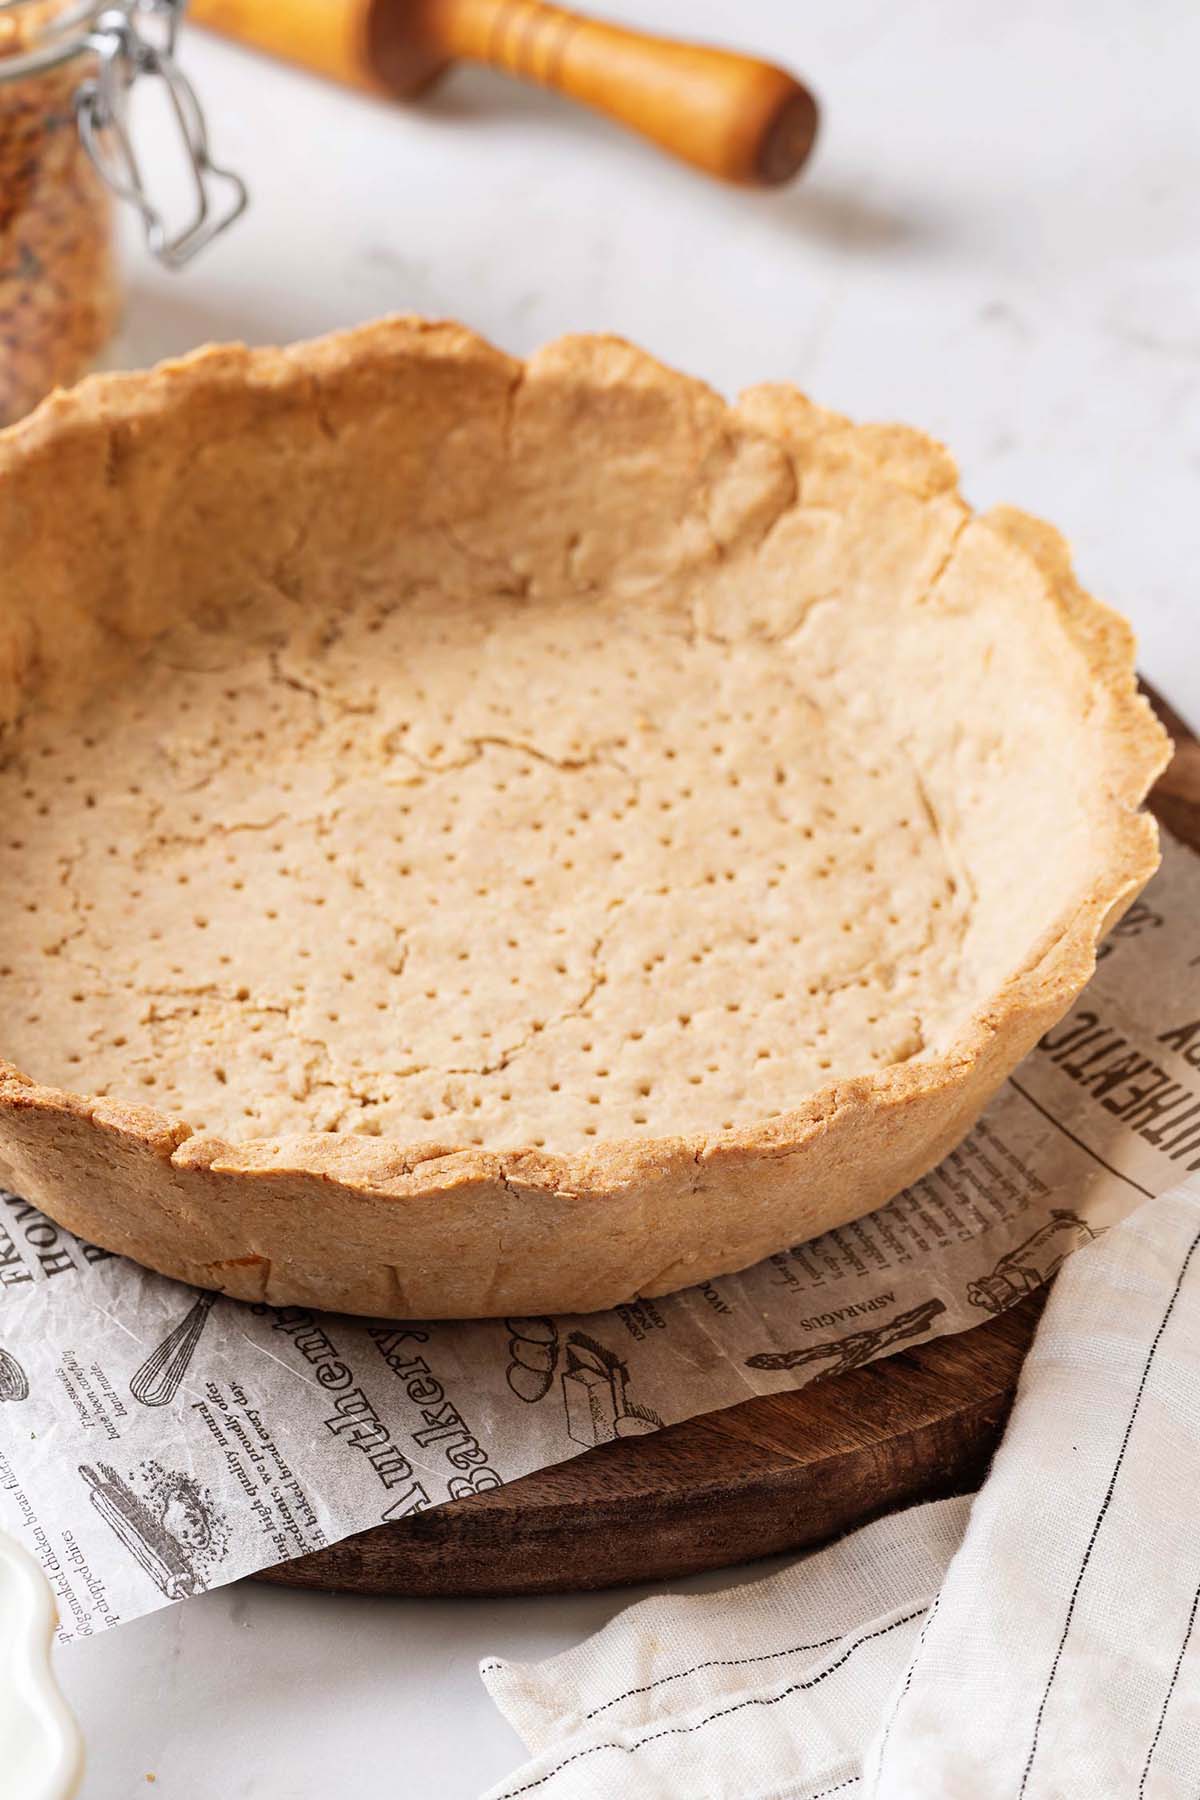
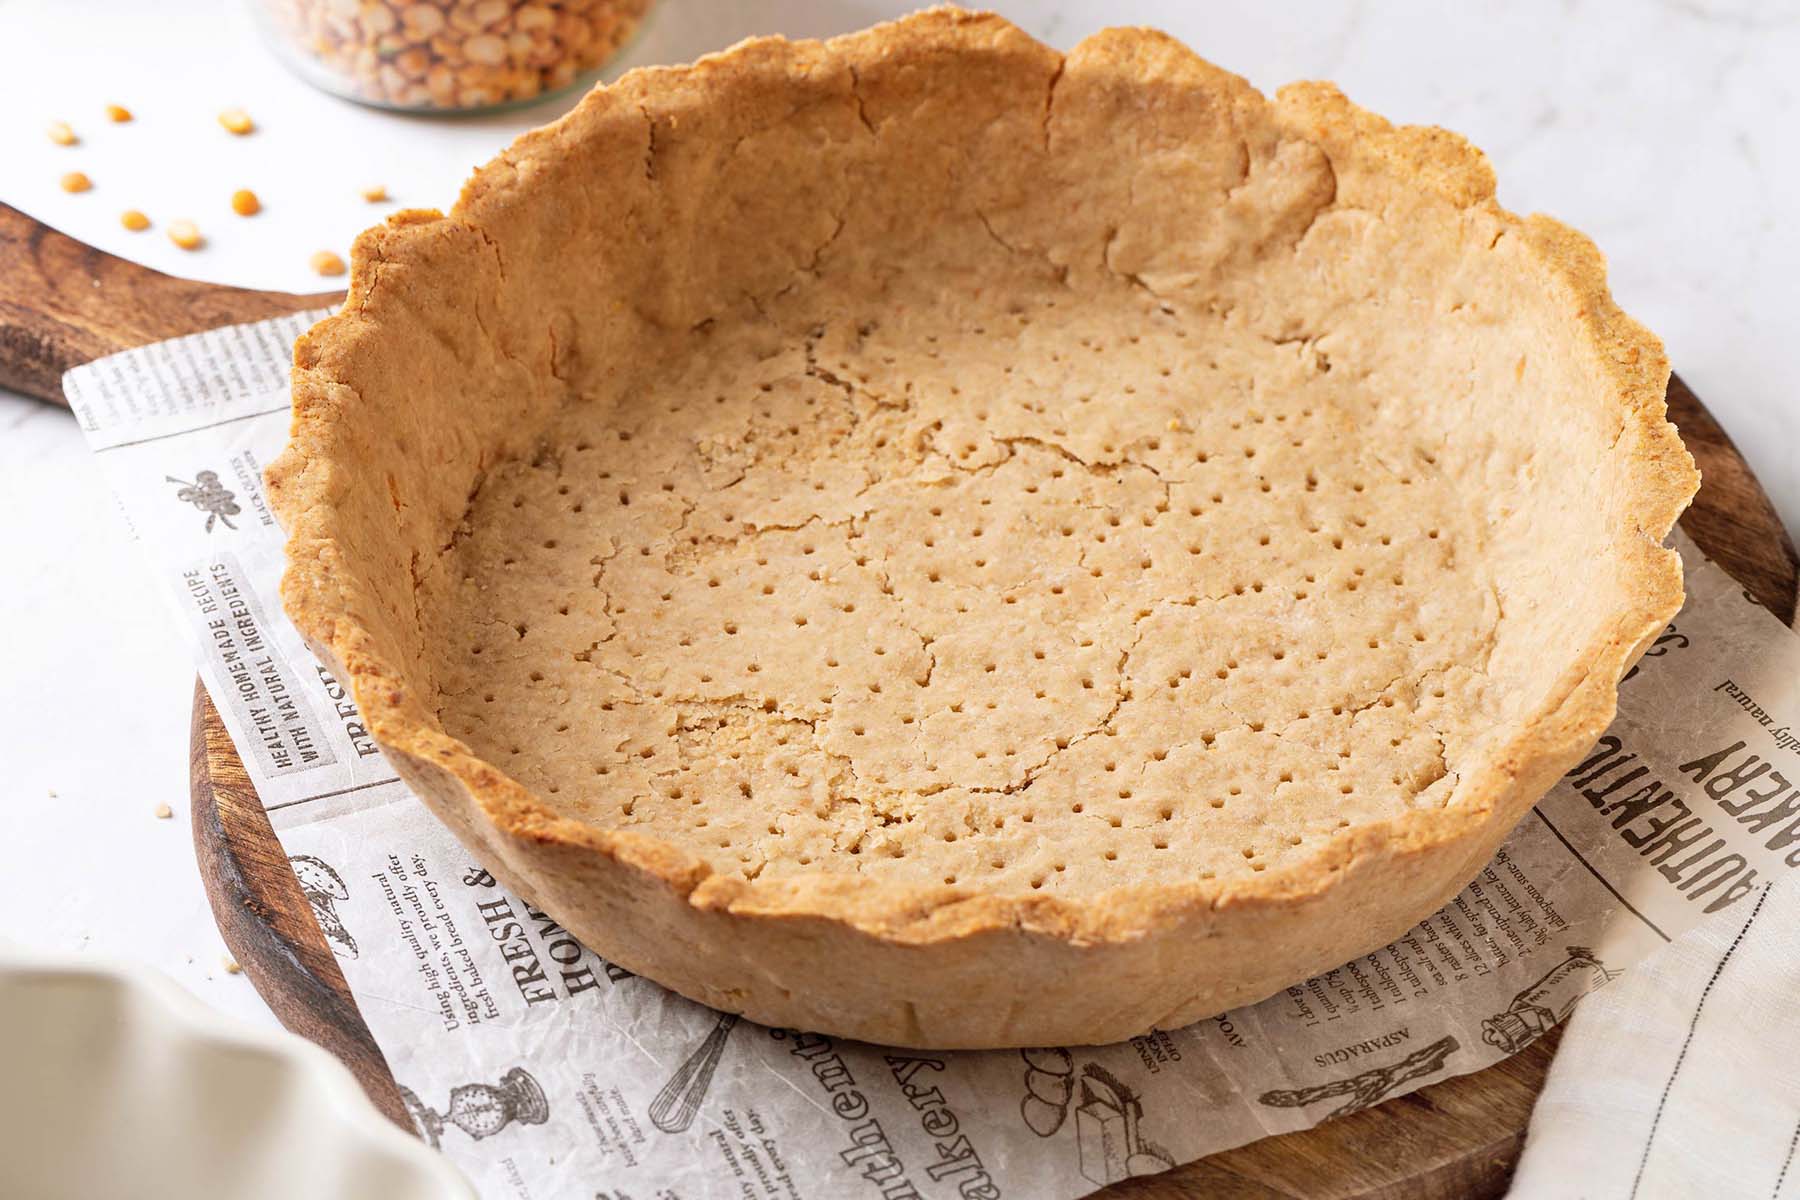
- Remove weights and bake further: After 20 minutes, remove the pie weights or beans by carefully lifting the parchment paper from the crust. Continue baking for additional 10 minutes or until the bottom of the crust is completely cooked and lightly browned. Allow the crust to cool completely before adding your desired filling.
Expert Tips
- Keep ingredients cold: It’s crucial to work with cold ingredients, especially butter. Cold butter ensures a flaky and tender crust. Refrigerate the butter beforehand prior to preparing the dough.
- Handle with care: Gluten-free dough is more delicate than traditional dough. When rolling out the crust, handle it gently to prevent cracking or tearing. If the dough breaks, simply press it back together. Remember, imperfections can be hidden once the crust is filled.
- Chill the dough: After forming the dough, refrigerate it for at least 30 minutes. Chilling allows the gluten-free flours to hydrate fully and firms up the butter. This makes the dough easier to roll and results in a flakier crust.
- Roll with parchment paper: Rolling gluten-free dough can be challenging as it tends to stick. Place the dough between two sheets of lightly floured parchment paper to prevent sticking. This also makes transferring the dough to the pie dish easier.
- Prick the crust: Before prebaking, use a fork to prick the bottom of the crust. This prevents air bubbles from forming and helps the crust bake evenly.
- Prebake the crust with weights: To prebake the crust, line it with parchment paper and fill it with pie weights or beans. This prevents the crust from puffing up. Alternatively, you can use the fork pricking method without weights. Experiment with both techniques to find your preferred method.
- Adjust sweetness levels: Customize the sugar amount based on your preference and the sweetness of the filling. Increase or decrease the sugar quantity in the crust to achieve the desired level of sweetness.
How to Freeze Pie Crust
Freezing gluten-free pie dough is a convenient option, especially if you want to have the dough ready for future use. After preparing the dough, shape it into a disk, wrap it tightly in plastic wrap, and place it in a freezer-safe bag or container. Frozen pie dough can be stored in the freezer for up to 2-3 months. When you’re ready to use it, thaw the dough in the refrigerator overnight before rolling it out.
Tips for Making Mini Pies or Tartlets
By following these tips, you can easily make delightful mini pies or tartlets using the gluten-free pie crust recipe.
- Roll out smaller portions: Divide the chilled dough into smaller portions and roll them out to achieve a thickness comparable to a full-size crust.
- Use mini pie pans or tartlet molds: Buy individual-sized pans or molds designed for mini pies or tartlets. Ensure they are greased or lined to prevent sticking.
- Adjust baking time: Mini pies or tartlets will require less baking time than a full-sized pie. Keep a close eye on them and adjust the baking time accordingly.
- Experiment with fillings: Get creative with various fillings such as berries, custards, apple filling, or savory options. Try different combinations.
- Serve with style: Enhance the presentation with toppings like whipped cream, powdered sugar, or drizzles of caramel sauce. Arrange the mini pies or tartlets on a platter or individual dessert plates for an appealing display.
You now have a fantastic gluten-free pie crust recipe that is sure to impress your family and friends. With its flaky texture and delicious flavor, this crust will be the perfect foundation for all your pie creations. Remember to follow my expert tips, and let the dough chill properly for the best results. Enjoy the process of gluten-free baking, and savor every bite of your homemade gluten-free pies!
FAQs
Use this Gluten-free Pie Crust in These Recipes:
More Easy Gluten-free Desserts to Try:
- Gluten-free Strawberry Chantilly Cake
- Gluten-free Carrot Cake
- Gluten Free Strawberry Trifles
- Vegan Chocolate Peanut Cheesecake

Ingredients
- 2 tbsp (14 g) flaxseed meal
- 5 tbsp (75 g) water
- ¾ cup (75 g) almond flour
- ½ cup (50 g) oat flour
- ½ cup (75 g) rice flour
- ½ tsp salt
- ¾ stick (85 g) cold butter (use vegan butter for a dairy-free option)
- 1 tbsp sugar (for the sweet pies)
Instructions
- First, make a flax egg. In a small bowl combine flaxseed meal and water. Stir well and let it thicken for 5 min.
- Place flour, salt (and sugar if you are making the crust for a sweet pie) into the bowl of a food processor.
- Add the cold diced butter and pulse the mixture until coarse crumbs form. This will take about 15 seconds.
- Add the flax egg mixture and pulse until the dough forms big clumps. This will also take just a few seconds. If it's still crumbly and doesn't stick into clumps, add 1 tbsp cold water and pulse again. Be careful not to add too much water or the dough will get too soft.
- Form the dough into a disk and cover it with plastic wrap. Refrigerate for 30 minutes.
- Roll the dough on lightly floured parchment paper (I use rice flour for this) into a 14-inch circle. Carefully flip the dough into a 9-inch pie dish and remove the paper. The dough could break, don't worry about it, just press it back together and form an even layer in the pie dish.
- Pierce the bottom of the crust with a fork.
- To prebake the crust, heat the oven to 425°F (220°C). Line the crust with parchment paper and fill it with beans or pie weights. Make sure to take a large enough paper piece. This way it will be easier to remove the weights after the crust is baked.
- Bake the crust for 20 minutes, until the edges begin to golden. Then, remove beans or pie weights lifting the parchment paper from the pie crust. Bake until the bottom is completely cooked, about 10 more minutes. Cool crust completely before filling.
Notes
* I removed the crust from the pie dish for photography purposes, but don't recommend doing it. If you need a pre-baked crust for your recipe, let it cool in the pie dish and fill it with the filling while it's still there. Gluten-free crust is very delicate and can break easily.