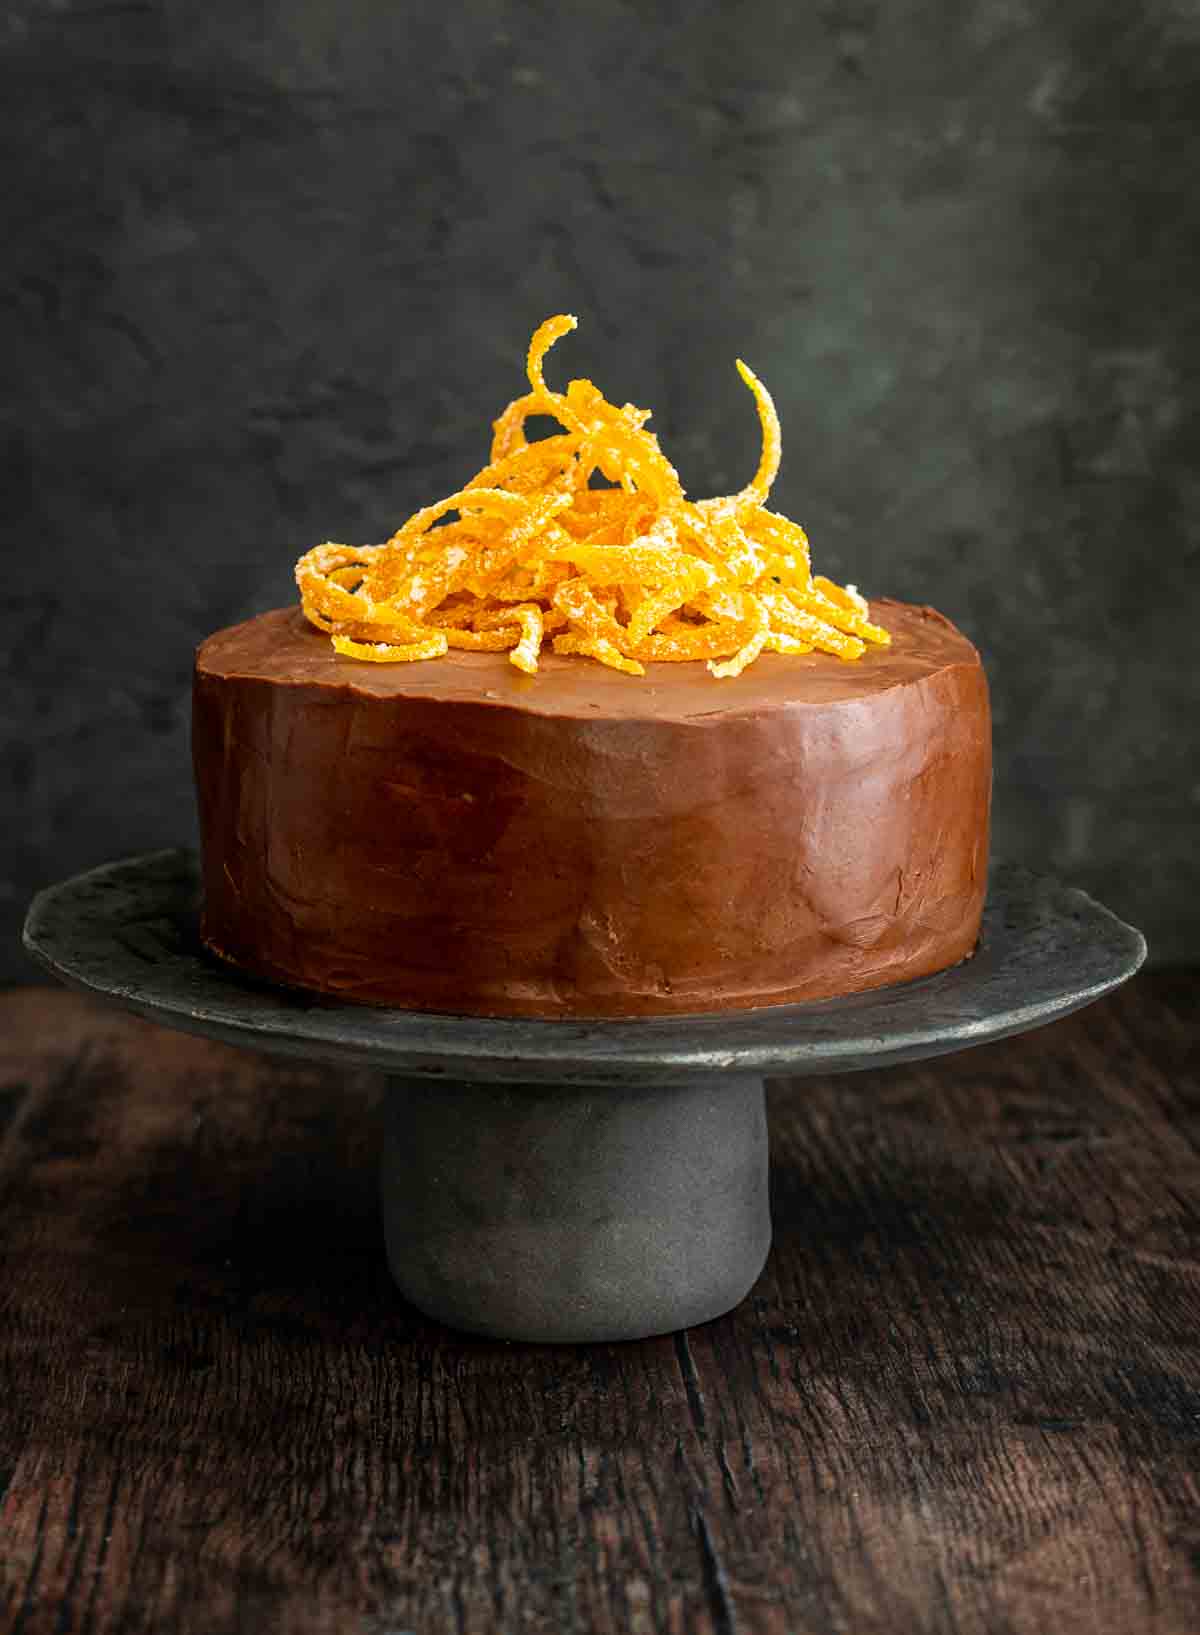
This super-easy chocolate orange cake recipe is rich, moist, gooey and packed full of flavour!
Infused with zesty orange peel, freshly squeezed orange juice, tangy marmalade and orange-flavoured chocolate, this cake is the ultimate indulgence for chocolate orange fans. We're also adding a dash of robust coffee for extra depth of flavour.
If ever a cake deserved the title of 'death by chocolate', this is it. Bonus point, you only need one large bowl and a hand whisk to make the sponge.
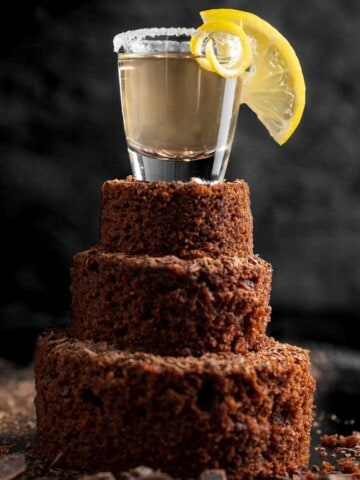
If you love chocolate cake, why not try this fun chocolate cake shot for a chocolate fix without the calories? Also, have a look at our baking category for more cakes and bakes.
Jump to:
Recipe

Easy chocolate orange cake recipe
Ingredients
For the cake
- 400 grams light brown sugar
- 220 grams all purpose flour
- 85 grams cocoa powder - good quality unsweetened
- 2 teaspoons baking powder
- 1 teaspoon bicarbonate of soda
- 1 teaspoon salt
- 2 eggs - at room temperature
- 240 grams sour cream
- 120 millilitres strong black coffee - use one heaped teaspoon of instant espresso or coffee granules dissolved in 120ml water
- 120 millilitres orange juice
- 120 millilitres vegetable oil
- 1.5 teaspoons vanilla extract
- zest of one orange
For the chocolate orange buttercream
- 200 grams unsalted butter - softened
- 375 grams icing sugar
- 40 grams cocoa powder - good quality unsweetened, sifted
- 80 grams orange chocolate - like Cadbury's orange chocolate or Terry's chocolate orange
- 1-2 tablespoons orange juice - to loosen up the buttercream
- 140 grams orange marmalade - shredded or smooth
Instructions
To make the cake
- To prepare the cake tins, cut two circles of parchment paper to fit the bottom of two 20cm (8") cake tins. Place the parchment paper circles in the bottom of each tin.
- Lightly butter the sides of the tins or use a non-stick cooking spray to prevent the cakes from sticking.
- In a large mixing bowl, add the light brown sugar, all-purpose flour, cocoa powder, baking powder, bicarbonate of soda and salt.
- Use a whisk to thoroughly combine the dry ingredients together. Make sure to break up any lumps, especially in the brown sugar, as it can be slightly clumpy at times.
- Add the room temperature eggs and sour cream to the dry ingredient mixture.
- Fold the ingredients together using a spoon instead of a whisk for this step. The mixture will be thick at this stage.
- Pour the prepared coffee, orange juice, vegetable oil, vanilla extract, and orange zest into the bowl with the dry ingredients.
- Switch back to your hand whisk to whisk the mixture together until all the ingredients are thoroughly combined.
- Divide the cake batter between the cake tins. If you want to be precise you can weigh each tin. There should be circa 700 grams of batter per tin.
- Bake the cakes in the preheated oven for about 35 minutes or until a cake tester inserted into the centre comes out almost clean. Since this is a moist cake, there may be some crumbs sticking to the cake tester. The cakes are done when they feel firm to the touch on top.
- Let the cakes cool in the tins for at least 10 minutes. Use a palette knife or offset spatula to loosen the edges of the cakes from the tins.
- Carefully transfer the cakes onto a wire rack, remove the parchment paper, and allow them to cool completely before decorating.
To make the chocolate orange buttercream
- Add the softened butter and icing sugar (powdered sugar) to a stand mixer.
- Beat the mixture on medium-high speed until it becomes light and fluffy, which usually takes about 5 minutes.
- While it's beating, melt the orange chocolate in the microwave and sift the cocoa powder.
- Add the melted chocolate and sifted cocoa powder to the mixer. Continue beating until all the ingredients are well combined, creating a smooth and creamy chocolate orange buttercream.Scrape the sides of the bowl down once or twice.
- Add the orange juice to the chocolate orange buttercream a little at a time until it reaches a spreadable consistency. Begin with one tablespoon and mix well. If you want a thinner texture, add a second tablespoon. You may not need both tablespoons.Adjust the amount to your liking, making sure the buttercream is easy to spread while keeping the desired thickness.
Assemble the cake
- Before you add the buttercream, check if your cake layers are level. If one layer has a slightly rounded top, turn it upside down so that the flat bottom becomes the top. This layer will be your base.
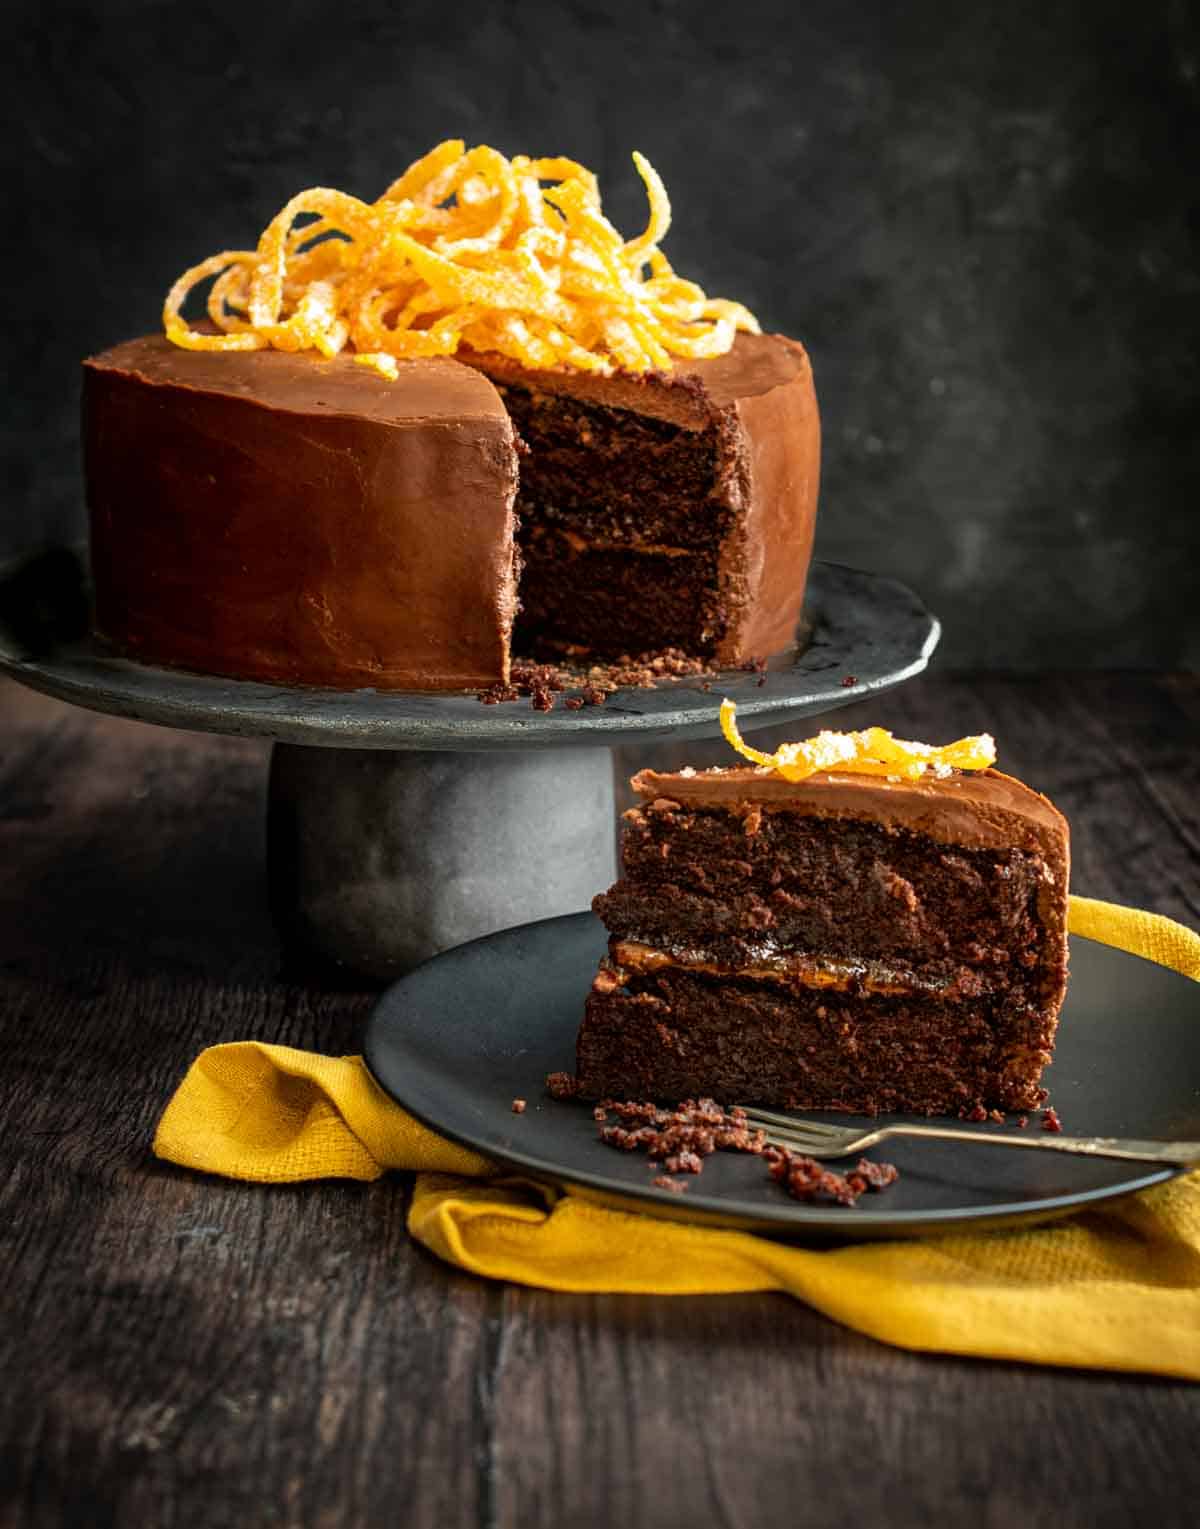
- Put a layer of marmalade on the first cake, and then add a layer of buttercream on top. Next, place the second cake on top of the first one.
- Finally, cover the entire cake with the remaining buttercream, making sure to spread it evenly.
- Decorate with chocolate shavings or candied orange peel.
**Nutritional data disclaimer**
Please keep in mind that the nutritional information provided below is calculated by a third party and we cannot guarantee the accuracy. We try our best to give you the most accurate information, but we do not take responsibility for errors that may be present. Also, the nutritional value of the recipe may change depending on the exact brands and products used. We recommend that you consult with a qualified healthcare professional or registered dietitian for personalised advice on your dietary needs.
Nutrition
What's to love about this recipe
- Fool-proof chocolate and orange cake recipe.
- Very easy to make, even for novice bakers.
- Stays moist for days.
- You don't need an electric mixer for the cake batter, it can be easily whisked by hand.
- The cake is incredibly rich with an intense chocolate flavour.
- The cake improves in flavour as it matures over time.
- No orange extract is needed.
- This cake is perfect for special occasions or as a birthday cake.
Key ingredient notes and substitutions
Light brown sugar
Using light brown sugar adds a deeper flavour profile to the cake than using white sugar. If you don't have light brown sugar, regular brown sugar can be used as a substitute.
Cocoa powder
We suggest using a high-quality Dutch-processed, 100% unsweetened cocoa powder like Valrhona, Callebaut, or Ghirardelli. The difference in taste is remarkable and will enhance the flavour of the cake.
Alternatively, use the cocoa powder that's available to you.
Eggs
Before starting the cake, remember to take the eggs out of the fridge and allow them to come up to room temperature for about an hour. This helps them incorporate better into the batter.
If you need to speed up the process, check out the 'Tips and tricks' section below for helpful suggestions.
It's worth noting that this recipe uses only two eggs, which is a slight variation from Nigella's chocolate orange cake which typically calls for a whopping six eggs.
Strong black coffee
For the best flavour, we recommend using good-quality instant coffee granules. You'll need about one heaped teaspoon of coffee granules, or instant espresso granules, dissolved in 120ml of hot water.
Alternatively, you can brew coffee using your preferred method, making it slightly stronger than usual to ensure a robust coffee flavour in the cake.
Orange juice
Using the juice from fresh oranges would be ideal for the recipe, but if that's not an option for you, orange juice from a carton or bottle will work perfectly fine as a substitute.
Zest from one orange
If you want a less pronounced orange flavour, you can choose to skip the orange zest altogether or use zest from only half an orange.
The zest provides a more authentic and subtle orange taste compared to using orange extract.
Orange chocolate
Feel free to use any plain orange-flavoured chocolate you can find for this recipe.
Some popular options are "Cadbury's Milk Orange Chocolate" and "Terry's Chocolate Orange." You can even decorate the cake with Terry's chocolate slices on top to give it a lovely Terry's chocolate orange theme.
Another option is Lindt's dark chocolate orange, although it can be a bit more expensive.
Marmalade
You can use either shredded or smooth marmalade in the recipe.
How to make the chocolate orange cake
Which baking pans to use:
This cake requires 2 x 8-inch round cake pans (20cm). Alternatively, you can use 3 x 6-inch cake pans for a smaller, but taller three-layer cake.
To make the sponges:
- Preheat the oven to 180C/356F/gas mark 4.
- To prepare the cake tins, cut two circles of parchment paper to fit the bottom of two 20cm (8") cake tins. Place the parchment paper circles in the bottom of each tin.
- Lightly butter the sides of the tins or use a non-stick cooking spray to prevent the cakes from sticking.
- In a large mixing bowl, add the light brown sugar, all-purpose flour, cocoa powder, baking powder, bicarbonate of soda and salt.
- Use a whisk to thoroughly combine the dry ingredients together. Make sure to break up any lumps, especially in the brown sugar, as it can be slightly clumpy.
- Add the room-temperature eggs and sour cream to the dry ingredient mixture. Fold the ingredients together using a spoon instead of a whisk for this step. The mixture will be thick at this stage.
- Pour the prepared coffee, orange juice, vegetable oil, vanilla extract, and orange zest into the bowl with the dry ingredients. Switch back to your hand whisk to whisk the mixture together until all the ingredients are thoroughly combined.
- Divide the cake batter between the cake tins.
- Bake the cakes in the preheated oven for about 35 minutes or until a cake tester inserted into the centre comes out almost clean. Since this is a moist cake, there may be some crumbs sticking to the cake tester.
The cakes are done when they feel firm to the touch on top.
- Let the cakes cool in the tins for at least 10 minutes. Use a palette knife or offset spatula to loosen the edges of the cakes from the tins.
- Carefully transfer the cakes onto a wire rack/cooling rack, remove the parchment paper, and allow them to cool completely before decorating.
Make the chocolate orange buttercream:
- Add the softened butter and icing sugar (powdered sugar) to a stand mixer.
- Beat the mixture on medium-high speed until it becomes light and fluffy, which usually takes about 5 minutes.
- Then, add the melted chocolate and cocoa powder to the mixer. Continue beating until all the ingredients are well combined, creating a smooth and creamy chocolate orange buttercream.
- Add the orange juice to the chocolate orange buttercream a little at a time until it reaches a spreadable consistency. Begin with one tablespoon and mix well. If you want a thinner texture, add a second tablespoon.
Adjust the amount to your liking, making sure the buttercream is easy to spread while keeping the desired thickness.
How to assemble the cake:
- Before you add the buttercream, check if your cake layers are level. If one layer has a slightly rounded top, turn it upside down so that the flat bottom becomes the top. This layer will be your base.
It's okay if the top layer has a slight dome, but if you prefer, you can use a serrated knife to gently trim it for an even surface.
- Put a layer of marmalade on the first cake, and then add a layer of buttercream on top. Next, place the second cake on top of the first one.
- Finally, cover the top and sides of the cake with the remaining buttercream, making sure to spread it evenly.
- Add some additional decorations to the top of the cake if you wish.
How to decorate the chocolate orange cake:
Here are some ideas on how to decorate your masterpiece:
- Candied orange peel (how to make it).
- Chocolate shavings, chocolate chips or chocolate curls.
- Fancy piping work.
- Dehydrated oranges.
- Fresh orange slices.
- Use a chocolate ganache instead of the orange buttercream.
- Whip up some heavy cream and serve it alongside the cake in a serving bowl.
Storage
You can keep this cake in an airtight container for 3-4 days, and the good news is that it gets even better over time!
Freezing the cake
To freeze the cakes, without buttercream, for up to three months, follow these steps:
- Ensure the cakes are completely cooled before wrapping to prevent condensation.
- Wrap each cake tightly with a few layers of plastic wrap to keep them well protected from freezer burn.
- Place the wrapped cakes inside an airtight container to provide an additional layer of protection.
When you're ready to defrost the cakes, remove them from the freezer for a few hours before decorating. Let them thaw at room temperature. Once thawed, you can decorate them with freshly made buttercream.
Tips and tricks
How to bring eggs up to room temperature quickly
To bring the eggs up to room temperature quickly, place them in a small bowl with warm water for a few minutes.
Accurate measurements
For precise measurements and excellent outcomes, a digital kitchen scale is your best friend! If you haven't gotten one yet, put it on your Christmas list, pronto! You won't regret it.
How to soften butter quickly
To quickly soften hard butter, you can use a simple microwave method.
Begin by placing a glass bowl with about an inch (2.5cm) of water in the microwave. Heat the bowl with the water at high temperature for approximately 2-3 minutes until the water becomes hot.
Remove the bowl carefully, empty the water, and quickly dry the bowl. Then, flip the bowl upside down and position it over the hard butter, creating a cover for the butter.
Allow the butter to sit covered for 5-10 minutes, taking advantage of the residual heat to gently soften it.
Scrape the bowl
When whisking the batter, make sure to scrape the bottom of the bowl to incorporate all the flour.
Sometimes, the flour tends to hide at the bottom, especially when it gets sealed in by the liquid ingredients.
How to get cakes of equal height
To make sure your cakes have the same height, weigh each tin after pouring the batter. Aim for around 700g of batter in each tin.
Adjust the amount if needed to achieve a similar weight in both tins. This helps ensure even baking and consistent results.
How to make cakes easier to frost
If you place the cakes in the freezer for an hour or two before decorating, they will become firmer, making them easier to frost.
The slight firmness helps to stabilise the cakes and allows for smoother and neater frosting.
How to avoid a mess when making buttercream
When beating the butter and icing sugar, begin at the slowest speed to prevent a cloud of icing sugar from flying up. You can also cover the opening of the bowl with a tea towel.
Alternatively, you can use a spatula to press the butter into the icing sugar before turning on the stand mixer.
Sift your cocoa powder
Remember to sift the cocoa powder before adding it to the icing sugar.
This step prevents any lumps or clumps of cocoa powder from appearing and makes it easier to achieve a smooth texture when decorating your cake.
How to deal with a dome on your cake
Flip the cake upside down so that the bottom of the cake becomes the top. This helps create a level surface instead of a slight dome.
Another option is to trim off the dome using a serrated knife, ensuring an even and flat top for the cake.
How to get an extra smooth surface on your buttercream
For a smooth and polished finish with the buttercream, try this simple trick: Dip a palette knife into boiling water, then wipe it dry. Use the warmed knife to gently smooth over the icing, applying even strokes.
The heat from the knife will help create a mirror-like surface on the buttercream, giving your cake a professional look.
FAQ
3-4 days if stored in an airtight container. It gets better by the day and stays moist.
Coffee is often added to chocolate cakes because it enhances the flavour of the chocolate.
Coffee and chocolate share similar flavours, so adding coffee to a chocolate cake makes it taste richer and more delicious. It brings out the best in chocolate and adds depth to the overall flavour of the cake.
Yes! You will need about 24 cupcake liners (filled ¾) for this amount of cake batter. You can bake them at 180C/350F/gas mark 4 for 18-20 minutes. Test them for doneness by pressing on top of the cupcakes. If they feel firm, they should be done.
More decadent chocolate recipes


For food safety advice, including guidance on food allergies


Leave a Reply