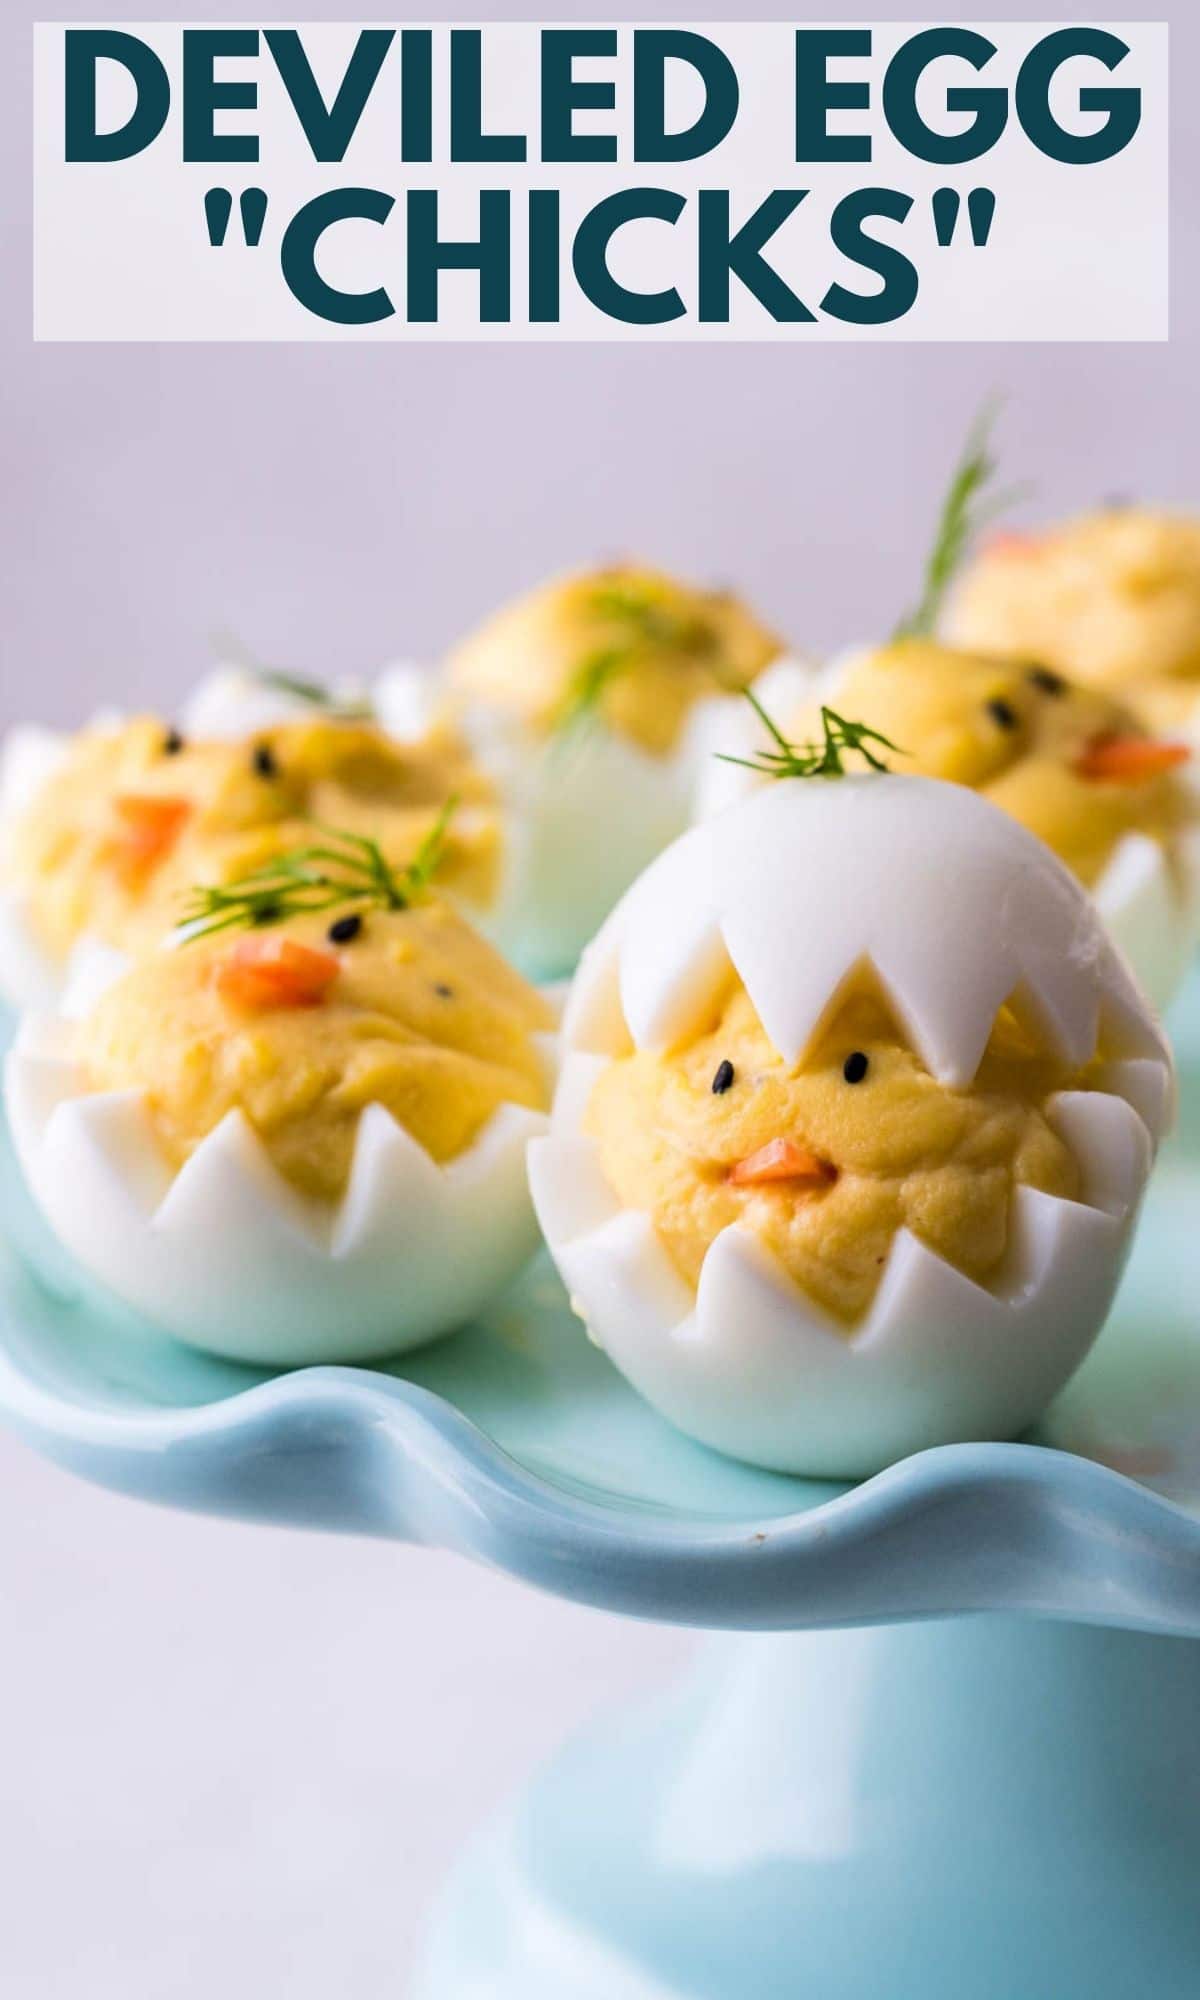
Easy Deviled Egg Chicks For Easter
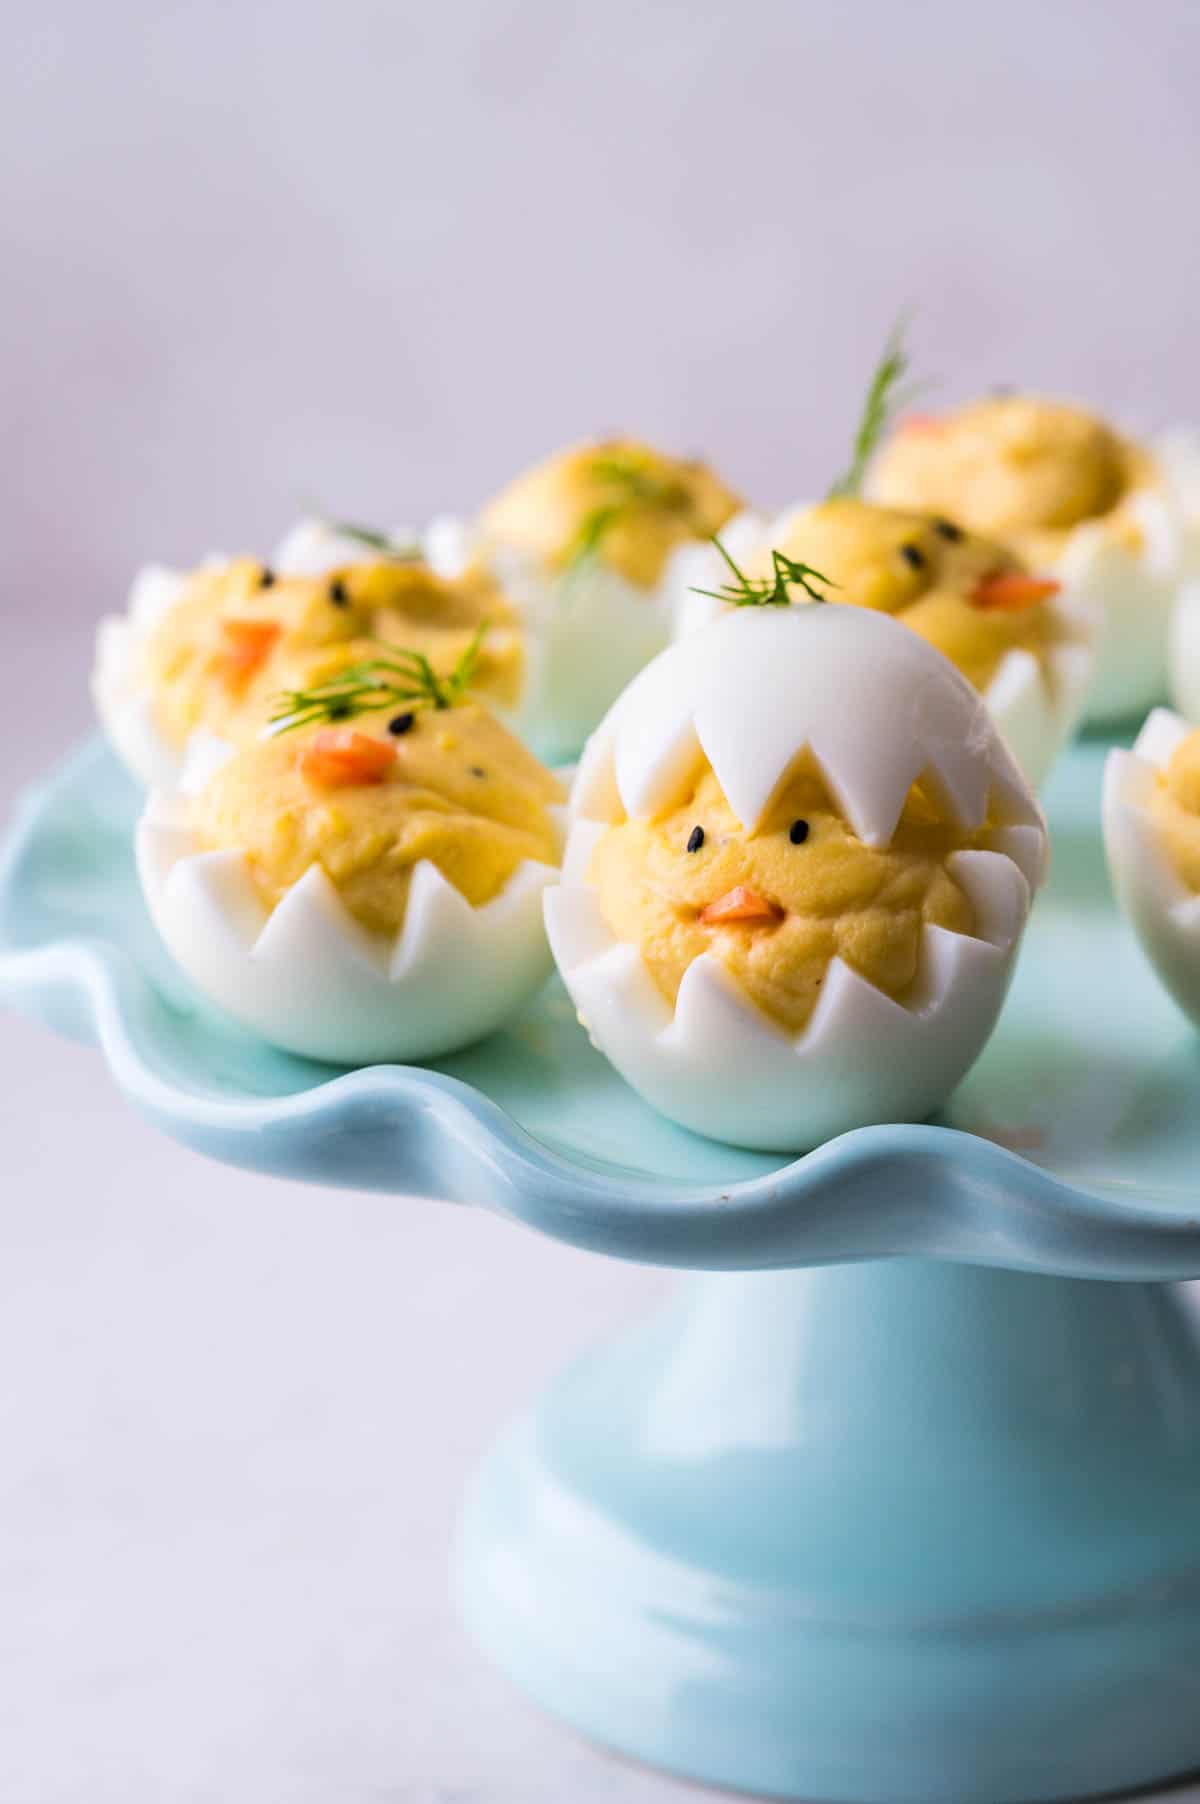
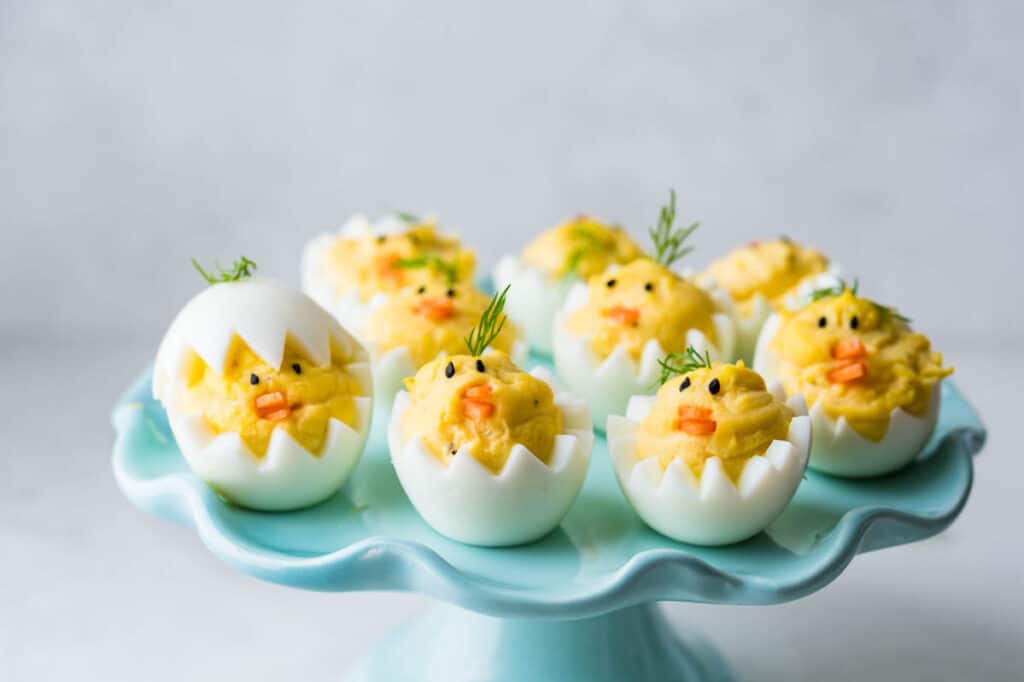
Take your classic deviled eggs to a whole new level this Easter with these super-cute Deviled Egg Chicks. You can tell they’re freshly hatched by the tell-tale Van Dyke cut of their “shells”. This simple recipe uses a classic deviled egg filling and simple ingredients to garnish your Easter deviled eggs like baby chicks. Watch the video to see how it’s done.

Table of Contents
- 1 Even adults love deviled egg chicks
- 2 The foolproof method for perfect hard boiled eggs
- 3 How to Van Dyke a hard boiled egg:
- 4 Ingredients for Easter deviled eggs:
- 5 How to make extra creamy deviled egg filling for Easter chicks
- 6 How to garnish deviled egg Easter “chicks”
- 7 Pro-Tips for Easter deviled eggs
- 8 What else is on the Easter menu?
- 9 More deviled egg recipes you’ll love:
- 10 Deviled Egg Chicks
Even adults love deviled egg chicks
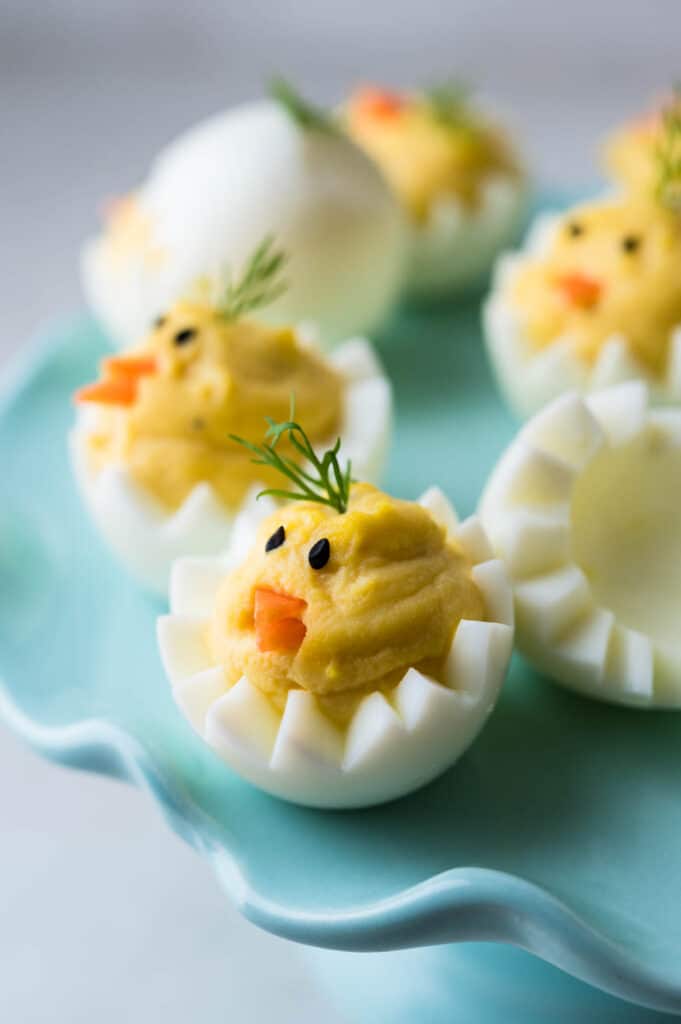
These cute little deviled egg Easter chicks aren’t just for the kids in your life. Adults love them too. The whimsy of baby chick faces poking out of a “just hatched” shell will bring a smile to everyone’s face and they’ll be the first things to go on your Easter buffet.
I sent pictures right after I made them to my sister-in-law, Mom and daughter and got immediate thumbs ups, with comments like, “they’re so cute!” “I just love the the ‘dill’ hair!” and “I love them!”
My husband even chimed in, “How did you DO THAT?”
Get my latest recipes, helpful kitchen tips and more good things each week in your inbox.
The foolproof method for perfect hard boiled eggs
The biggest problem most people suffer when hard boiling eggs is over-cooking. You’ll know by the unsightly greenish-gray ring that encircles the yolk. It’s not dangerous, just unsightly. As a persnickety food blogger, that green discoloration is a pet peeve of mine.
This method guarantees perfectly hard boiled egg yolks that are as bright yellow as a stick of butter with a creamy, but cooked through center.
- Place eggs in a saucepan and cover with cool water that comes 1″ over the eggs.
- Bring the eggs to a boil and then set your timer for 2 minutes.
- When the timer goes off, remove the pan from the heat, but let the eggs remain in the hot water for 13 minutes (that’s another timer).
- While the eggs are “cooking”, prepare an ice bath in a medium or large bowl (depending on how many eggs you’re making) with about equal parts ice and water. You’ll need enough to totally cover the eggs.
- When the eggs have finished soaking in the hot bath, transfer them to the ice water and set your timer for 13 more minutes.
That’s it. No undercooked or overcooked yolks and a bright yellow center for the deviled egg filling. Your Easter chicks will be sunny and bright.
Why you’ll love this method:
- Because the eggs are only in the boiling water for 2 minutes, there’s less opportunity for them to crack and leak their contents.
- The gentle, hot water soak will hard boil the eggs without overcooking.
- The ice bath, stops the cooking and chills the eggs to their core, which is why you’ll never have a green-tinted yolk again.
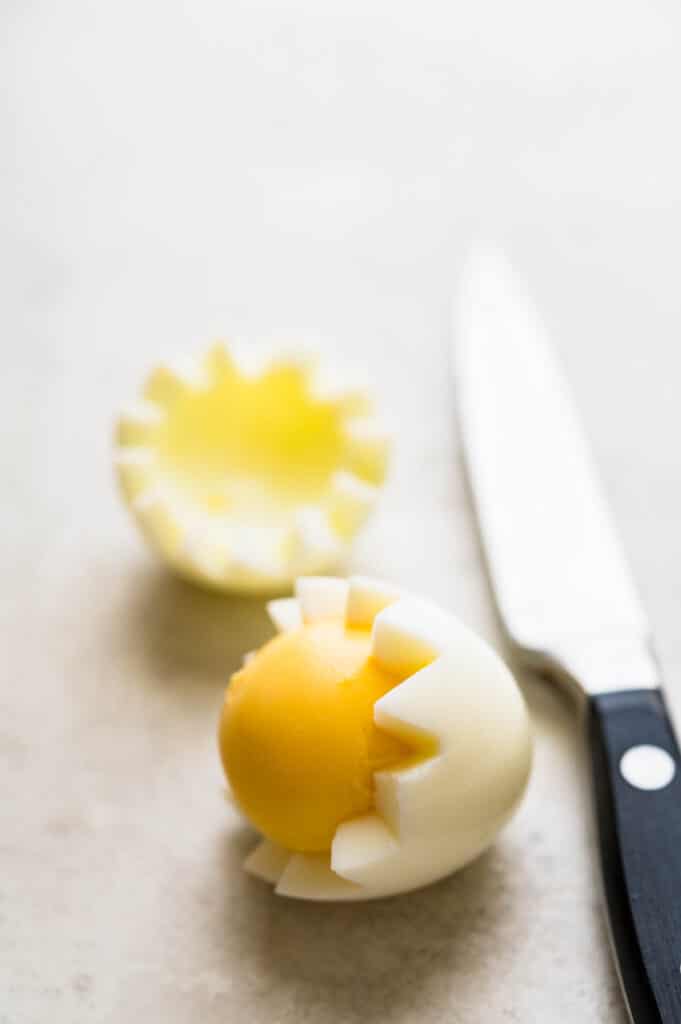
In order to get that “just hatched” look for your deviled egg chicks, I use a method called “Van Dyke”. This simply means that you’re creating a decorative zig zag look to the egg whites and it’s really easy to do.
How to Van Dyke a hard boiled egg:
- Peel and rinse the eggs.
- Hold the hard boiled egg upright with the pointier end facing up. Find the center around the perimeter where you want to cut and use a sharp paring knife to make 45° cuts, moving the knife 90° back and forth to achieve the zig zag look.
- Don’t stick the knife too far into the egg. Only penetrate until you feel the hard boiled yolk center, then remove the tip and make your next cut.
- You can check your progress (because unless you’ve got REALLY GOOD EYES it can be difficult to see the cuts) by gently pressing and slightly pulling the egg from either end to see the cuts you’ve made. Do this a few times until you get the hang of it and can tell if you’re connecting the cuts.
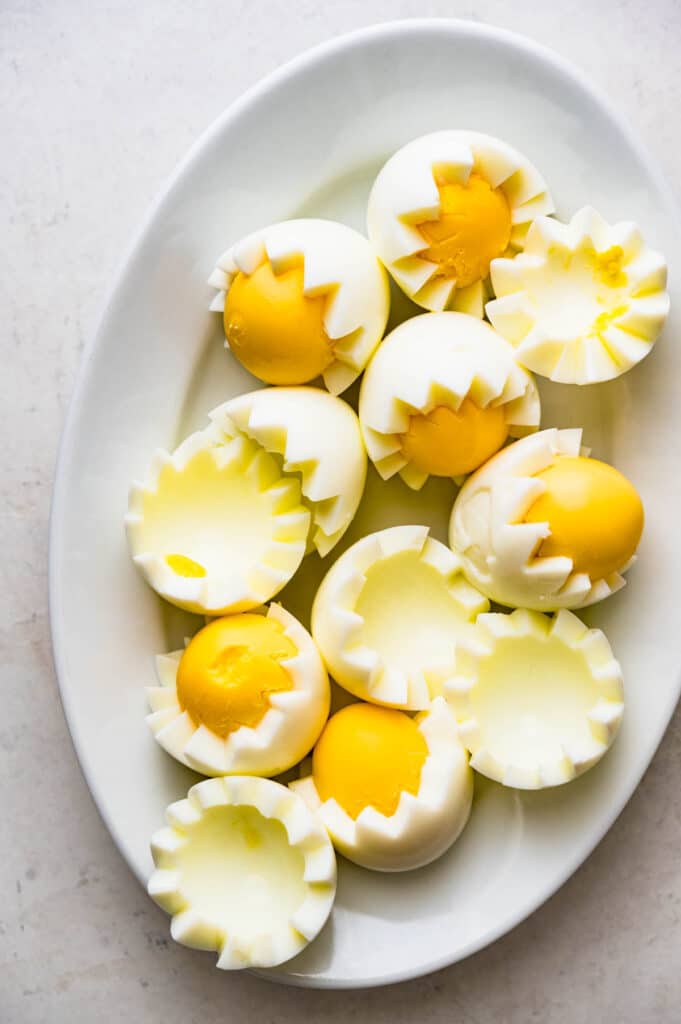
- Once you’ve made it around the perimeter of the hard boiled egg, gently pull the white off of the yolk. You’ll have two perfectly Van Dyked egg halves and a perfectly cooked hard boiled yolk for your Easter chick deviled eggs.
Ingredients for Easter deviled eggs:
- Eggs
- Mayonnaise
- Dijon Mustard
- Lemon Juice
- White Wine Vinegar
- Hot Sauce (optional)
- Kosher Salt
- Black Pepper
- Black Sesame Seeds (for eyes)
- Carrots (for beak)
- Fresh Dill (for hair — I know chicks don’t have hair, but it’s CUTE!)
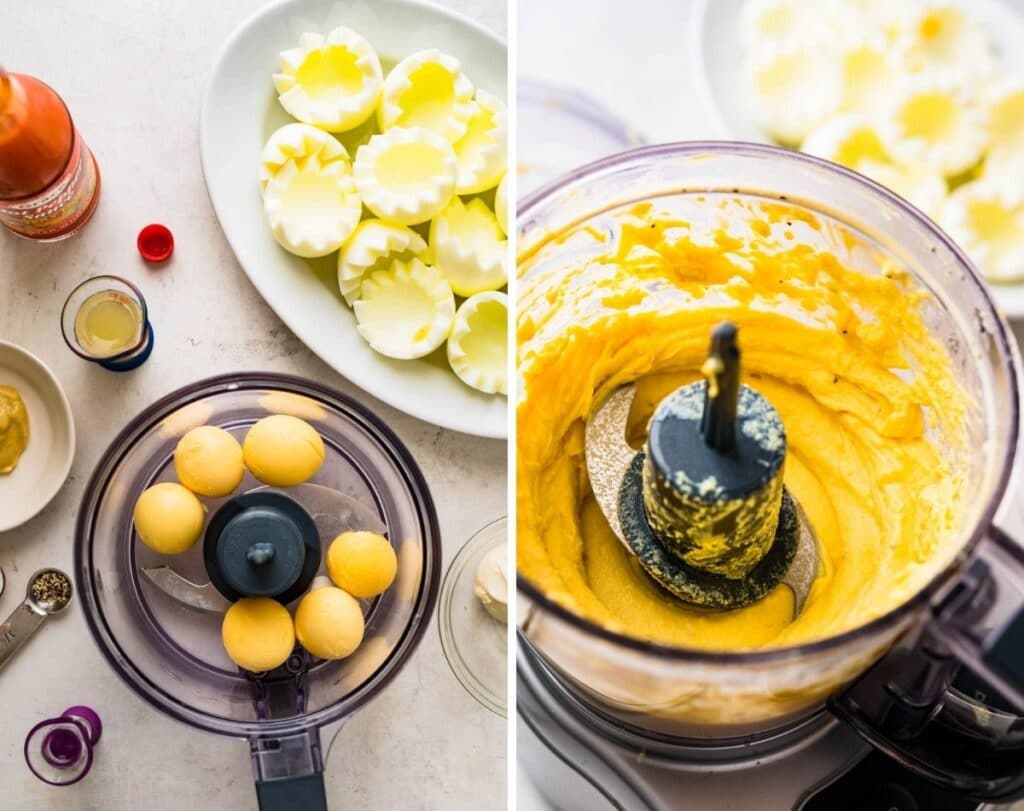
I love a really creamy deviled egg filling with NO lumps and while you can do a pretty good job with the tines of a fork, a mini food processor works even better.
How to make extra creamy deviled egg filling for Easter chicks
- Transfer the egg yolks to the bowl of a mini prep food processor.
- Add the mayonnaise, dijon mustard, lemon juice, vinegar, hot sauce, salt and pepper.
- Secure the lid and pulse several times, scraping down the sides if necessary until the deviled egg filling is perfectly smooth. (This will give the chicks a smoother appearance, too).
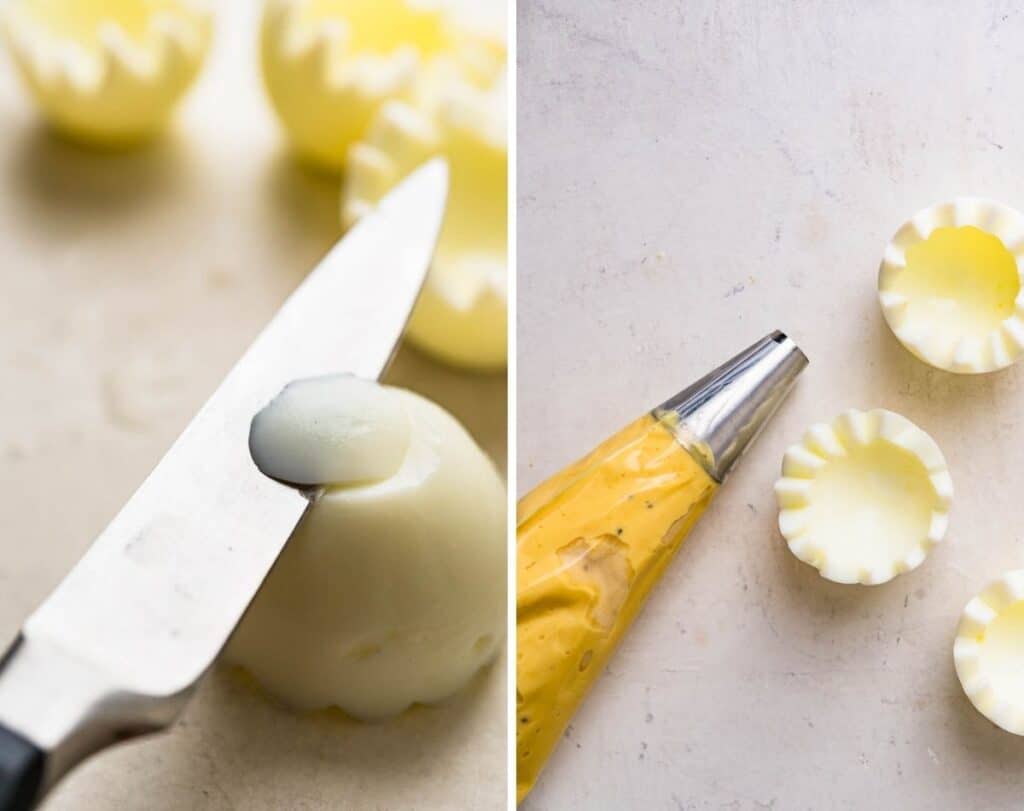
Assembling the chicks is easy, it’s just a matter of filling the Van Dyke egg with the creamy deviled egg filling and garnishing with “chick faces”. I recommend using a piping bag and a plain large round tip.
How to garnish deviled egg Easter “chicks”
- Sometimes their is an air pocket in the eggs which will give one side a flat “stand” that allows the egg to sit upright. If you don’t have that flat stand, make your own by cutting off a thin slice from the ends, so the deviled egg chicks will stand upright in the “shell”.
- Fill the egg whites with the deviled egg mixture using the piping tip to help you mound it over the top into a rounded peak. (You can also do this with a spoon, smoothed with a knife or offset spatula, but I think the piping bag is easiest.)
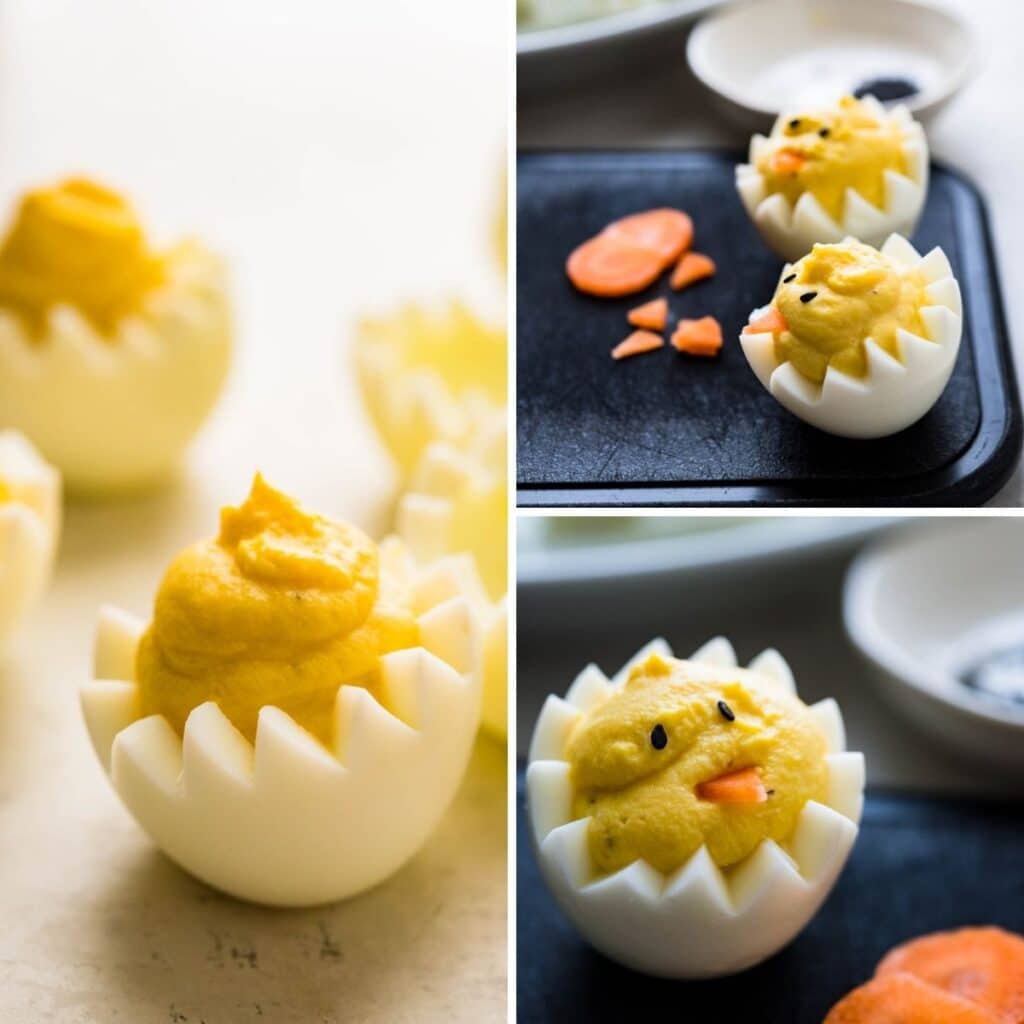
- Cut thin cross sections of carrot, then cut each slice into 8 equal triangles, by cutting in half going from 12:00 to 6:00, cutting again going from 9:00 to 3:00 and then two more times (2:00 to 8:00 and 10:00 to 4:00) These are the beaks for the deviled egg chicks.
- Carefully place two black sesame seeds on the “face” of the chick and insert two triangles of the carrot beak with the pointy end sticking out.
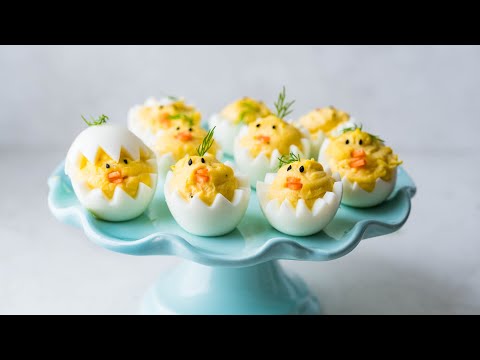
- Garnish with a sprig of dill “hair” and arrange on a platter to serve.
Pro-Tips for Easter deviled eggs
- Working with sesame seeds is easier if you have very small, steady hands, but you can also use a pair of tweezers if that’s easier.
- Don’t get upset if a few of the eggs aren’t perfect. It’s not about that. These fun Easter chicks are about whimsy and a tasty snack or appetizer before your holiday meal.
- For a rooster, use the Van Dyke method to cut a piece of red bell pepper for a comb and wattle.
- Generally, you’ll end up with more hard boiled egg whites than you have deviled egg filling, I recommend using whatever is leftover as a topper to some of your “uglier chicks”. It looks like the chick has really just hatched.
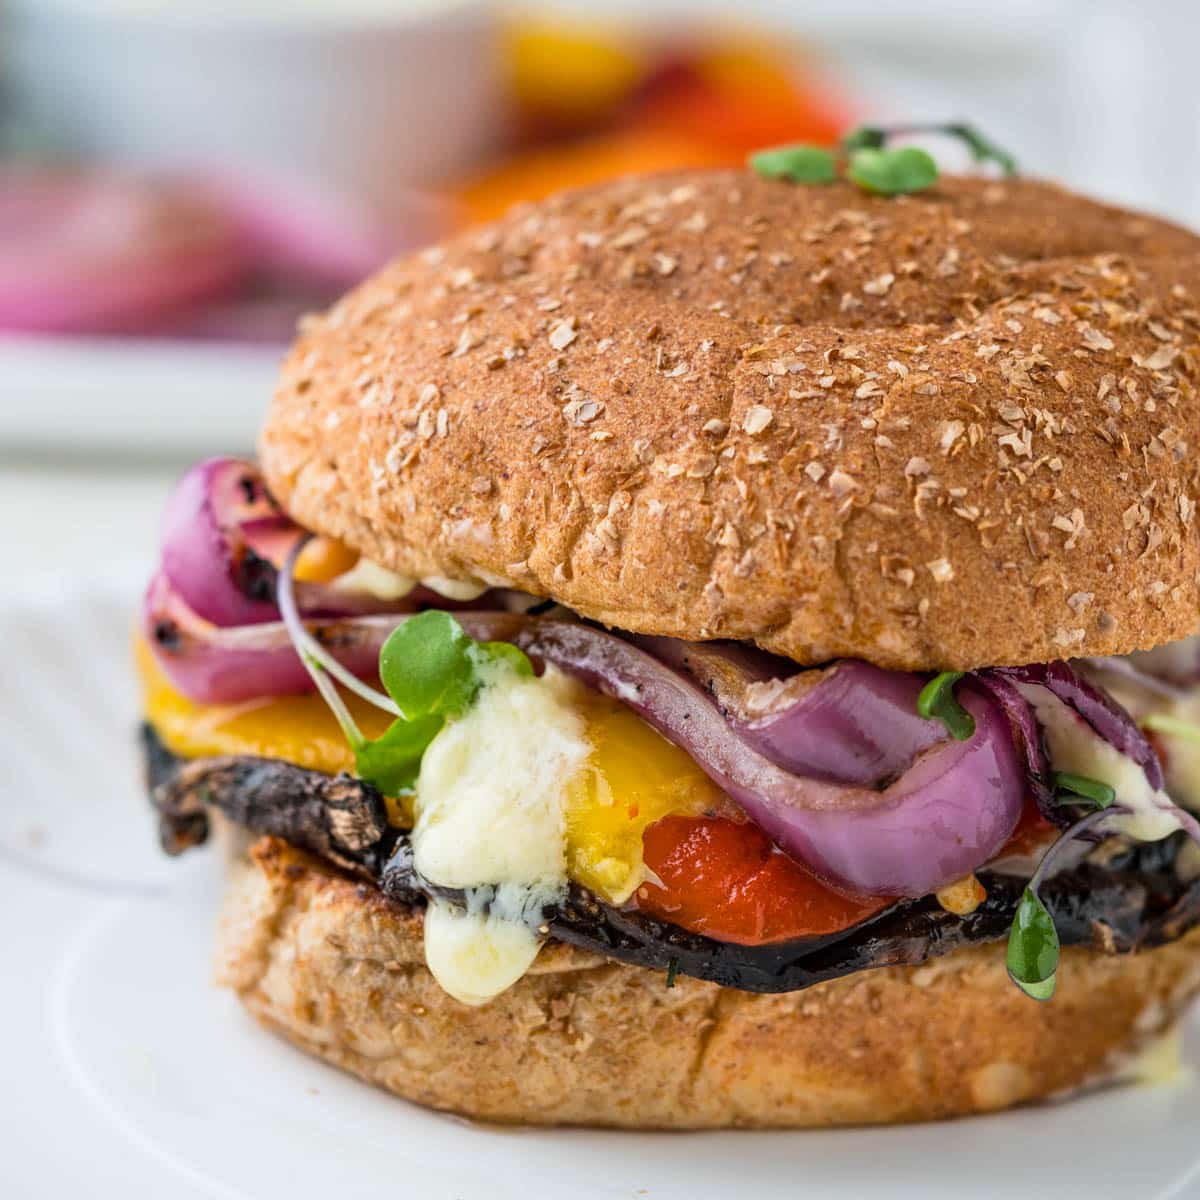
Here are some of my very favorite Easter inspired recipes to serve with your deviled egg chicks.
More deviled egg recipes you’ll love:

Tried this recipe? Leave a rating and review.
Your comments and shares are invaluable to me and the thousands of readers who use this site daily. If you've made the recipe, leave a star rating and review. We want to hear how you liked it.
We'd love it if you shared the recipe with your friends on social media!

Deviled Egg Chicks
SPECIAL EQUIPMENT:
- piping bag and tips optional
INGREDIENTS:
- 6 large eggs
- 2 tablespoons mayonnaise
- 2 teaspoons dijon mustard
- 1 tablespoon lemon juice
- 1 teaspoon white wine vinegar
- 2-3 dashes hot sauce
- ¼ teaspoon Diamond Crystal Kosher salt or 1/8 teaspoon Diamond Crystal
- pinch black pepper
FOR CHICK FACES:
- black sesame seeds
- thin slices of carrots cut into triangles
- dill leaves for “hair”
DIRECTIONS:
MAKE HARD-BOILED EGGS
- Place the eggs in a medium saucepan and fill with enough cool water to cover the eggs one inch over the eggs. Bring the eggs to a boil and cook for 2 minutes. Remove from heat and let the eggs sit in the hot water for 13 minutes.
- While the eggs are “cooking” in the hot water, fill a large bowl with water and ice. After the eggs are done cooking, transfer the hard boiled eggs to the ice bath for 13 minutes. This will stop the cooking process, chill the eggs and prevent the standard “green ring” around the yolks.
VAN DYKE THE EGGS
- Gently tap the eggs on the counter to break the shells. Peel the eggs and rinse any stray shell away.
- Instead of slicing the egg in half vertically like you would for normal deviled eggs, hold the egg upright and use the tip of a sharp paring knife to make small cuts in the white in a zig zag fashion around the middle of the egg. Insert the knife tip at a 45° angle, then turn it 90° in the opposite direction.
- Only insert the egg until you hit the hard boiled yolk (you’ll be able to feel it). It can be hard to see the cuts in the egg, so to get an idea of where your cuts are, gently press and pull the two halves of the egg to reveal the cuts so you can continue.
- Continue to cut the eggs until they’ve been completely cut, then gently pull the two halves apart. Transfer the yolks to a mini food processor and transfer the cut whites to a platter.
- The van dyked egg halves may not stand up on their own, so if they seem to wobble (like a weeble ), make a small, flat cut to the bottom of the egg halves so that they stand upright.
- Add mayonnaise, dijon mustard, lemon juice, white wine vinegar, hot sauce, kosher salt and pepper to the egg yolks. Pulse until the filling is smooth.
- Transfer the deviled egg filling to a pastry bag fitted with a large round tip (or spoon the filling into the egg) so that the filling peeks over the top of the egg whites.
DECORATE THE “CHICKS”
- Carefully place two black sesame seed eyes onto the deviled egg.
- Insert two triangles of carrots so that the pointy end sticks out and forms a “beak”.
- Garnish with a bit of fresh dill for “hair”.
- Note, if you run out of filling for eggs, you can use excess van dyke eggs to give a few chicks a freshly hatched look by topping the chick with the other half.
RECIPE VIDEO:
NOTES:
NUTRITION:
Pin “Easter Deviled Eggs” for later!
Fun recipe, my local Kroger had black sesame seeds, Tweezers help with applying the eyes.
FYI: this entire recipe takes longer , but it is worth it as I got so many compliments on them at my grandson’s First BD party which was a little Bird theme. I Boiled eggs and Van Dyke cut the night before, refrigerated , then made filling, filled and decorated the next morning. I would say 2.5 hrs total.
Chicks look adorable! I wonder if using the small pumpkin knife from craving pumpkins would be a good utensil to use.
you could certainly try it!
Too, too cute! Definitely putting these on our Easter menu!