Honey Teriyaki Chicken


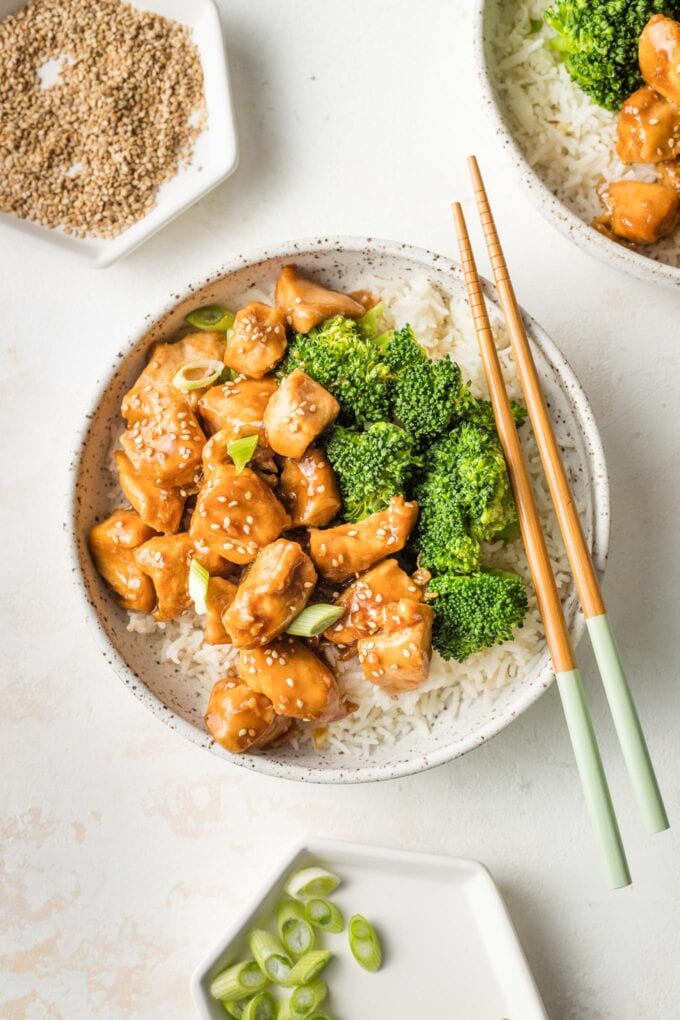
With tender bites of chicken coated in a sweet, silky homemade sauce, this easy Honey Teriyaki Chicken will be a new back-pocket recipe for busy days. Ready in just about 20 minutes!
Easy Weeknight Teriyaki Chicken
This quick and easy honey teriyaki chicken tastes every bit as delicious as the popular takeout dish, but is much healthier and so easy to make in your own kitchen. I absolutely love it for a super fast meal — about 20 minutes start to finish — that will please everyone and feels a little different from the usual pasta, salad, taco rotation.
You’ll love that this requires no marinating and no hard-to-find ingredients. The flavor is out of this world, and it goes well with pretty much any steamed vegetable your family enjoys. Best of all, you can have it ready in about as much time as it takes to coordinate and place a takeout order — at least in our house. 😉
Related: Slow Cooker Teriyaki Chicken – one of our family’s favorite Crockpot meals!
Ingredient & Substitution Notes
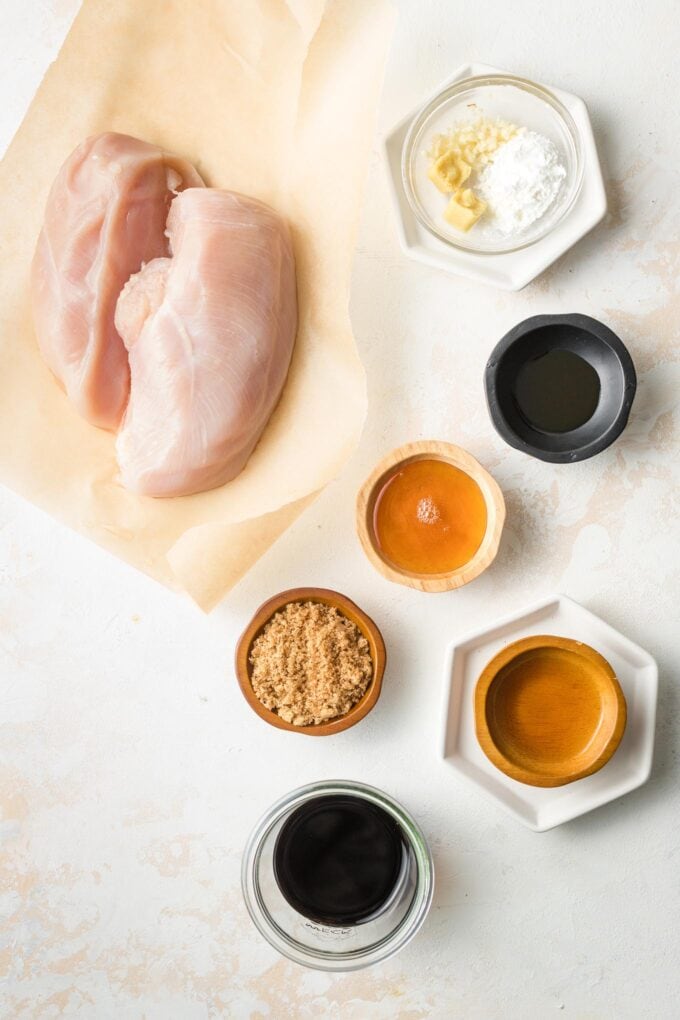
Here are a few notes and shopping tips about the ingredients you’ll need. Find full amounts in the print-friendly recipe card below.
- Chicken breasts: Use boneless, skinless chicken breasts for the fastest cook time. Chicken thighs are also terrific but will need to cook a few minutes longer.
- Soy sauce: This recipe is designed to be made with low-sodium soy sauce.
- Honey and brown sugar: Either light or dark brown sugar works well. Using both honey and brown sugar gives this sauce a little extra depth of flavor and a luscious consistency.
- Apple cider or rice vinegar: An acidic ingredient to perfectly complement the sweet sugar and honey and salty soy sauce.
- Toasted sesame oil: Adds irresistible warmth and flavor.
- Ginger and garlic: Fresh minced or grated ginger works well, but I actually love using frozen cubes of crushed ginger. In a real pinch, you can substitute 1 teaspoon garlic powder and 1/2 teaspoon dried ginger for a similar effect.
- Cornstarch: This is the key to get a nice coating on the chicken for maximum sauce adhesion, and its integral to letting the sauce thicken without burning.
- Olive or avocado oil: Any other neutral-tasting vegetable oil can be used as well.
- Sesame seeds and green onions: Optional garnishes that add a nice pop of flavor and make it look pretty.
We usually serve this with white or brown rice, which is easy to make on the stovetop, in a rice cooker, or in the Instant Pot. Candidly, though, I usually use the ultra easy microwave-ready rice sold at Trader Joe’s. It takes 3 minutes, zero effort, and comes out perfectly every time.
Can you make teriyaki sauce without mirin?
Yes! A very traditional recipe for teriyaki sauce will typically include sake and/or mirin, which is a sweet Japanese rice wine with a unique flavor. It is possible, however, to mimic the flavor of teriyaki sauce without it.
You can find mirin at well-stocked grocery stores, but many people prefer not to purchase what they consider specialty ingredients, so I’ve tested and written this recipe to work without it. The combination of apple cider or rice wine vinegar for tang and honey and brown sugar for sweetness makes for a very tasty imitation. This is certainly an Americanized version of honey teriyaki sauce, but I think and hope you’ll find it delicious all the same, which is what matters most to me!
Can I use bottled teriyaki sauce instead?
Yes, but be aware that the flavor will be different since the vast majority of bottled sauces contain more sugar, preservatives, and artificial ingredients than this homemade version.
How To Make Honey Teriyaki Chicken
This is so simple and quick! It’s a perfect recipe even for a novice chef to get an easy dinner on the table from scratch.
- To prep, cut chicken into bite-sized pieces and toss with cornstarch, then whisk together the sauce ingredients in a small bowl or liquid measuring cup.
- To brown the chicken, warm oil in a large skillet until hot and shimmering, then add the chicken pieces and sauté just until browned. Remove the chicken briefly to a plate.
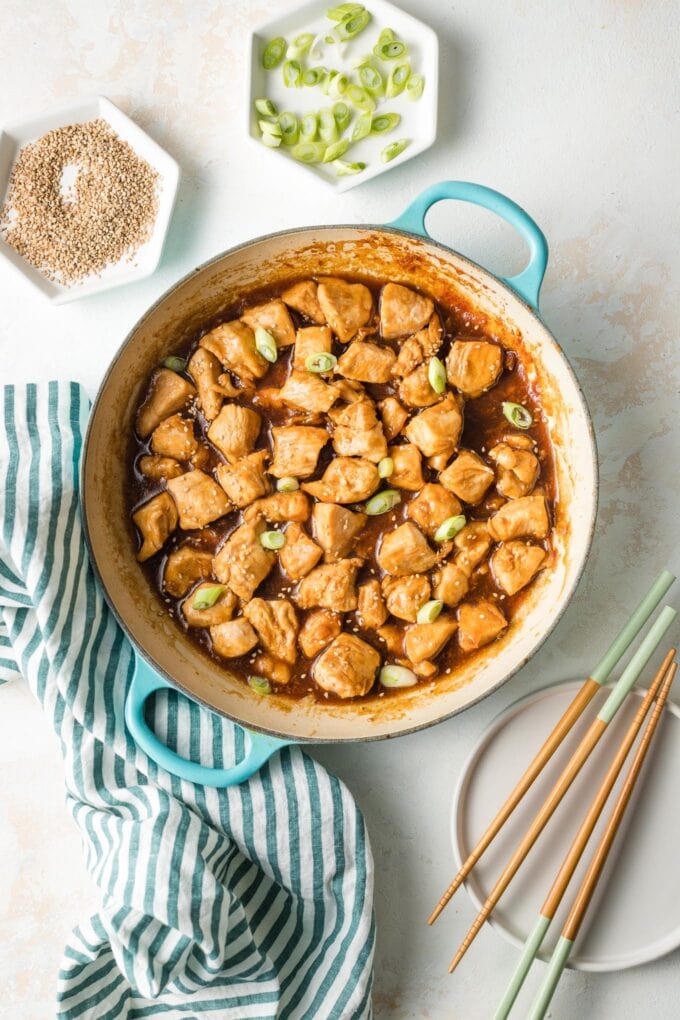
- Pour sauce into pan and bring to a simmer.
- When the sauce is bubbling nicely, return chicken, toss to coat, and continue to simmer until the chicken is cooked through.
- Serve over rice and with veggies of choice!
Tips & Tricks
- Be sure to cut the chicken into evenly-sized bites so they cook at the same rate.
- Whisking the sauce together before starting to cook is a helpful way to ensure the chicken doesn’t overcook and dry out. This is also why I recommend searing the chicken, then removing it and adding back in. An extra step, yes, but it takes only a minute and ensures the chicken stays nice and tender.
- To be sure your chicken stays nice and tender, use an instant read thermometer to know exactly when it hits 165 degrees and is done.
- Simple kitchen tongs make quick work of turning and transferring the chicken pieces.
- The sauce will thicken as it cools so don’t worry if it looks a tiny bit too thin when the chicken is done cooking.
- Care for a little more heat? Add a touch of red pepper flakes or Sriracha to the sauce mixture.

What To Serve with Teriyaki Chicken
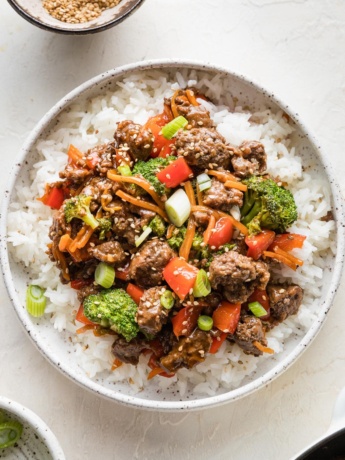
Teriyaki chicken goes perfectly with steamed broccoli and rice–brown, white, jasmine, cauliflower rice, you name it. Quinoa is also a nice pairing. We also really enjoy this dish with edamame, carrots, snow peas, or another steamed veggie.
Top the chicken itself with a sprinkling of sesame seeds and thinly-sliced green onions — aka scallions — for a little extra garnish.

This is a must-try, especially if you’re looking to change up the weeknight dinner routine. Everyone is going to love it!
Storage & Reheating
Honey teriyaki chicken reheats very well if you have extra for lunch or dinner the next day. Or, plan this as a meal prep to get ahead for the week — in that case, consider making a double batch!
- To refrigerate, package leftovers in an airtight container and store in the fridge for 3-4 days.
- To reheat, warm over low heat on the stovetop or reheat at 50% power in the microwave until warmed through. Warming chicken at half-power significantly reduces the likelihood of it drying out and becoming tough. If the sauce appears too thick, add a tiny splash of water or chicken broth and stir well to loosen it to your desired consistency.
Related Recipes
Can’t get enough of this flavor? Try my ultra-quick teriyaki ground beef or slow cooker teriyaki chicken — a Crockpot meal my whole family gets excited about.
For more Asian-inspired weeknight dinners, you’ll also love this simple Korean ground beef, a chicken and asparagus or chicken and bell pepper stir fry, pineapple chicken, or easy bourbon chicken.
If you try this Honey Teriyaki Chicken recipe, don’t forget to rate it and leave a comment below. I love hearing how recipes turn out in your kitchen, and it helps other readers, too.
You can also FOLLOW me on PINTEREST, INSTAGRAM, FACEBOOK, and TWITTER for more great recipes and ideas!

Honey Teriyaki Chicken
Ingredients
- 1 pound boneless, skinless chicken breasts
- 2 Tablespoons plus 1 teaspoon cornstarch divided
- 1/4 cup low-sodium soy sauce
- 1/4 cup water
- 2 Tablespoons honey
- 2 Tablespoons packed brown sugar light or dark
- 1 Tablespoon apple cider or rice vinegar
- 1 teaspoon toasted sesame oil
- 2 teaspoons peeled and minced fresh ginger see note
- 2 cloves garlic minced
- 2 teaspoons olive or avocado oil
- green onions and sesame seeds optional for serving
Instructions
- Cut chicken into bite-sized pieces and place in a bowl. Sprinkle with 2 tablespoons cornstarch, toss briefly to coat, and set aside.1 pound boneless, skinless chicken breasts, 2 Tablespoons plus 1 teaspoon cornstarch
- In a separate bowl or liquid measuring cup, combine the soy sauce, water, honey, brown sugar, vinegar, sesame oil, ginger, garlic, and remaining 1 teaspoon cornstarch. Whisk until smooth and set aside.1/4 cup low-sodium soy sauce, 1/4 cup water, 2 Tablespoons honey, 2 Tablespoons packed brown sugar, 1 Tablespoon apple cider or rice vinegar, 1 teaspoon toasted sesame oil, 2 teaspoons peeled and minced fresh ginger, 2 cloves garlic
- Warm the oil in a large skillet over medium-high heat until it is hot and rippling. Add chicken pieces and cook for about 1 minute on each side, just until the outside edges are golden. The chicken should not be cooked all the way through. Remove pieces to a plate and set aside.2 teaspoons olive or avocado oil
- Lower the heat to medium, pour in the sauce, and bring it to a simmer. Return chicken to the pan and stir to coat. Cook for 4-6 minutes, stirring occasionally, until the chicken is cooked through and the sauce thickens slightly.
- Serve warm over rice garnished with green onions and sesame seeds, as desired. Enjoy!green onions and sesame seeds
Notes
- Ginger: Fresh minced or grated ginger works great, but I usually use frozen cubes of crushed ginger, because they are so darn convenient! I buy Dorot brand, and use 2 cubes for this recipe, which is equivalent to about 2 teaspoons of the fresh grated stuff. Look for the cubes in the freezer section near frozen veggies.
- Prep Work: This comes together really quickly, so it’s helpful to mix together the sauce ingredients before starting the chicken. Otherwise, you risk overcooking the chicken while you measure and mix up the sauce.
- Leftovers: Keep well for 3-4 days and make a great reheated lunch.
Nutrition Estimate
This post was originally published on March 30, 2021, and has been updated with more helpful tips, tricks, and information on storage and reheating. The recipe is unchanged.


Oh my gosh – the sauce on this one is so good! Everyone asked for seconds!