This article is most useful for beginners who prepare tempura batter while looking for relevant information on the internet.
I have been working in the restaurant for over ten years, but this is the first time I try my hand to make my favorite Japanese snack, tempura. I finally worked past the steeped learning curve and want to share my learning experience with you.
I have included all the information you need in this article for a first-timer like me.
My objective is to search for the perfect tempura with the best texture and flavor.
Let’ get started.

Note: This post may contain affiliate links. Please read my privacy policy for more info. I may receive commissions for purchases made through links in this post. As an Amazon Associate, I earn from qualifying purchases.
1. How to prepare the tempura batter (very important technique)
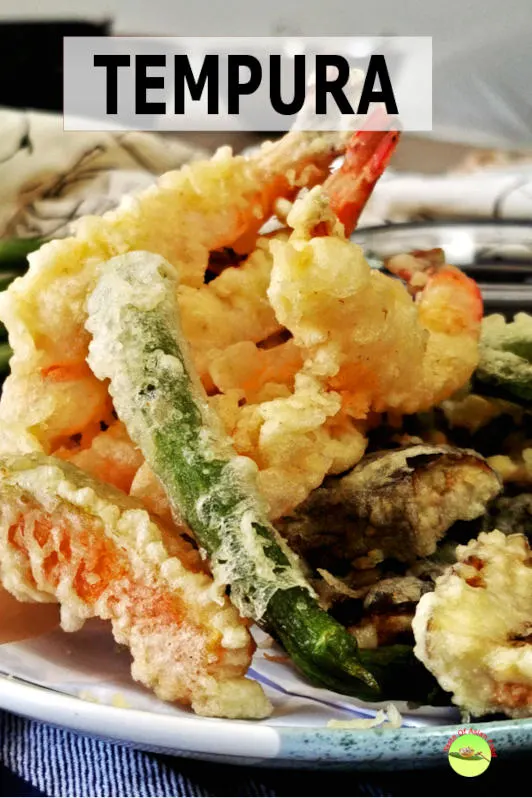
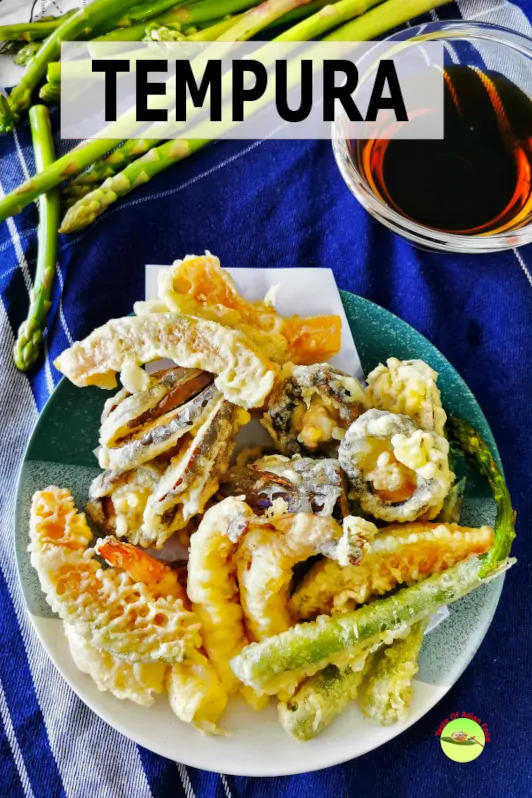
Tempura is a typical Japanese snack usually prepare with shrimp and vegetable dip in batter and deep-fried. The batter forms a translucent coating that protects the tempura from absorbing oil excessively, making it taste clean, fresh, and light.
I follow all the recommended techniques to ensure that it turns out flawlessly. All these techniques minimize gluten formation in the tempura batter and ensure that the coating is crispy and crunchy.
a. Key techniques to make the best tempura batter
- Use low protein flour to make the batter. I use the Japanese violet cake clour with only 8 % of protein. The tempura coating is less crispy if the protein content of the flour is high.
- Run the flour through a sieve. The aerated flour contributes particularly to the crispiness of the final product.
- Use ice water to mix the flour since less gluten will form when it is cold.
- Use cold flour and egg. I kept both in the refrigerator before use.
- Mix very lightly. I gently stir the flour/water/egg mixture to minimize gluten formation. More gluten will form with longer and more vigorous mixing.
Some chefs suggest microwaving the flour before using it to prepare the homemade tempura batter. The reason given is heated flour will form less gluten during mixing. However, I did not microwave it as the flour I use is with low protein content.
b. How to make tempura batter
- Sieve the low protein flour into a mixing bowl.
- Add the egg and the ice water.
- Gently combine the flour with the egg and ice water. The batter is a little clumpy, which is ok and resist the temptation to stir it until homogenous.
- Keep the batter sitting inside a bowl of ice to keep it at a low temperature if you do not finish using it immediately.
The coating of the tempura is incredibly light, crunchy by following these steps. Best of all, the crispness lasts for more than one hour after deep-frying:
I also pour a small amount of the batter into a separate bowl and add a bit of water to dilute it. This batter will be used to drizzle onto the shrimp and asparagus during deep-frying.
c. What is Japanese violet wheat flour?
I use the Japanese ‘violet’ wheat flour that is white (not violet actually), with fine-textured & fine-grained. It is suitable to use for crispy tempura as the protein content is as low as 8%. As a result, it is also referred to as tempura flour. Please substitute it with three parts of regular cake flour and one part of cornstarch if it is unavailable.
2. How thick should the tempura batter be?
I want to constitute a batter that accentuates the ingredient’s taste with just a little crunch, yet the ingredients are still moist and juicy.
With that in mind, I have tried a few different ratios of flour, water, and egg. Finally, I have found an optimal ratio of these ingredients.
My magical ratio is 100g flour, 180ml ice water, and 45g egg. If I use less water, large pieces of crumbs are formed as it is too thick. If there is too much water, the crumbs will not adhere to the ingredients’ surface during deep-frying.
I measure each ingredient with a digital weighing scale to get the precise measurement. I hope this is a valuable reference if you are struggling to get the batter’s right consistency. Your tempura batter’s thickness may be slightly different, but I am sure it will be very close to this ratio.
3. How to form the crispy coating of the tempura
Once you have prepared the batter, it’s time to deep-fry the vegetables and shrimp.
Here are the steps to fry the tempura:
- Coat the ingredients with some flour, then dust off the excess. The flour act as glue, so the batter will stick onto the ingredients.
- Dredge the ingredients into the tempura batter.
- Heat the oil to 340°F/170°C. If you drizzle some batter into the oil, it will form multiples tiny bits of crumbs that will initially sink to the bottom, bounce back to the top, and float on the surface within three seconds. If the small bits are still sunk at the bottom for more than three seconds, it means the oil is not hot enough.
- Gently place the coated ingredients into the oil. Move the ingredients gently so that they do not stick together.
- If you want a more crunchy and thicker coating, dip your finger into the batter that we reserve earlier and drizzle it onto the ingredient. When the crispy crumbs are formed, they will float around the ingredients. Use the chopstick to push the tiny crumbs towards the ingredient to let them adhere to the surface. I do this for my shrimp and asparagus.
- The ingredient will turn light golden within 2 to 3 minutes. When it is done, the bubbles surround the ingredients will be less and less noisy. Also, it will float up a little more to the surface.
- Remove it from the oil with a pair of chopsticks. Transfer it to a cooling rack to drain away from the excess oil.
Note: It is essential to keep the temperature consistent. Therefore, you should not put too many ingredients into the oil to lower the temperature. Also, stir the oil occasionally to keep the temperature constant at every part of the wok.

4. Ingredients for making tempura
a. How to prepare the shrimp for frying
Shrimp tend to curl when cooked. You can straighten it before dipping it into the batter for a better appearance.
Here is how to prevent it from curling up.
- Remove the shrimp head, then devein and peel the shell starting from the tail side.
- Cut off the tip of the tail, and use the knife to scrape the dirt and water inside the tail. Sometimes, the tail might explode and splutter while frying due to the water inside if you don’t do that.
- Cut some small incisions on the shrimp belly and the top side.
- Place the shrimp on the chopping board, snap the prawn muscle with the finger.
b. Which vegetables are suitable for tempura?
Here is my pick for the tempura vegetables: pumpkin, sweet potatoes, eggplants, and shitake mushrooms.
- Starchy vegetables have less moisture and are suitable for making tempura. Examples are sweet potatoes, lotus roots, and pumpkin.
- Vegetables containing plenty of moisture are not suitable for tempura, as it takes longer to fry until crispy. As a result, the batter is already burnt when the vegetables are ready. Some of these examples are tomatoes and cucumbers.
- Other relatively dry ingredients are also suitable for making tempura. Examples are asparagus, eggplants, shiso leaves, and shitake mushrooms.
c. How to create the fan-shaped eggplant
I have seen the attractive fan-shape presentation of the eggplant at the Japanese restaurant. Here is how to create it:
- Cut and remove the stem.
- Cut it into four inches sections.
- Make five to six cuts through the eggplant lengthwise at an angle but keep one end of the eggplant intact.
- Press the eggplant with your palm lightly to fan out the eggplant.
The fan-shaped eggplant is not only aesthetically attractive but also shortens the time required to fry.
d. Additonal note about the vegetables:
- The thickness of the vegetables is essential to make good tempura. If it is too thick, the batter will start to burn before the vegetables are ready. If you cut it too thin, you are having a mouthful of crispy batter with little vegetables in your mouth. The suitable thickness of the starchy vegetables is about 0.5cm (0.2 inches).
- If you prefer to make it thicker, blanch it in some lightly salted water for two minutes, then shock in ice water, and pat dry. Now the vegetable is half-cooked and takes only a short time to deep-fry.
- If you are using frozen vegetables, wipe them dry after defrosting to remove the excess water. This step will prevent the vegetables from spluttering during frying.
- Remove the stem of the shiitake mushroom as it is quite hard and chewy.
5. Am easy tempura sauce
The tempura sauce I use is relatively straightforward: a mix of dashi, soy sauce, and mirin.
Here are the steps:
- Pour five parts of dashi, a part of mirin, and one part of Japanese soy sauce into a small pot.
- Bring it to a boil.
- Let it cools and use it as the dipping sauce.
A comparison between three recipes of tempura batter
Since the batter is so important for making tempura, I have tested recipes with different ingredients to compare their texture, crispiness, and appearance.
Recipe 1: 100g flour, 180ml ice water, and 30g egg
Recipe 2: 100g flour, 2g baking powder, 180ml ice water, and 30g egg
Recipe 3: 77g flour, 23g cornstarch, 180 ml ice water, and 30 egg.
The result:
- Recipe 1 and 2 produce tempura with a crunchy coating which lasts for more than one hour. (I tried to wait for two hours, and it is still partially crunchy!)
- For recipe 3, I substitute 1/4 of the flour with cornstarch. The result is not significantly different from recipes 1 and 2.
Conclusion:
- The baking powder in recipe 2, which aims to increase tempura’s fluffiness, is unnecessary. The tempura is already very light and crunchy in the recipe without it.
- Cornstarch in recipe 3 is also not necessary when using flour with low protein content. The violet wheat flour I used contains less than 8% of protein, making it very crispy due to less gluten being formed during the batter’s preparation.
- If you do not have this extra low protein flour, I suggest using the regular cake flour (protein content is between 8% and 9%) and substitute a quarter of it with cornstarch to reduce the gluten formation.
My take-home message: Proper technique (keep everything cold, use low protein flour, and do not overmix) is more important than adding baking powder and cornstarch to produce the crunchy coating of the tempura.
Other related recipes
If you like tempura, you will also like to check out other popular Japanese recipes:
Miso soup is a warm and comforting Japanese soup prepared with a soup stock (Dashi) and miso paste. There is a section on making the dashi required to prepare the tempura sauce in this article.
Japanese garlic fried rice is another popular item on the Japanese restaurant’s menu. You can make it easily by following this recipe.
Japanese cheesecake is pillowy soft, with a cottony texture and soufflé like crumbs. Here is the article to provide all the necessary information (and recipe, of course) to make it from scratch.
Tempura - How to make it at home


This recipe will show how to prepare the tempura batter that is light and crunchy.
Ingredients
- 160g (1.8 cup) of Japanese violet wheat flour
- 50g egg (one egg)
- 290ml (1.2 cup) ice water
Instructions
- Sieve the flour.
- Add the egg and ice water to the flour.
- Combine the ingredients gently. It is Ok if a little lumpy.
- Cut the vegetables and shrimps as required.
- Coat the ingredients with some flour, dust off the excess.
- Dredge the ingredients into the batter.
- Heat the oil to 340°F/170°C.
- Deep fry until light golden within 2 to 3 minutes.
- If you want a more crunchy and thicker coating, drizzle some batter onto the ingredient. When the crispy crumbs floating around the ingredients, use the chopstick to push the tiny crumbs towards the ingredient to let them adhere to the surface.
- When it is done, the bubbles surround the ingredients will be less and less noisy. Also, it will float up a little more to the surface.
- Remove it from the oil. Transfer it to a cooling rack to drain away from the excess oil.
- Serve with the accompanied sipping sauce.
Notes
The nutritional value is calculated based on the batter only, exclude all other ingredients.
Recommended Products
As an Amazon Associate and member of other affiliate programs, I earn from qualifying purchases.


Nutrition Information:
Yield:
3Serving Size:
1Amount Per Serving: Calories: 218Total Fat: 2gSaturated Fat: 1gTrans Fat: 0gUnsaturated Fat: 1gCholesterol: 62mgSodium: 29mgCarbohydrates: 41gFiber: 1gSugar: 0gProtein: 8g
This data was provided and calculated by Nutritionix on 2/28/2021
Patricia
Wednesday 20th of March 2024
What type of oil are you using to cook Tempura?
Thank you.
KP Kwan
Thursday 21st of March 2024
I use corn oil, but another neutral-flavored oil with high smoking points, such as soybean or canola oil, is fine.
Jayne
Friday 10th of March 2023
Can I use gluten free flour?
KP Kwan
Friday 10th of March 2023
Yes, You can use gluten-free rice flour.
Aspen Ballas
Friday 13th of May 2022
I just tried your recipe and it was excellent! My family was blown away. I appreciate the details and care that you put into your instructions. Thank you!!!
Steve
Tuesday 22nd of February 2022
Excellent article! I followed directions exactly. Cooked small Indian eggplant, Mexican squash, and shrimp. Best to eat right out of the fryer. Perfect texture inside and out. Your recipe is a keeper.
KP Kwan
Tuesday 22nd of February 2022
Thank you :)
Del
Monday 24th of January 2022
Above you said My magical ratio is 100g flour, 180ml ice water, and 45g egg. But the main recipe on here is another one. Which one do you recommend today
KP Kwan
Monday 24th of January 2022
If you use the same ratio (100g flour, 180ml ice water, and 45g egg) times 1.6x, it will be 160g flour, 288ml water, and 72g egg. It is the same ratio I use, except I reduce the egg in the main recipe from 72g to 45g, as one egg is 45g, so I choose to use one instead of 2 eggs.