Bombay Grilled Veggie Sandwich Recipe
Note: This post contains affiliate links. As an Amazon Associate I earn from qualifying purchases.


You’ll fall in love with this Bombay sandwich – bread slathered with butter and green chutney, layered with veggies, and then grilled to perfection. Learn how to make this sought-after Indian street food at home.
Disclosure: This veg sandwich recipe post was sponsored by the Idaho Potato Commission. All opinions, as always, are my own.

Bombay (or Mumbai), as it is called now, just like New York, is a city that never sleeps. The street food vendors and restaurants often operate late in the night, and you’ll always find a plethora of options at every nook and corner to satiate your hunger.
The street foods in Mumbai are especially popular and sought-after – because they are affordable, filling, and at times healthy, like this Bombay grilled veggie sandwich.
What is a Bombay sandwich?
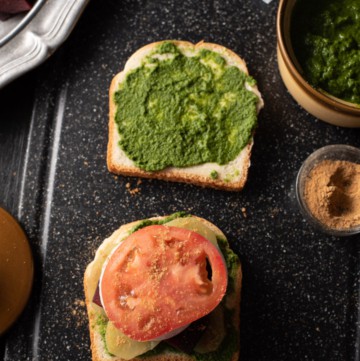
The Bombay sandwich is a loaded veggie sandwich that uses green chutney and butter as a spread. It is usually layered with potatoes, cucumber, onions, tomatoes, and sometimes a cheese slice or two. The veggies are then sprinkled with chaat masala (or salt and pepper) before placing a bread slice over it.
You can grill this vegetable sandwich or have it as is. It is often served with a side of green chutney and ketchup and a piping hot cup of tea.
How do you make a Bombay grilled veggie sandwich?
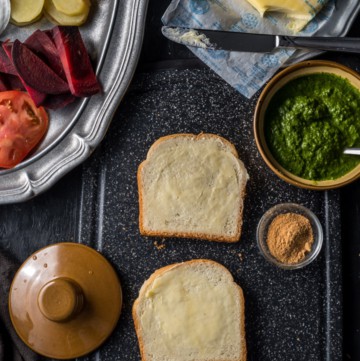
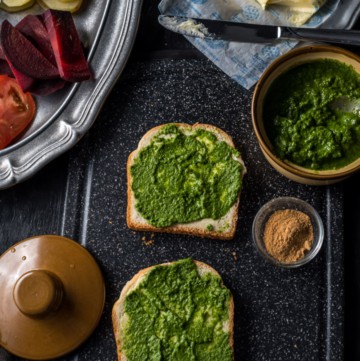
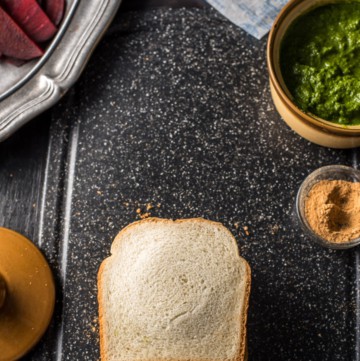
There is no one recipe, but the part that is consistent across all Bombay veggie sandwich recipes would be that you start with two slices of soft white bread and then apply butter followed by chutney on one side of each slice. This prevents the green chutney from making the bread soggy.
The next steps to make this vegetable sandwich recipe would include the following –
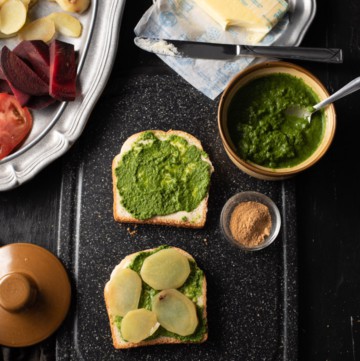
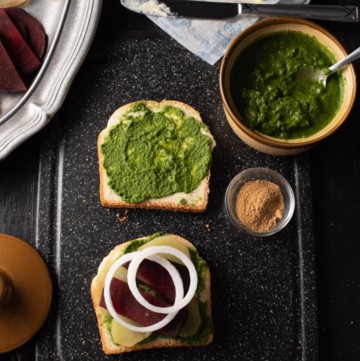
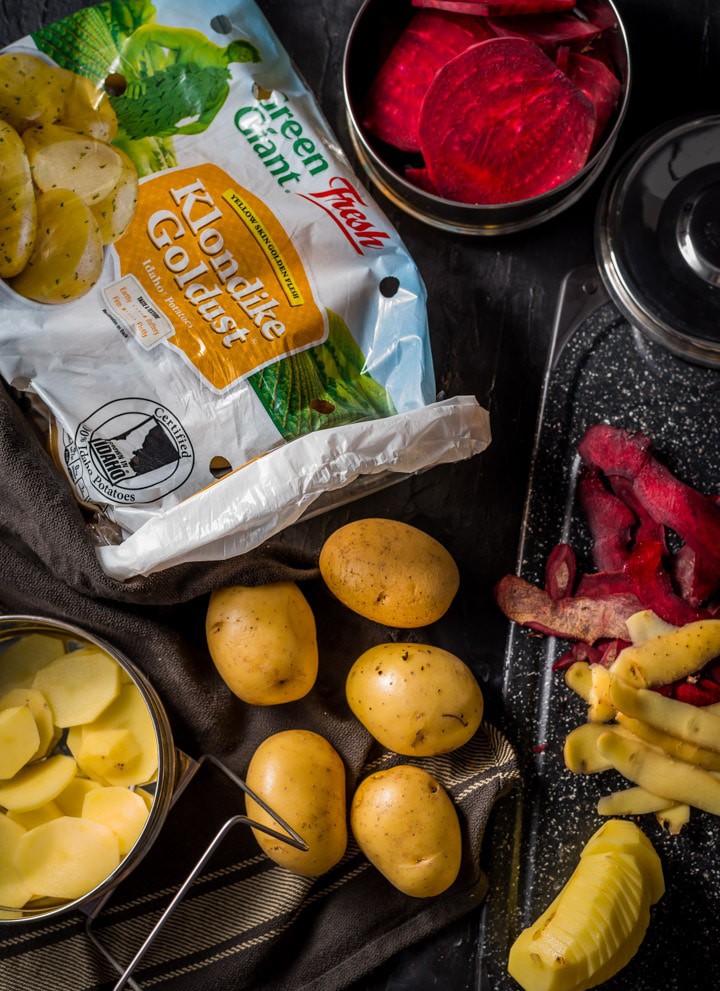
- Add veggies – Most Indian veggie sandwiches almost always include finely sliced boiled potatoes, cucumbers, tomatoes, and onions, but some include thinly sliced green peppers as well as beetroots.
- Sprinkle chaat masala over the veggies- This is a game changer. It adds a bit of tang to this sandwich and makes it finger-licking good. Once you have sprinkled the chaat masala, cover the cheese slice with the other bread slice with the chutney side facing down.
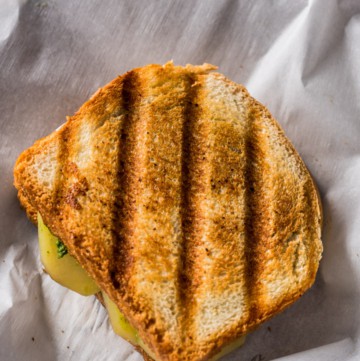
- It is not necessary to grill this sandwich. It is often served as is. Grilling gives this sandwich a nice crunchy exterior that most folks seem to like. Check out the grilling options mentioned below.
- Add garnishings – You could garnish it with sev (thin crispy sticks made from chickpea flour) or a drizzle of ketchup or green chutney. You can also use shredded mozzarella cheese both as a layer and/or as garnishing.
- Accompany it with a cup of hot ginger tea or a cold glass of lemonade, depending on the weather.

Should I grill or not grill the sandwich?
It is totally your choice.
My mom served these potato sandwiches without grilling them for school lunch or as an after-school snack. If you choose to grill it, make sure to serve it immediately, or else the bread can get soggy over a period of time.
If you are making these Indian sandwiches for a picnic, the alternative to grilling would be to toast the bread slices till they are golden brown and then either assemble it just before serving it or make it beforehand. Or you could just not grill it and serve it like English tea sandwiches.
How do you grill the veggie sandwich
You can use any of these methods to grill the sandwich-
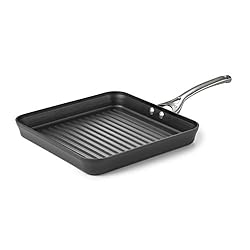
- Using a grill pan – I love this option the best because all the ones listed below limit the number of veggies you can put in the sandwich. The top lid will not close if you go beyond a certain threshold. You don’t have to worry about it when you are making this Bombay sandwich recipe in a grill pan.
- This is my next preferred option – this traditional stovetop sandwich toaster that most Indian street vendors use.
- Electric sandwich maker– This makes for an awesome hands-free version. Make sure to add just a few veggies, or it may spill out.
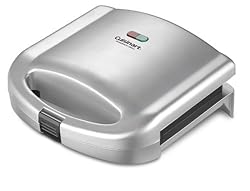
Panini grill – What’s great about this equipment is it grills both sides at the same time. I don’t own it, but I wish I did 🙂

Variations
- Vegetarian sandwich fillings – Other than the ones already mentioned, you could add a cheese slice (preferably Mozzarella), and include other veggies such as red/green/yellow capsicum slices or any other vegetable of your choice.
- Triple-decker sandwich – Another way to make this sandwich is to make this with three slices of bread. In this case, you’ll slather butter and chutney on both sides of the middle slice. Layer it with some more veggies, and then stack the top slice on top of it.
Tips for making the best Mumbai sandwich –
- Green chutney can make or break your vegetarian grilled sandwich. So, check out this tried and tested recipe for green chutney that is a hot favorite with my readers.
- Make sure the green chutney is not runny – otherwise, it will make your bread soggy. The chutney should be like a spread.
- Always slather butter first and THEN the green chutney. It prevents your bread from becoming soggy.
- Add chaat masala for that extra kick. If you don’t have one, here are the alternatives – salt and pepper, or a mixture of black salt and roasted cumin powder in a 1:1 ratio. Use these sparingly – you don’t want to overpower the sandwich.
- If you are making this Bombay potato sandwich recipe for a picnic, the alternative to grilling would be to toast the bread slices till they are golden brown and then either assemble it just before serving it or make it beforehand. You can skip grilling as well and serve it like English tea sandwiches.

Other favorite teatime snack recipes that we often make at home –
- Corn bhel – Try this non-traditional way of making corn bhel or corn chaat*, and you’ll be hooked. While most Indian street food demands a mandatory drizzling of tamarind chutney and green chutney, this no-fuss corn bhel recipe doesn’t require either.
- Poha Chivda – Make this poha chivda in under 10 minutes for a great after-school snack.
- Cereal chivda – Turn your leftover cereals into a snack (Cereal Chivda) that your kids will love to munch on during a road trip or after school.
- Chutney cheese quesadilla and mini veggie tortilla rolls – Two super easy snack options that come together in minutes.
- Shankarpalli – It is an extremely addictive snack that we can’t get enough of. Learn how to prepare Shankarpali in 30 minutes!
I would like to thank the Idaho Potato Commission for sponsoring this Bombay potato sandwich recipe.

Bombay Veggie Grilled Sandwich
Ingredients
Green chutney ingredients
- 2 cups cilantro
- 4-5 mint leaves
- 2 garlic cloves
- ½ teaspoon grated ginger
- 2 teaspoons lemon juice or to taste
- 3 tablespoons grated coconut
- 1 Indian or Thai green chilies (Bird's eye)
- 1 teaspoon sugar
- salt to taste
- water as needed
For the sandwich
- 8 slices white sandwich bread
- ¼ cup salted butter unsalted will work
- 1 cup green chutney
- 4 medium-sized Idaho® potatoes boiled and sliced
- 1 medium-sized onion thinly sliced
- 1 cucumber thinly sliced
- 1 medium-sized beetroot boiled and sliced
- 2 medium-sized tomatoes thinly sliced
- 1 tablespoon chaat masala
Garnishings / Toppings
- sev as needed
- ketchup as needed
- shredded mozzarella cheese as needed
Instructions
For the green chutney –
- Add all the ingredients in a blender and grind until smooth. (Note: use water as needed to get the consistency you desire. I used approximately a little less than 1/4 cup)
Assembling the sandwich
- Start with two slices of bread. Apply butter followed by chutney on one side of each slice.
- Place the potato slices over the chutney, followed by cucumber, onion, beetroot and tomato slices. Sprinkle chaat masala and cover it with the other bread slice with the chutney side facing down.
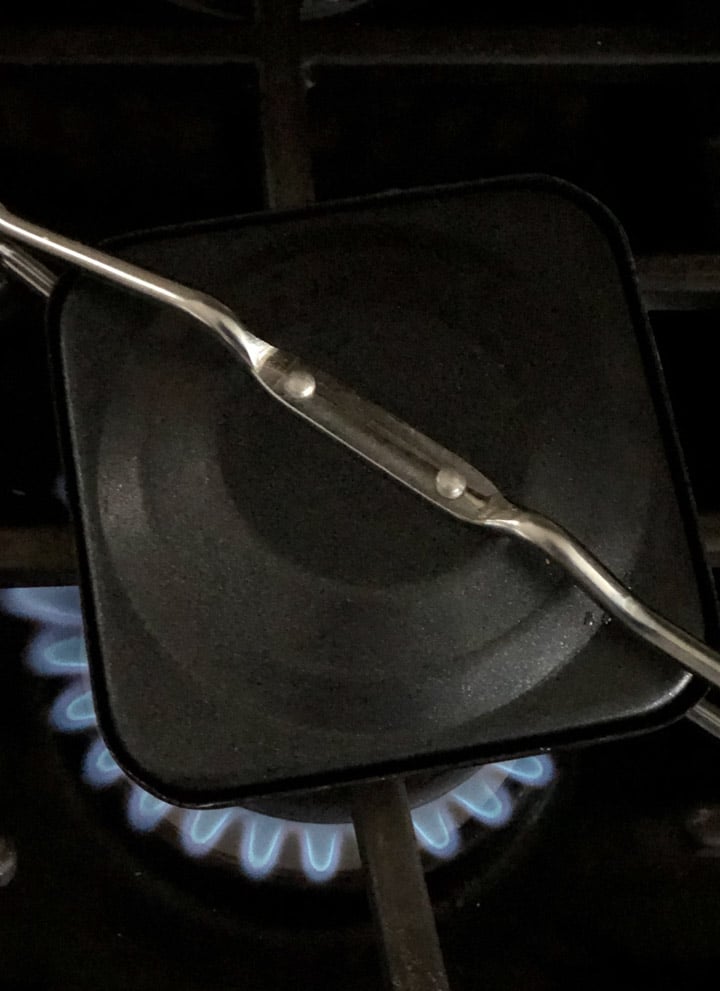
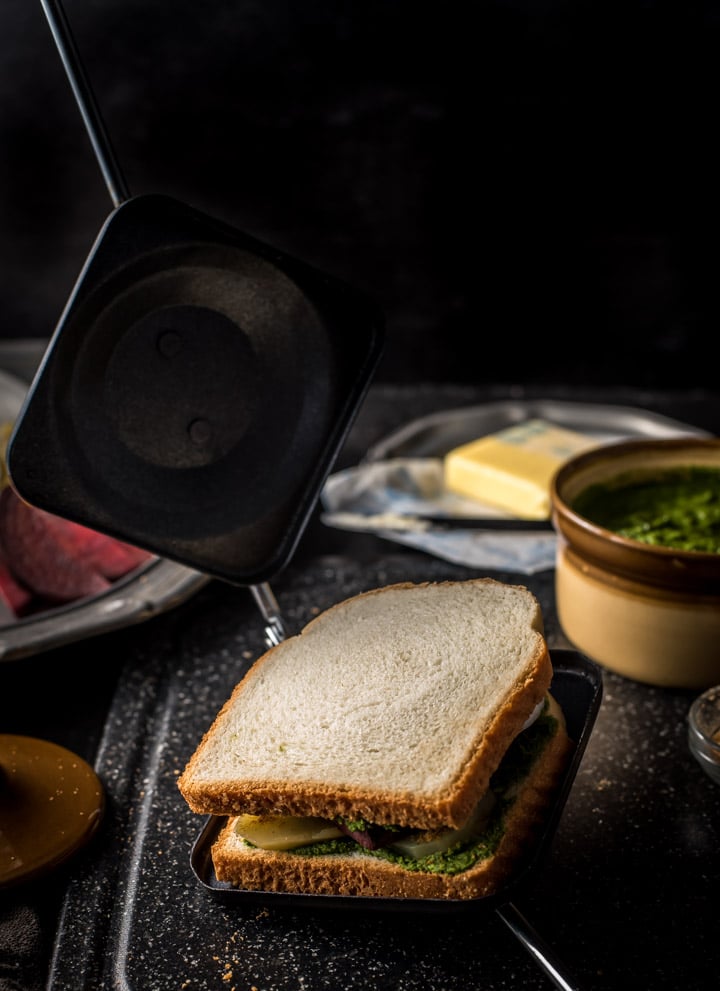
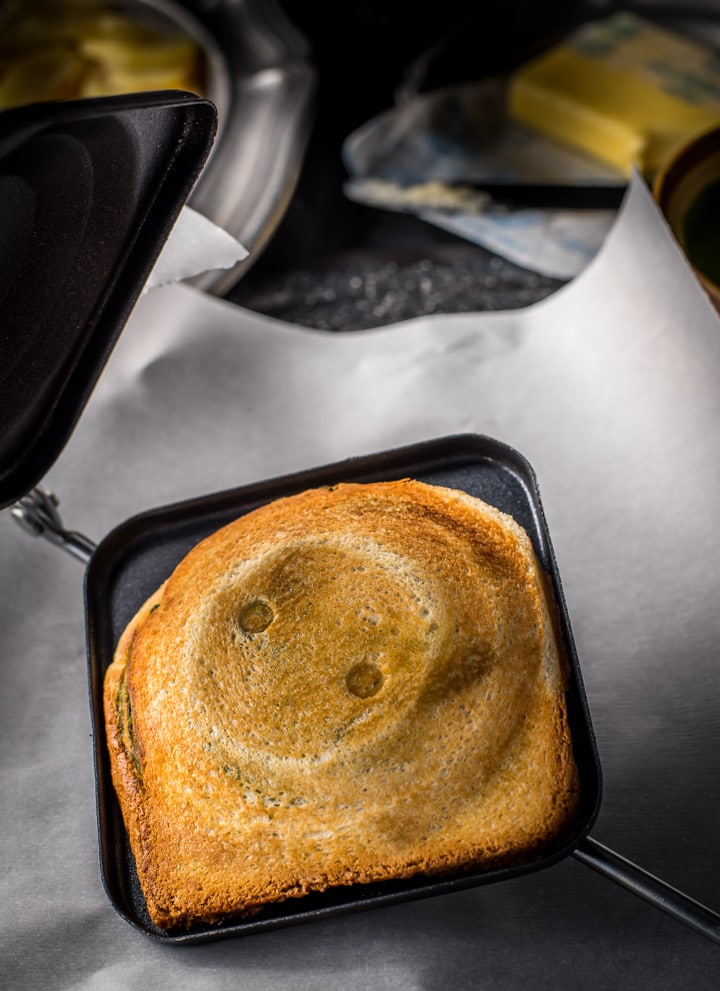
- Add a teaspoon of butter on a grill pan placed over medium heat. Carefully place the sandwich on the hot grill pan. Let it cook till grill marks appear at the bottom (about 2 minutes). Flip it carefully using a spatula on the other side and cook it for another 2 minutes. [Check out the notes section for alternate methods to grill].
- Once the cooking process is complete, cut the sandwich diagonally or into 4 equal pieces.
- Sprinkle cheese or sev (if using). Serve immediately with a side of chutney and/or ketchup.
- Repeat the process to make remaining 3 sandwiches.
Notes
- Panini grill – Follow the directions instructed in the manual. It will typically involve preheating the grill, placing the sandwich on the grill, closing the lid and letting it cook for about 5 minutes. The advantage is that you don’t need to flip. It will cook both sides at the same time.
- Stovetop handheld sandwich maker
- Make sure you don’t overstuff your sandwich and always use sandwich bread slices.
- Grease both plates of the sandwich maker, place the sandwich and close the lid.
- Place it on an open flame and cook both sides for 3-4 minutes each.
- Remove it from the flame, open the sandwich maker and carefully transfer the sandwich in a plate.
- Make sure the green chutney is not runny – otherwise it will make your bread soggy. The chutney should be like a spread.
- Always start with butter first and THEN green chutney. Prevents your bread from becoming soggy.
- Add chaat masala for that extra kick. If you don’t have one, here are the alternatives – salt and pepper, a mixture of black salt and roasted cumin powder in 1:1 ratio. Use these sparingly – you don’t want to overpower the sandwich.
- If you are making these sandwiches for a picnic, the alternative to grilling would be to toast the bread slices till they are golden brown and then either assemble it just before serving it or making it beforehand. Or you could just not grill it and serve it like English tea sandwiches.
Disclaimer: Approximate nutritional information is provided as a courtesy and can vary depending on the exact ingredients/brands used. If you have health issues, please work with a registered dietician or nutritionist.