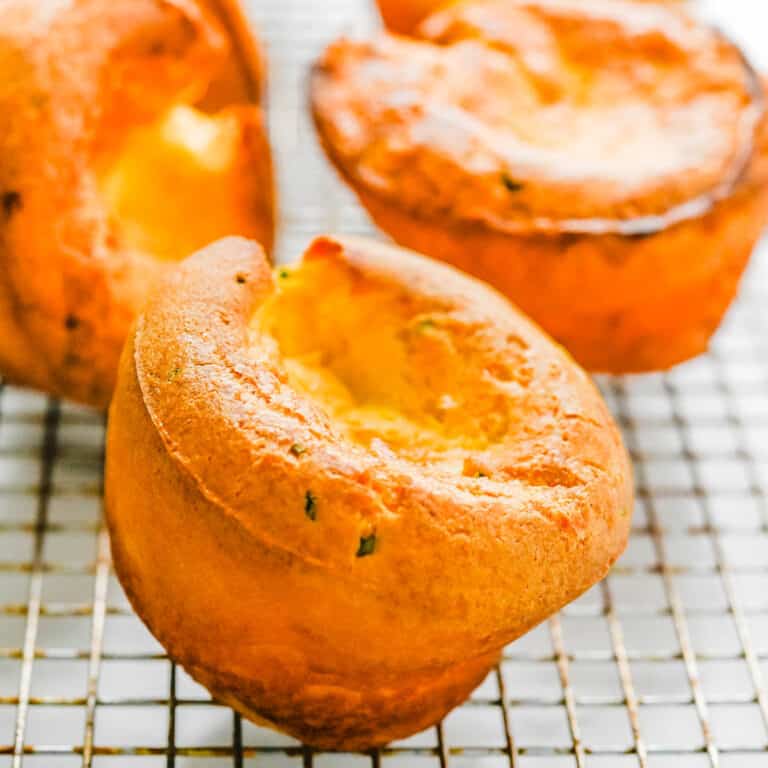
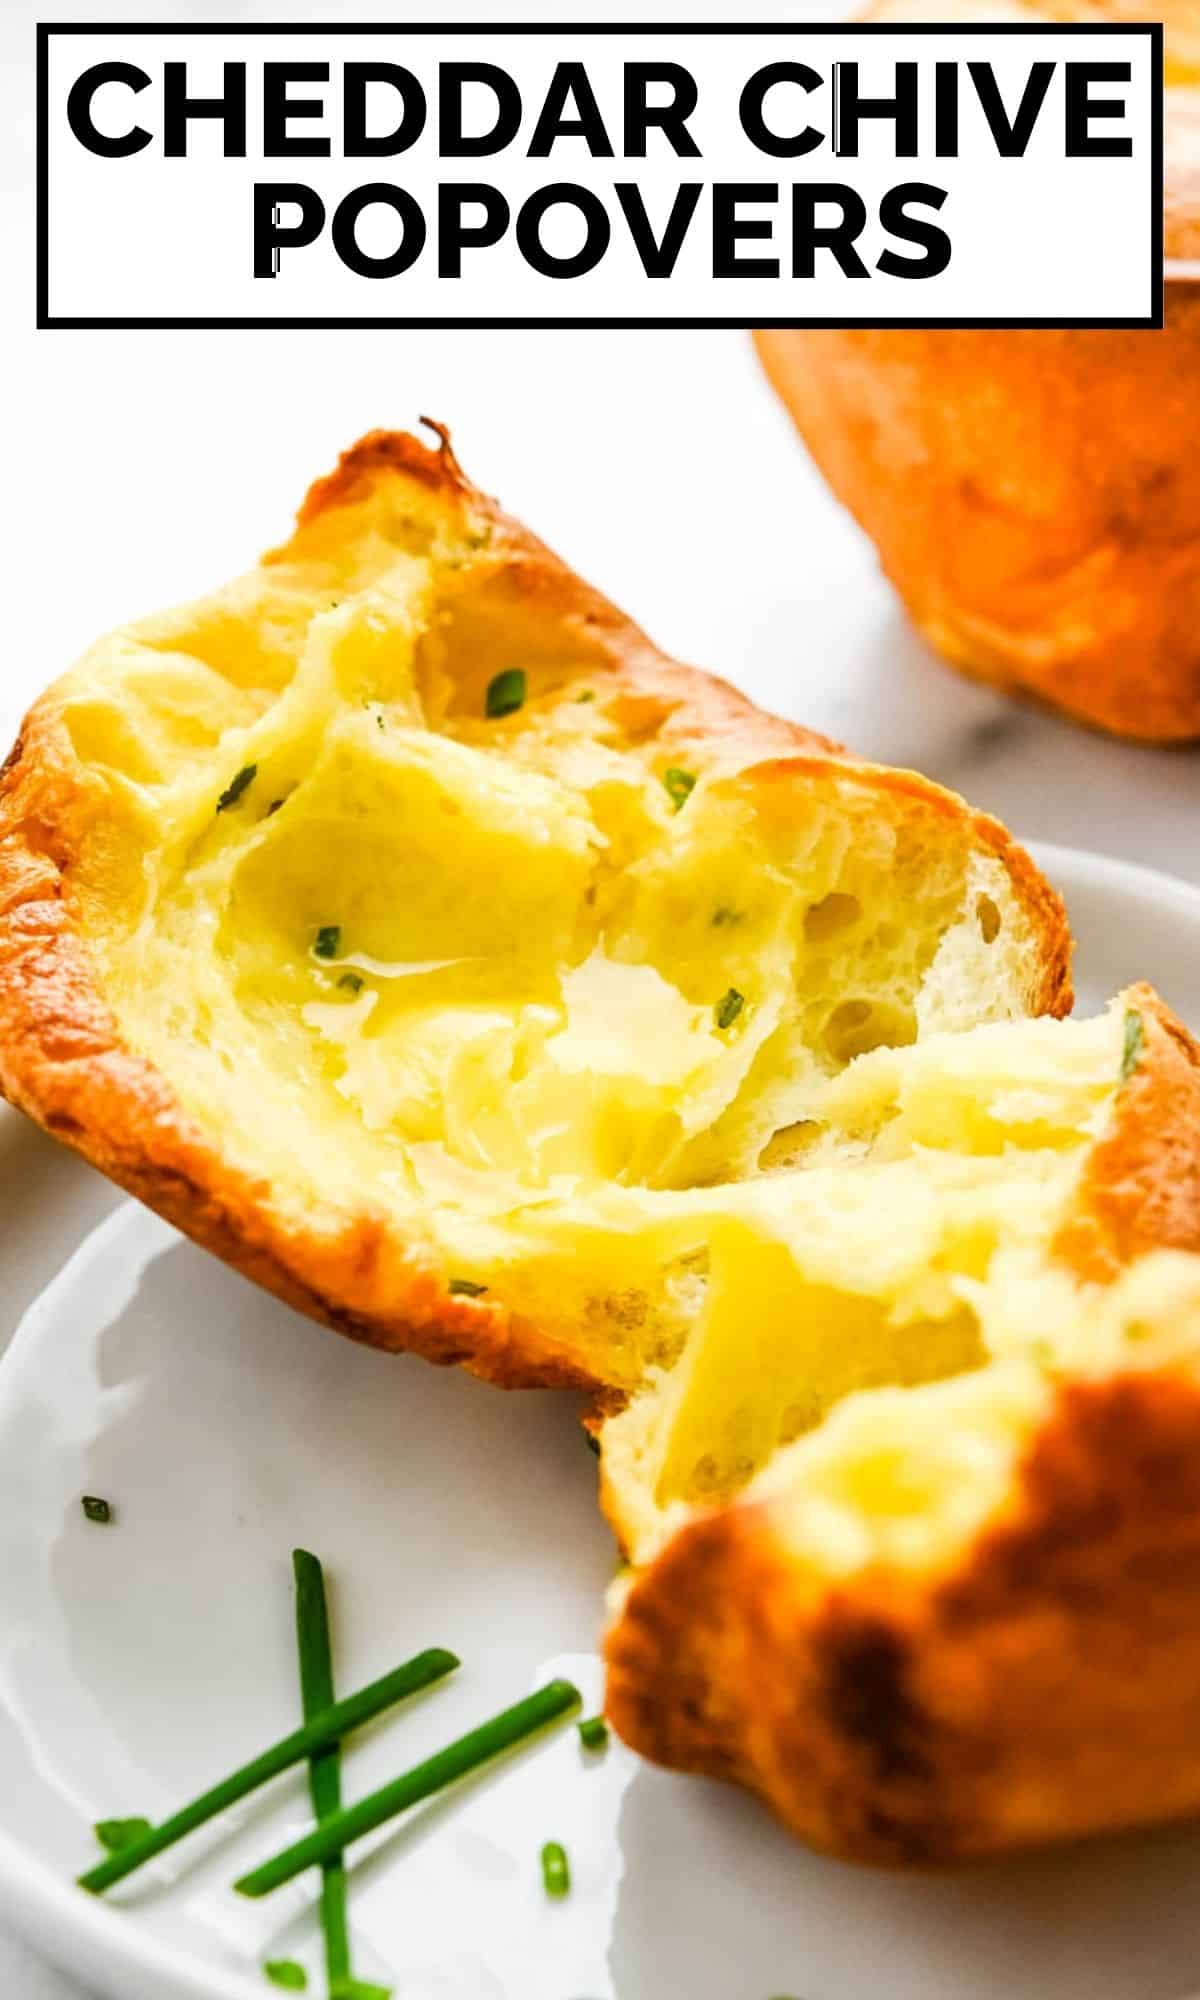
Cheddar Chive Popovers
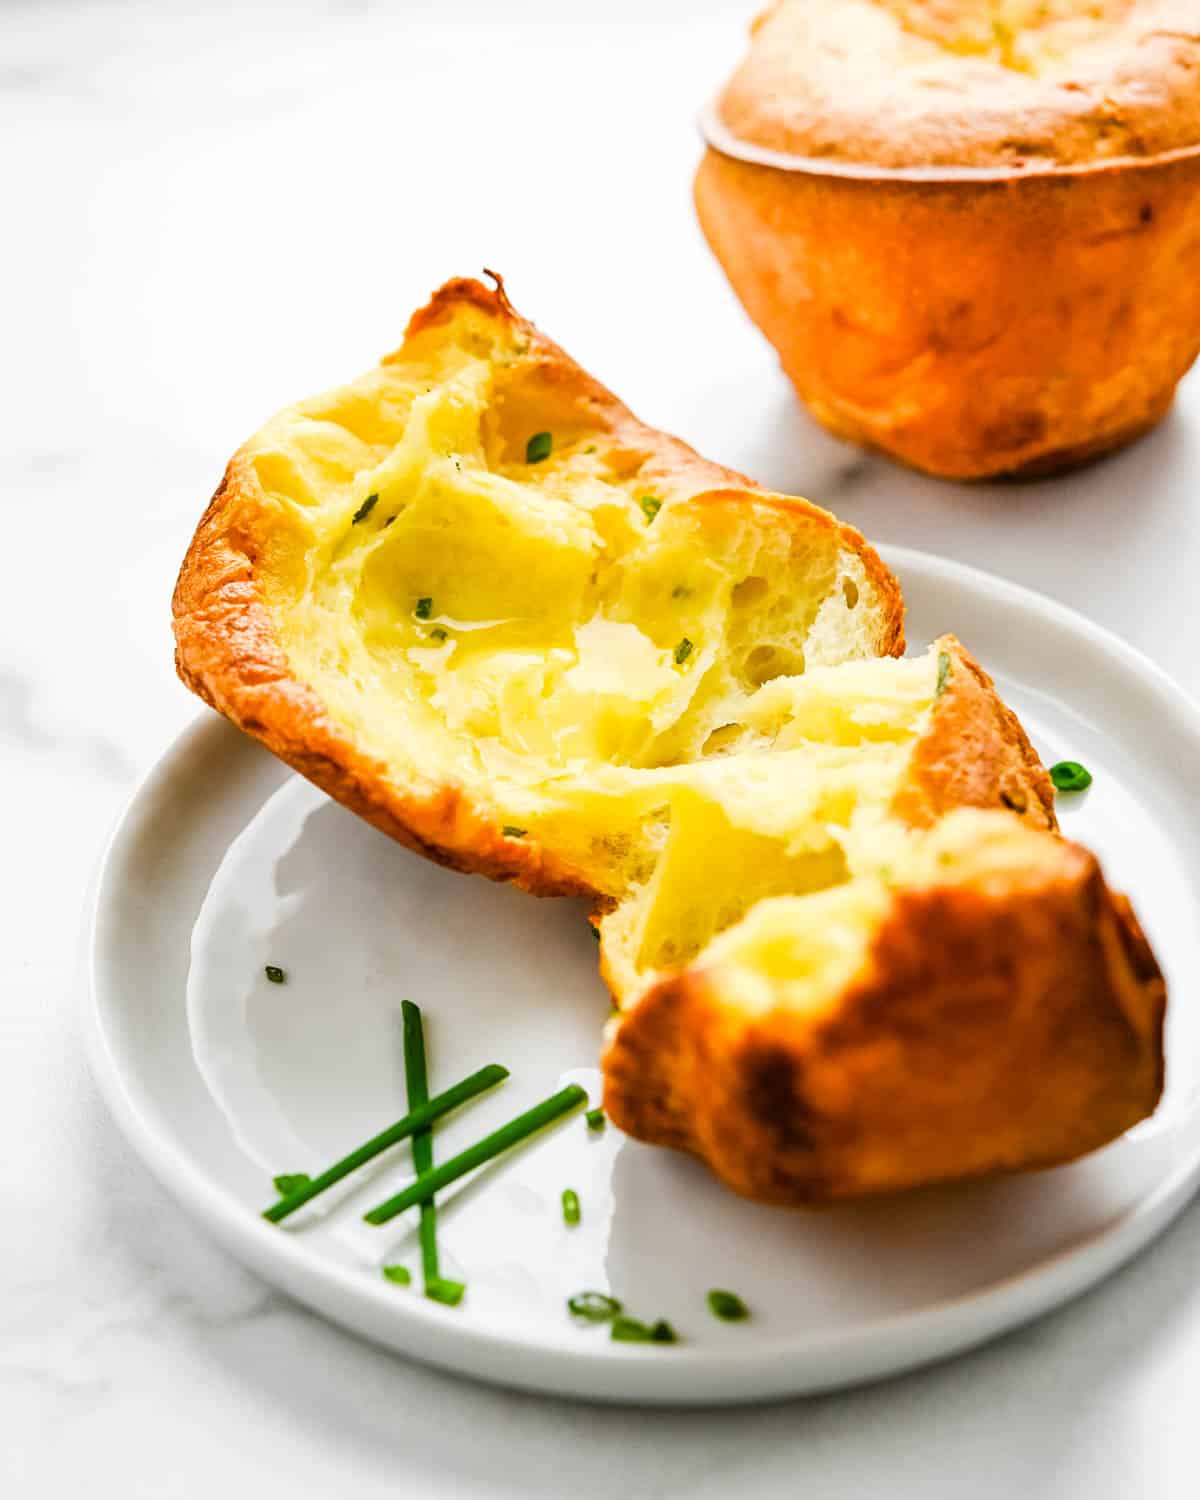
If the idea of no yeast dinner rolls (a.k.a. no knead dinner rolls) appeals to you, then you’ll LOVE this easy popover recipe. They’re ridiculously simple to make and you don’t need any fancy equipment… not even a popover pan (but if you have one, use it). Essentially, this is a dump and go blender recipe that takes about 30 seconds to assemble. Bake the popover batter in a hot oven and watch them rise, puff and sigh. These tender, chewy Cheddar-Chive Popovers have a chewy, crusty dome and an airy, soft interior. In other words, heaven.
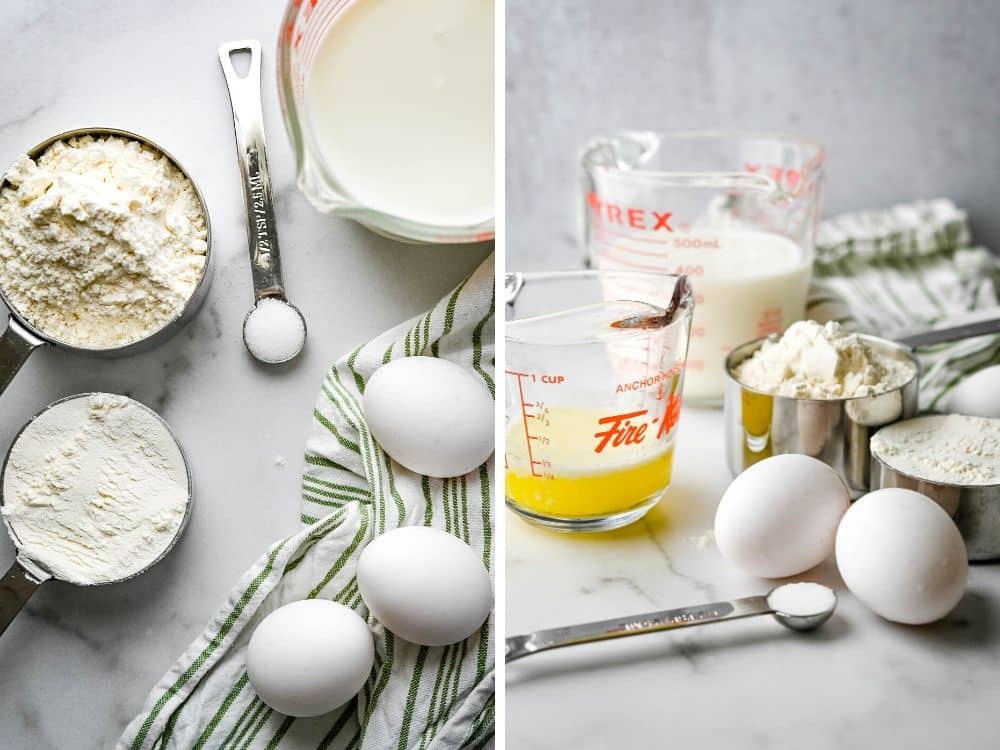
Table of Contents
What Is A Popover?
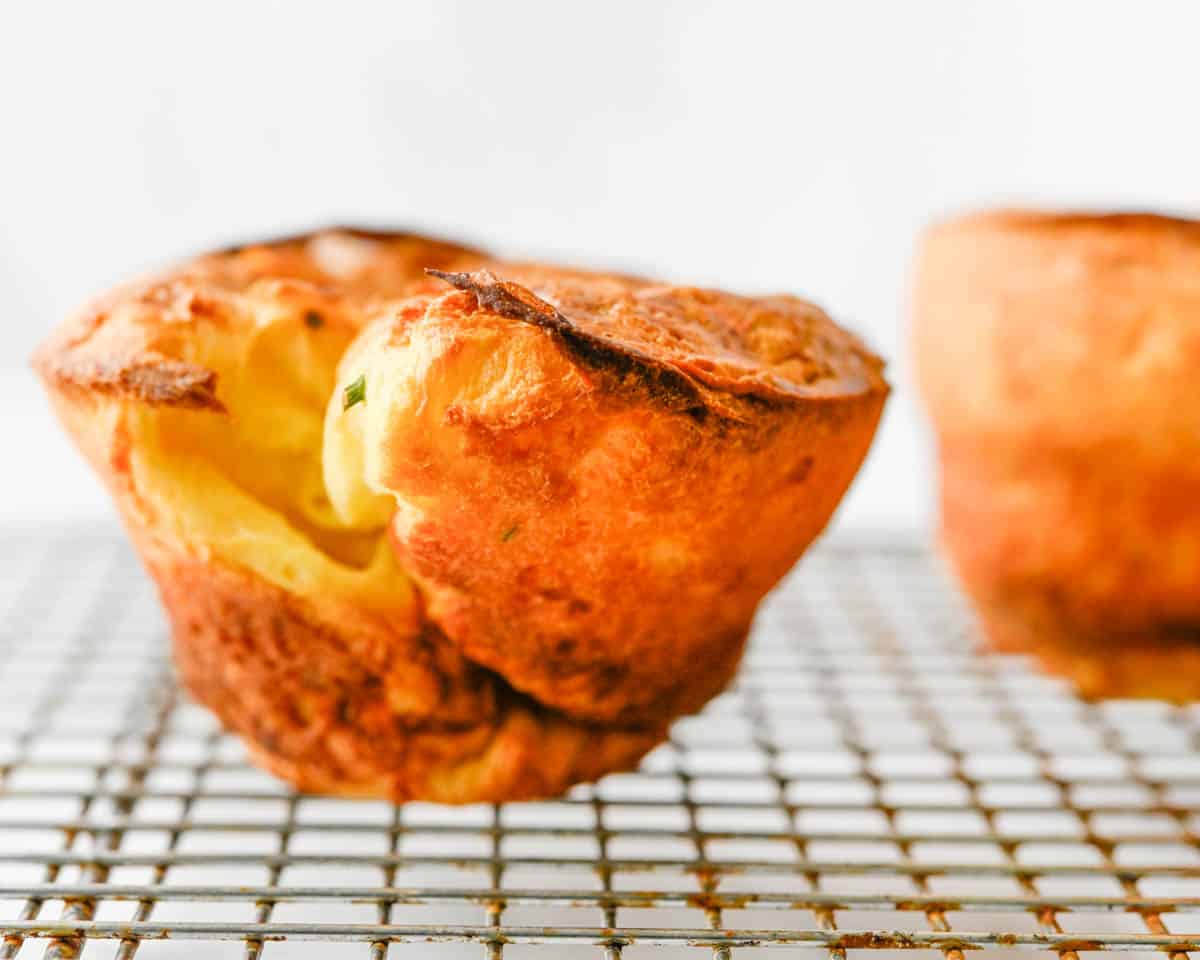
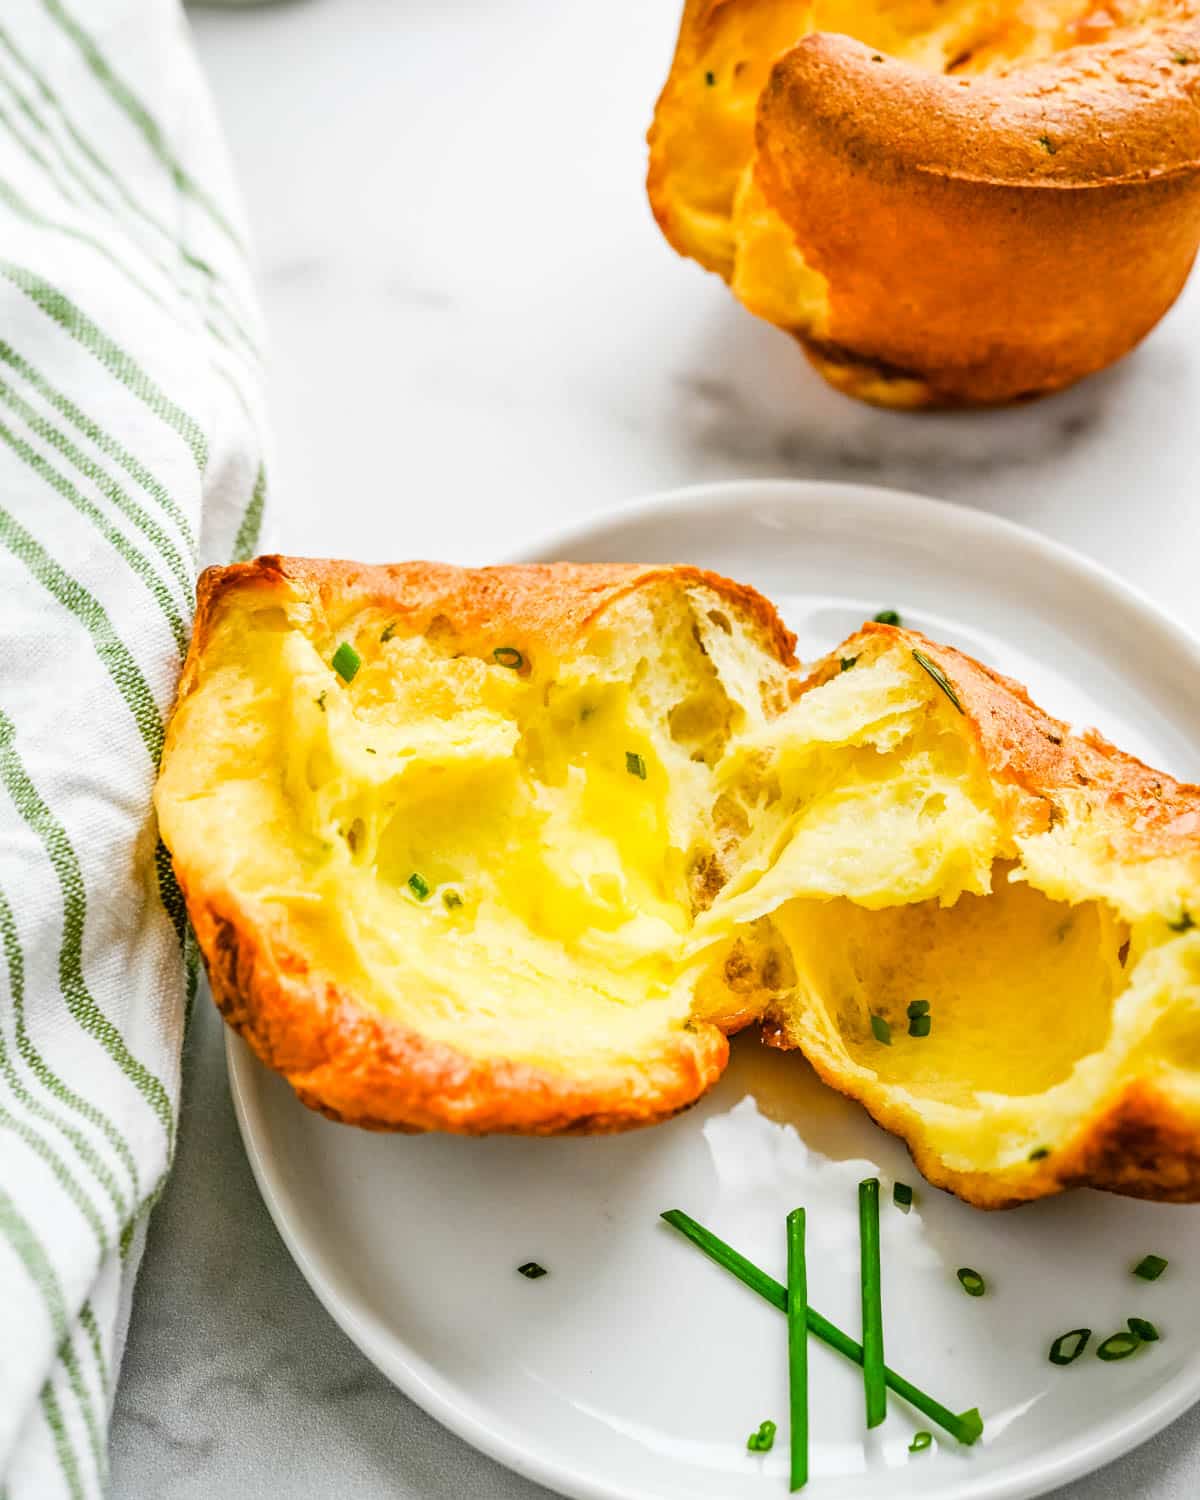
Popovers are like little bread soufflés that rise up in the pan to form a delicate crown. The exterior is golden and poofed while the inside is practically cavernous with soft pockets of savory crumb. There is no leavener in popovers, so the “rise” or “pop” comes from the steam generated from the liquid ingredients when baking at a high temperature.
Basic Ingredients For Easy Popover Recipe
- Large Eggs
- Whole Milk
- Unbleached Flour
- Salt
- Butter
- Cheddar
- Chives
I’ve enjoyed popovers for years (they were a favorite of my Aunt Heather) and I’ve tried multiple methods for creating those crispy, chewy domes. Some call for preheating the popover pan in the oven BEFORE adding the batter, others required a 20 minute rest in the refrigerator before baking. Of all the methods I’ve tried, this one is by far the simplest. You’re gonna love this easy popover recipe. The technique comes from the King Arthur Flour Baker’s Companion Cookbook and what I love about it, is that it’s made in your blender. You heard me right. The blender.
Top Tips For Easy Popover Recipe
While this easy popover recipe is very simple, there are a few tips that you need to follow for things to go smoothly. They are:
Get my latest recipes, helpful kitchen tips and more good things each week in your inbox.
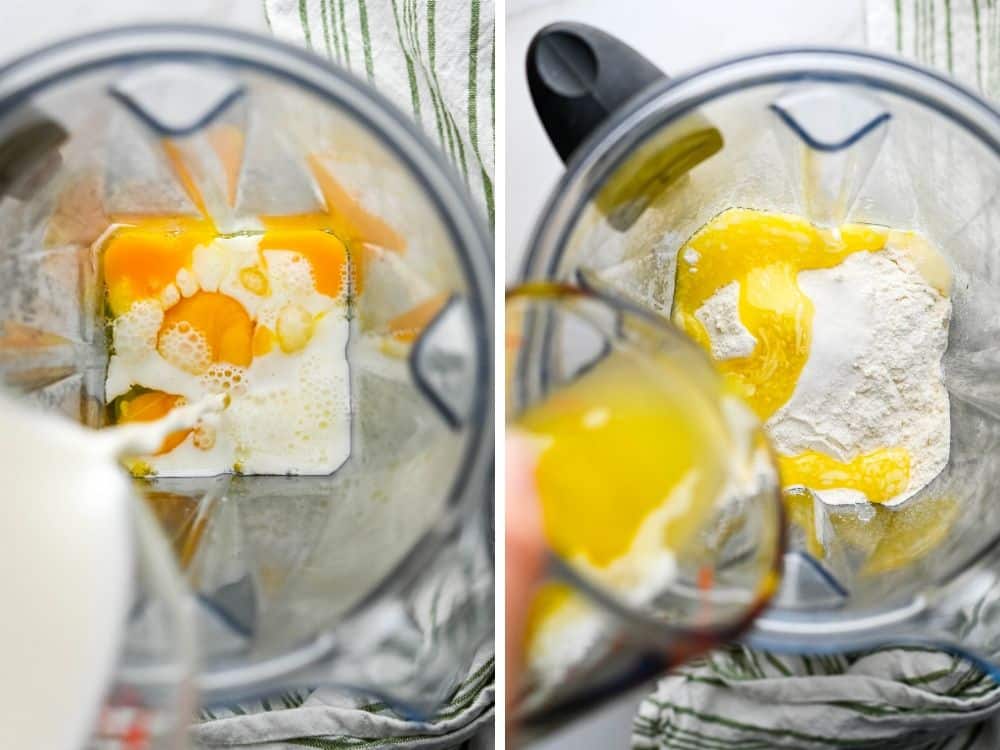
- ORDER: The order in which you add the ingredients the blender — you want to be sure to add the the eggs and milk first followed by the flour, to ensure even mixing. If you add the flour to the blender first, it won’t mix evenly with the other ingredients and worse, much of it will stick to the bottom of the blender and in the blades.
- DON’T PEEK: Do not, under any circumstances, open the oven while the popovers are baking. The lift that the popovers get in a hot oven will be disrupted if you decide to peek. Trust me, you’re only hurting yourself if you do it.
- DON’T FORGET TO TURN DOWN THE OVEN: The popovers start out in a 450° oven, but after 20 minutes you reduce the temperature to 350°. This is a key step, otherwise the popovers will over-brown or even burn — and that wonderful chew will turn into an over-cooked crunch. My advice: Set a timer.
How To Make Popovers
- Preheat the oven to 450°.
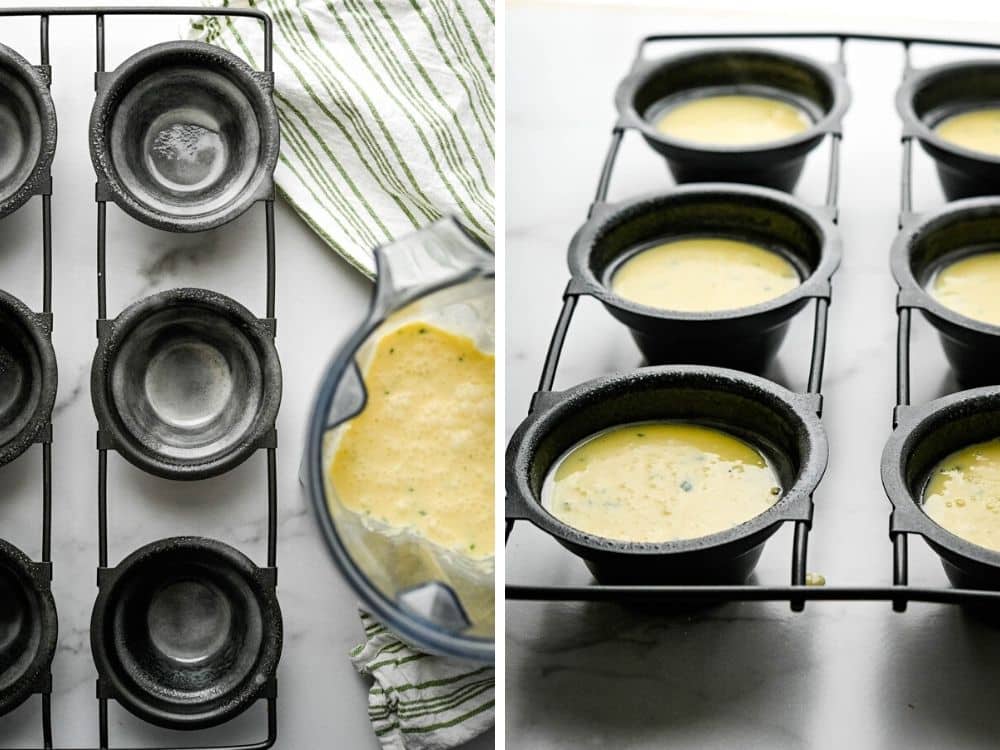
- Liberally spray the popover pan or muffin tins with vegetable spray (overspraying the top edges).
- In this order add the following ingredients to the blender: Eggs, Milk, Flour, Salt and Melted Butter.
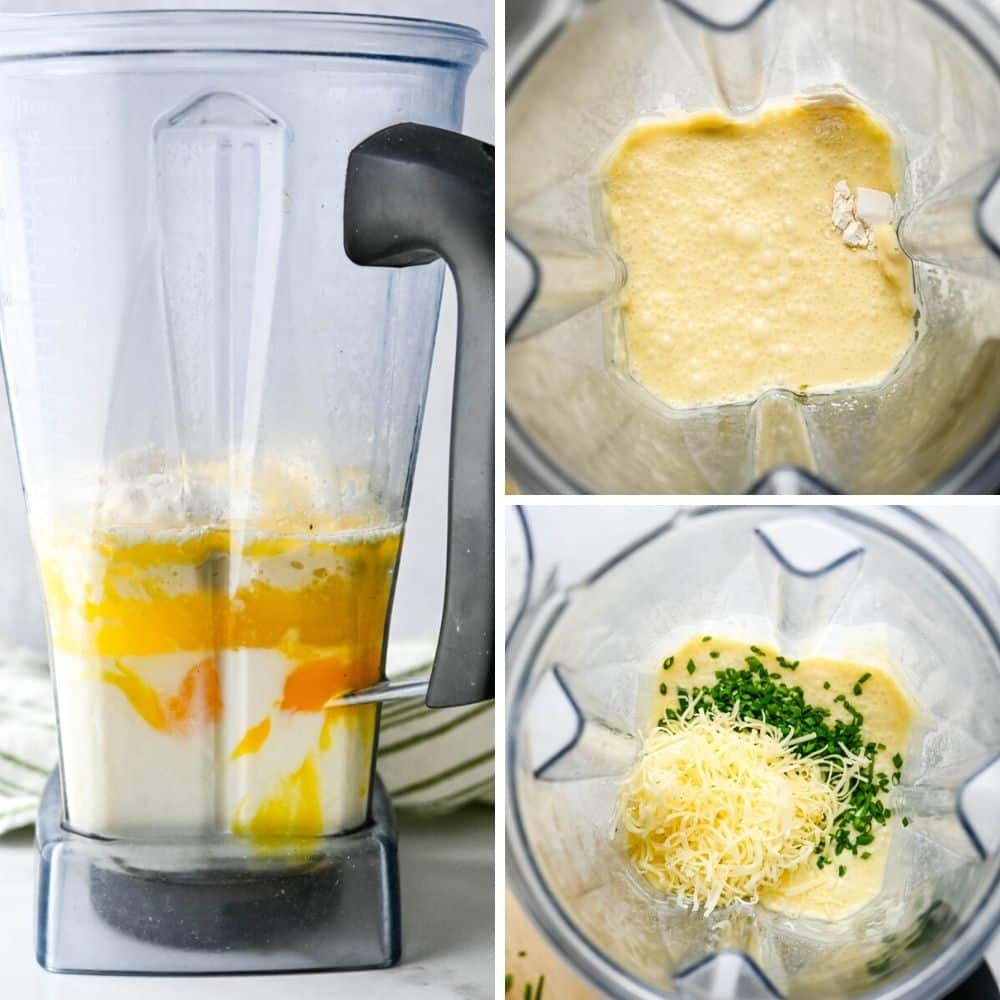
- Blend for 15 seconds and scrape down the sides.
- Blend for another 15 seconds.
- Add the shredded cheddar and chopped chives and blend to combine.
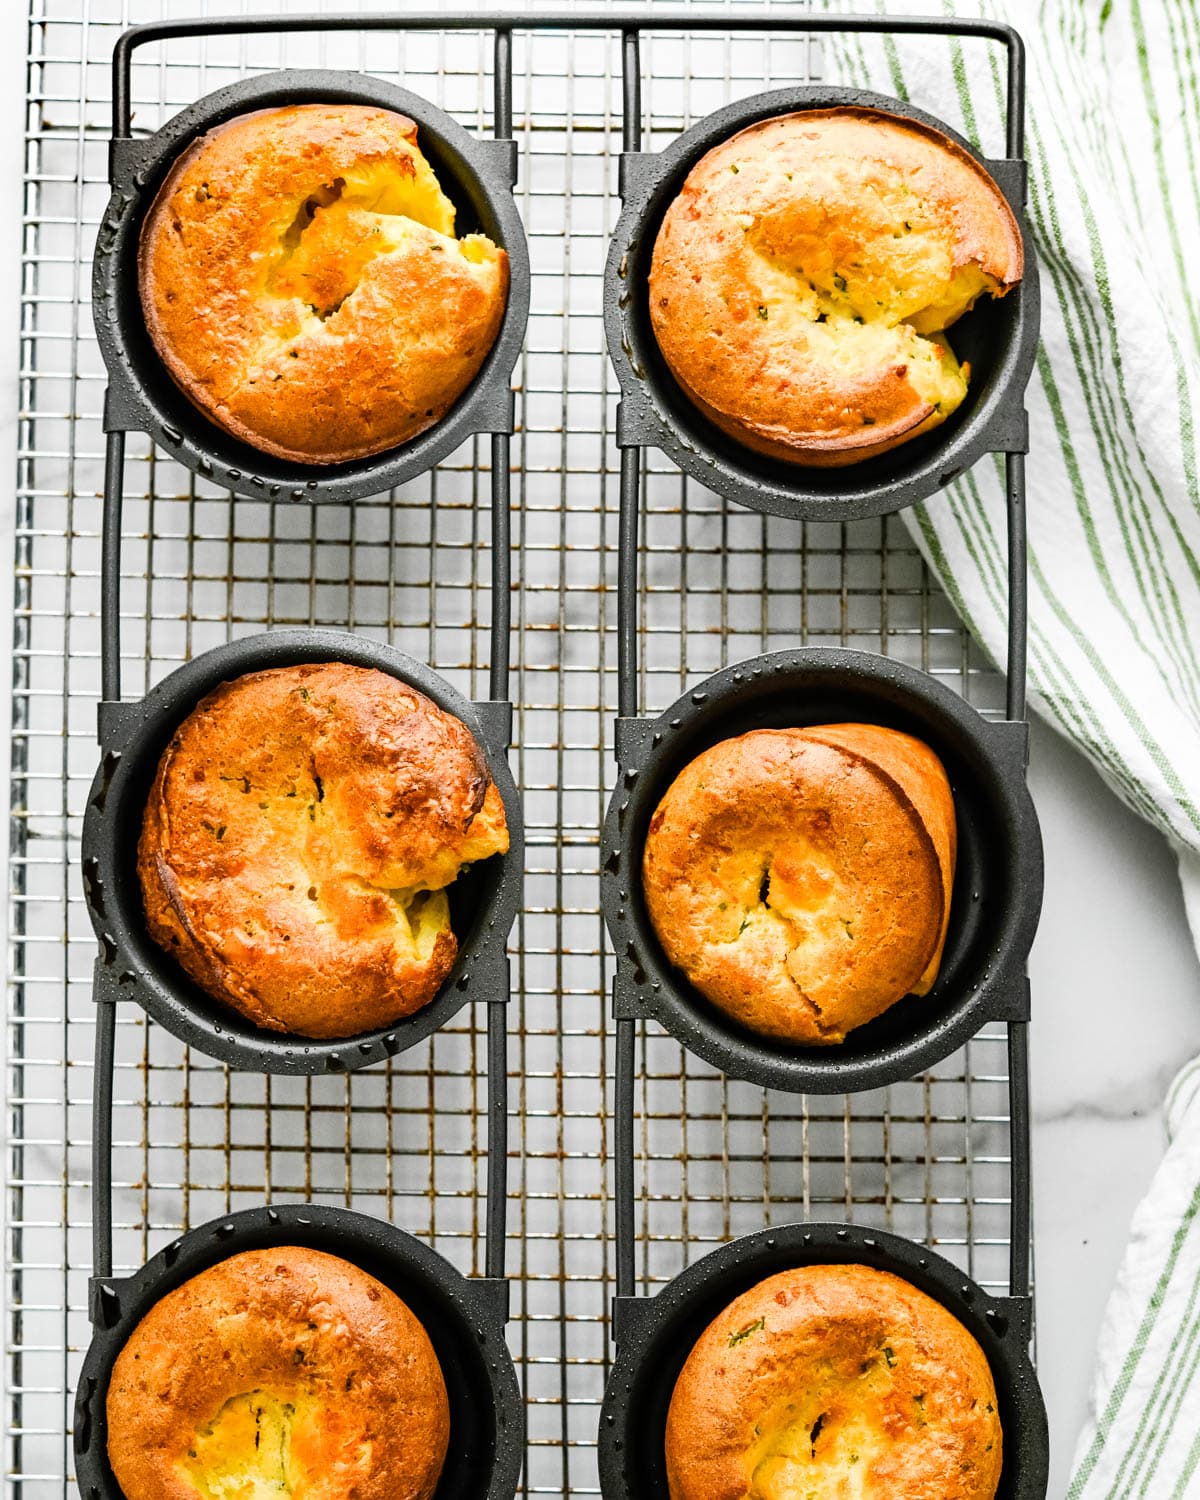
- Pour the batter into the popover pan and bake for 20 minutes.
- REDUCE THE TEMPERATURE OF THE OVEN TO 350° and bake for another 10 minutes.
Do I Need A Popover Pan To Make Popovers?
For many popover recipes a popover pan is a must have item, but for this easy popover recipe, you can feel confident using a standard muffin tin. The only noticeable difference will be in the rise of the popovers. A popover pan is deeper than a traditional muffin pan, so there’s more volume for bigger rolls. Additionally, a popover pan has an extra wide top which allows the popover to puff and create that distinctive popover shape. That said, the taste will be the same no matter which baking pan you choose.
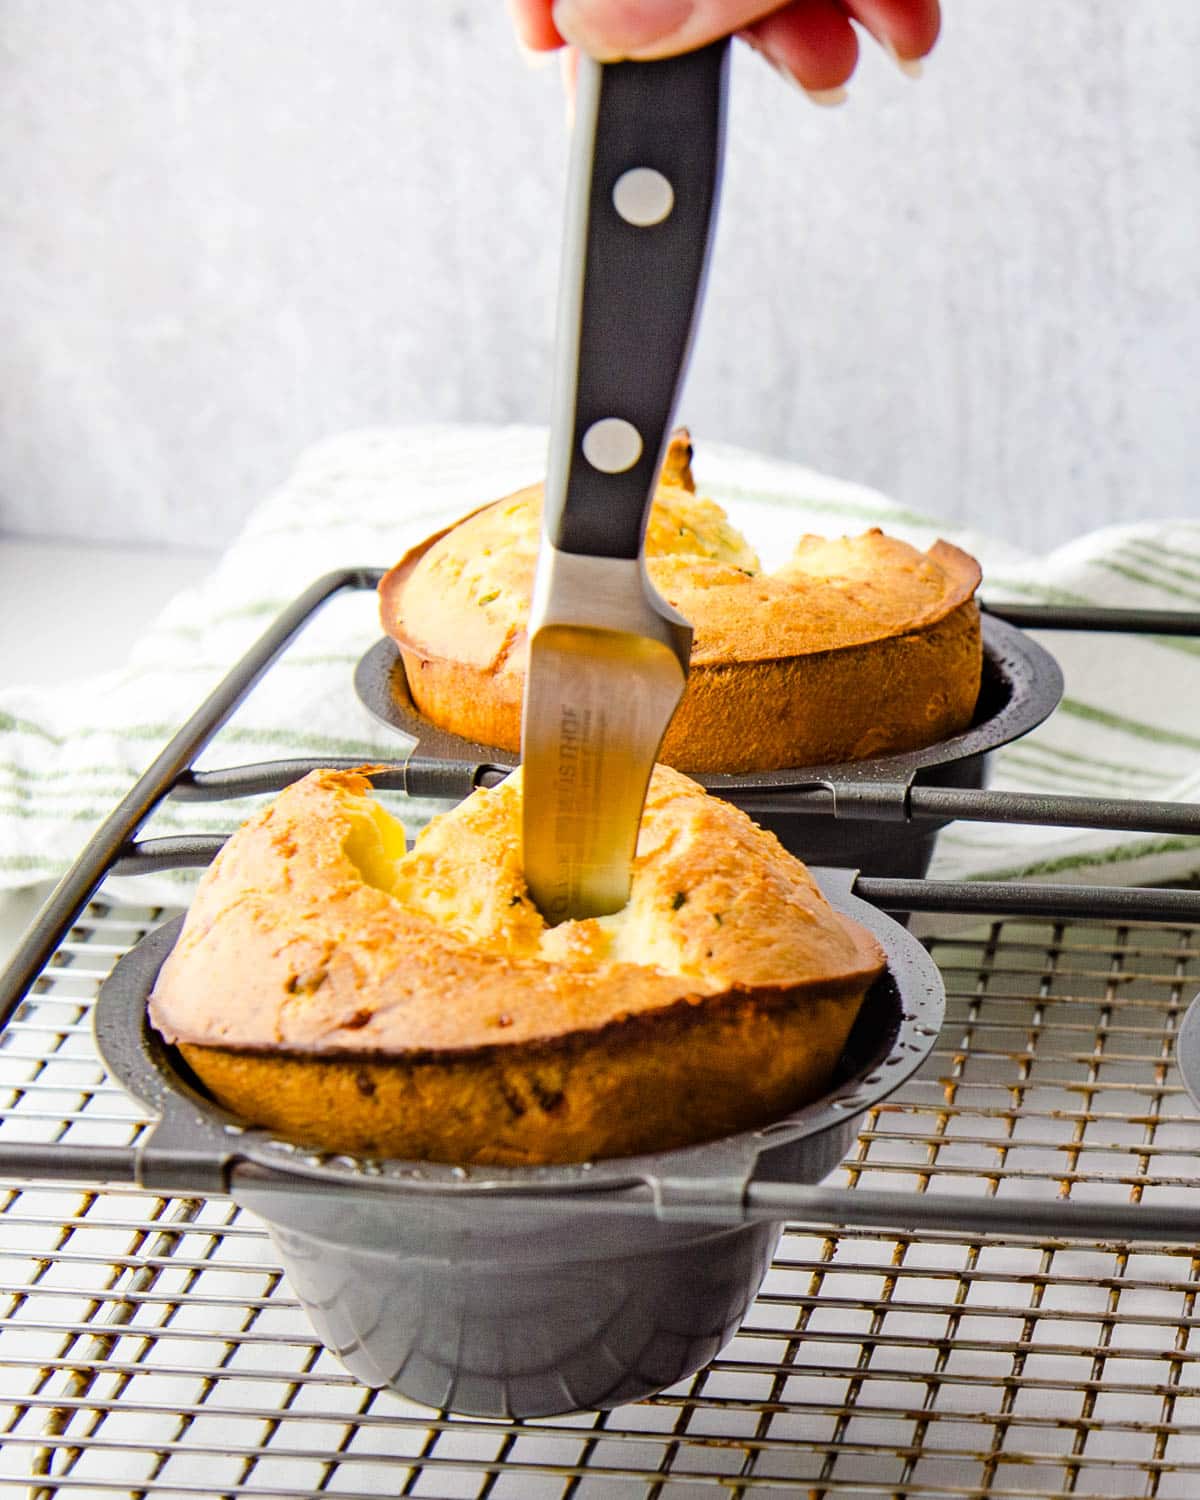
Releasing The Steam
As soon as the popovers come out of the oven, you’ll want to use a sharp knife to pierce the center of each roll. This allows the steam to escape and prevents the popovers from becoming soggy on the inside. Let the rolls rest in the pan for 5 minutes before turning them out onto a wire rack. This easy popover recipe should be served warm, so they only need a minute or so on the rack to rest.
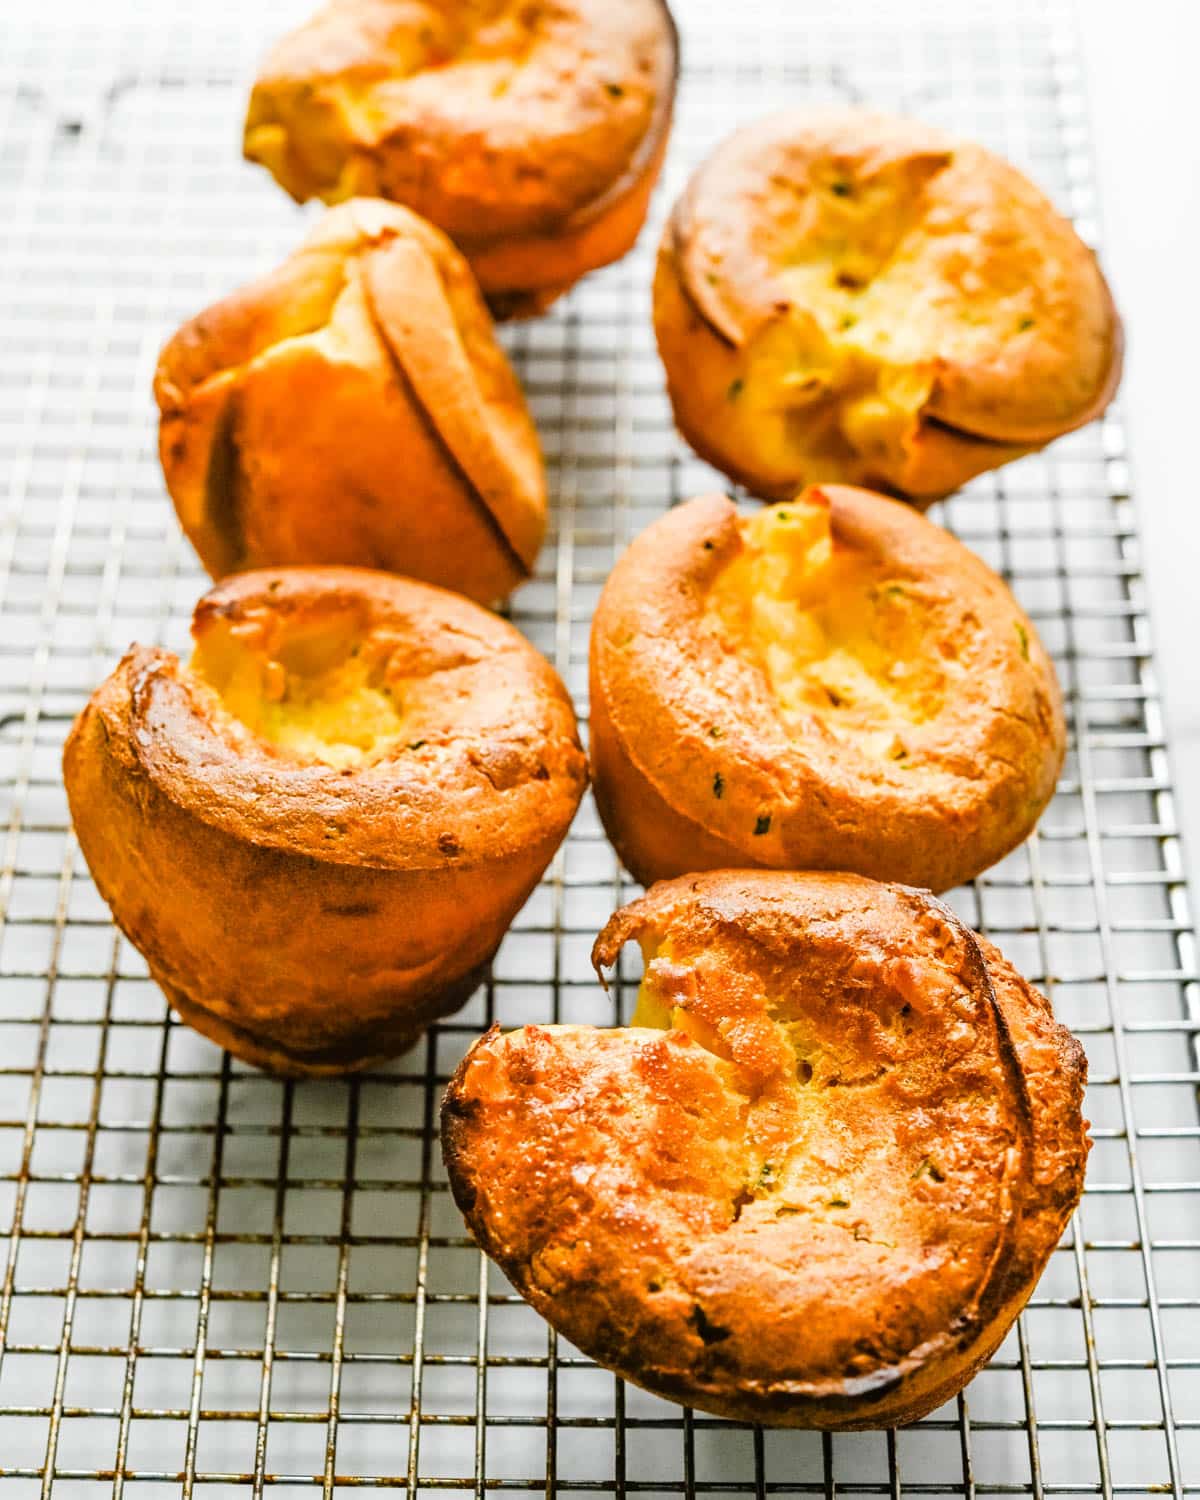
Why Are My Popovers Misshapen?
They’re not. They’re SUPPOSED to look like that. Imperfectly perfect.
Some will slump to one side or another, others will cave slightly in the center, it doesn’t matter.
These rustic rolls are tender, chewy and absolutely delicious.
The cheddar and chive amplify the savory bread without overpowering it and those airy nooks inside are perfect receptacles for a pat of melting butter.
More No Yeast Dinner Rolls & Bread:
You Might Enjoy These Yeast Dinner Rolls:

Tried this recipe? Leave a rating and review.
Your comments and shares are invaluable to me and the thousands of readers who use this site daily. If you've made the recipe, leave a star rating and review. We want to hear how you liked it.
We'd love it if you shared the recipe with your friends on social media!
Cheddar Chive Popovers
SPECIAL EQUIPMENT:
- popover pan (optional)
INGREDIENTS:
- 3 large eggs
- 1½ cups whole milk
- 1½ scant cups unbleached flour
- ½ scant teaspoon salt
- 4 tablespoons butter melted
- 1 tablespoon chives minced
- ½ cup white cheddar cheese finely shredded
DIRECTIONS:
- Prehet the oven to 450°. Spray a popover pan liberally with vegetable spray — cover the interior and around the top. (Can also use muffin tins).
- To a blender add the eggs, milk flour, salt and butter IN THAT ORDER. Blend for 15 seconds. Scrape down the sides of the blender with a spatula and blend for an additional 15 seconds until combined.
- Add the cheddar cheese and chives and blend until just mixed.
- Fill the popover tins ⅔ full with batter and put into the hot oven. Bake for 20 minutes.
- Reduce the heat to 350° and cook for an additional 10 minutes.
- Remove the popovers from the oven and use a sharp knife to prick the dome of each muffin to allow steam to escape. Let the muffins rest in the popover tin for 5 minutes before turning them out onto a wire rack.
- Serve warm with butter.
NUTRITION:
These were awesome!!!
My husband found this recipe a few months ago and has made them almost every week since. He is not a baker, and they turn out perfect every single time! We even invested in a popover pan so that they look gorgeous as well. 10/10 recommend! Sooooo delicious!
Do you think these are OK to make in the morning and then reheat for an 8 PM dinner party?
No, sorry. Popovers are all about timing and will deflate.
Made these tonight for Thanksgiving and let me tell you they were delicious, crispy outside, hollow inside and so damn tall and popped over. A little butter and I was in heaven.
This looks delicious! Can I sub with gluten free flour?
I have never tried GF flour with this recipe — so I’m not sure how it would work. I would cut the recipe into 1/3 and make two popovers to test it.
Can this be mixed in a food processor instead of a blender? Or, utilize a stick blender? I do not own a blender…
I think a food processor would be your best bet!
Can I use coconut flour?
I wouldn’t substitute coconut flour, it has very different properties than all purpose flour — and soaks up liquids like a chamois.
How far up would you fill a muffin tin?
about 2/3 full should do it.
Yes to a cheesy carby side! I’ll add this to my turkey day menu, this came in great time!
I had never made popovers before, but was inspired by your post! These were easy and delicious and my family just gobbled them up!
Wow these look so delicious and easy! I’m still hunting for a good bread recipe for Thanksgiving, I’ll give these a try!
They’re super easy to make and really tasty!
These popovers looks amazing. I will have to try my hand with this recipe with your tips I can’t go wrong. I think I may have to double the recipe since these will disappear in my house quickly.
They went quick at our house too!
Delicious! Just look how buttery! #droolingonmykeyboard
LOL – wipe up your keyboard!
Mmm… These look amazing and I love your step by step photos!