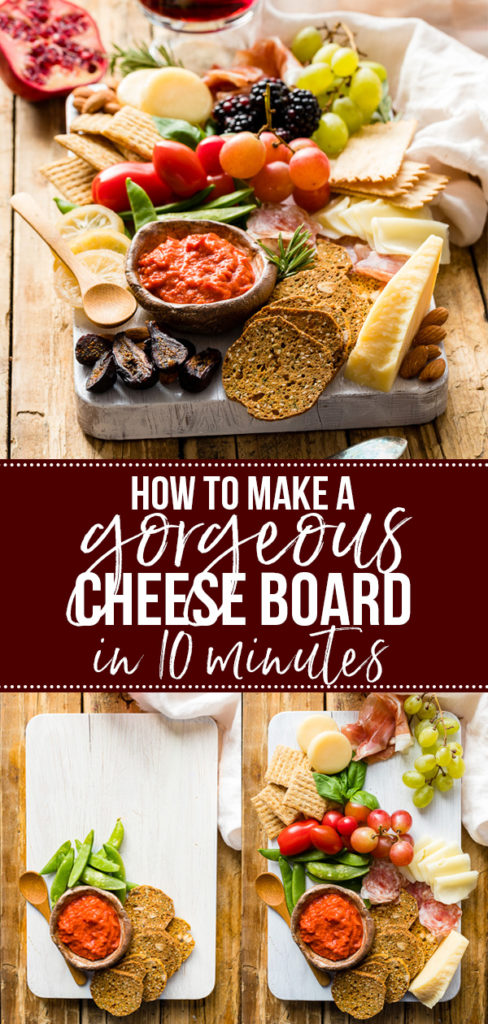
How To Make A Gorgeous Cheese Board in 10 Minutes
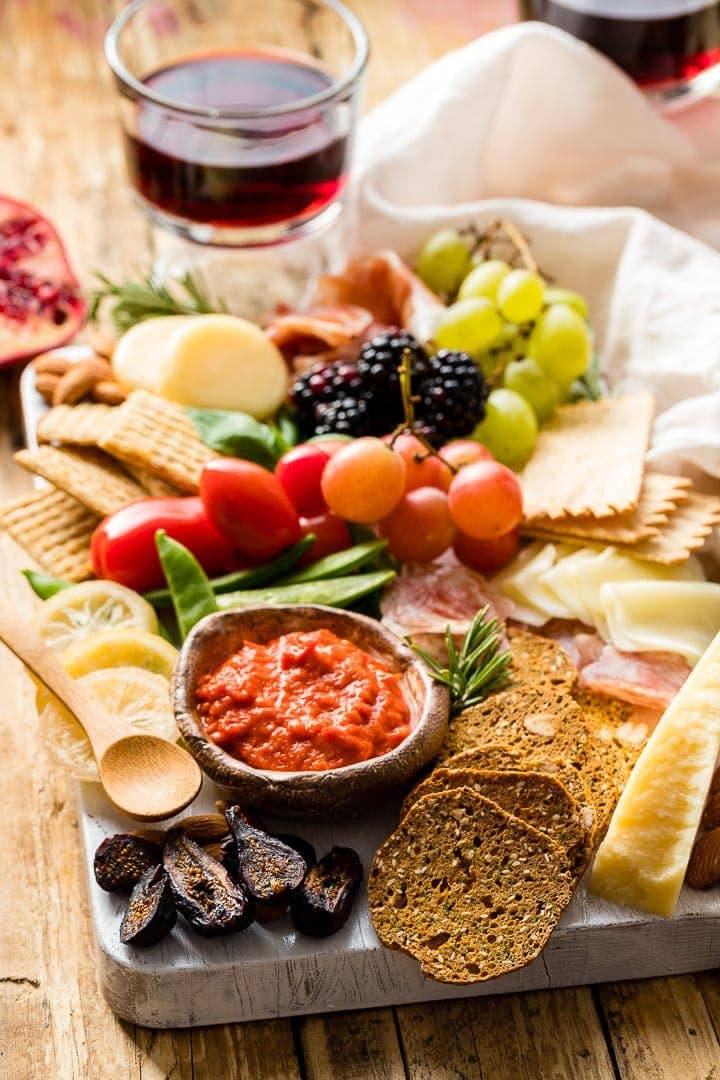
Making a stunning cheese board is easier than you think! Whether you are entertaining a few friends, planning appetizers for a big meal, or just want an easy supper, a simple cheese board offers something for everyone without major hassle for you – the host.
The holiday season is near at hand, and one thing is for sure: cheese boards are where it’s at for entertaining. Delicious, impressive, and simple to put together. What more could you ask for??
Dinner for two / party for a crowd
Before we had Henry, “wine and cheese” was one of my husband’s and my favorite dinner options. We nearly always have a few types of cheese on hand, along with crackers, fruit, and a smattering of other fun bites in the pantry. It should go without saying that we always have wine. So usually one night a week, we’d just pile a few favorites on a cutting board, take that and some little plates out to the coffee table, curl up and call it a day.
Come to think of it, I don’t really know why we stopped doing that when the little one came along. Cheese and crackers are two of his primary food groups, after all, so I’m pretty sure he’d be all about it. 😉
Well, bottom line, a basic cheese board is fantastic for any sort of occasion. As much as I love it for a simple meal for two/two-plus, it’s also unquestionably a go-to for parties and for holiday appetizers.
The only rub is that a lot of the cheese boards I see these days (I’m looking at you, Insta) are almost overwhelming and, dare I say, intimidating?
Which is a shame, because it can be SO EASY to make a really beautiful AND well-balanced cheese board for your crowd. I personally would never spend more than 10 minutes assembling one. Because, really, that’s all it takes!

What to include?
Having some variety–both for your tastebuds and for your eyes–is half the fun! So you’ll want to include a good mix of items. Don’t worry too much about having a huge amount of any one thing–if it goes fast, well, you know it was well-liked!
For a mid-sized crowd, like entertaining 4-6 friends, or offering up some pre-Thanksgiving nibbles, I like to aim for:
- 3-4 cheeses
- 2-3 meats
- 2-3 crackers/breads
- selection of fresh or dried fruit, nuts, or other snacks from the pantry
- possibly a fun dip or spread
- possibly fresh berries, fruit, veggies, olives, or pickles
- bonus: fresh herbs, for garnish!
How to select types of cheese
So, while balancing out these categories will give you a lot of variety in its own right, it’s nice to aim for a selection within each group, as well. This is easier than it might seem!
For an, um, cheese board, it seems reasonable to think first about the types of cheese you choose, right? Aim for some variety along these two spectrums:
- mild vs. medium vs. strong
- hard vs. soft
The terms mild, medium or strong refer to the flavor strength of the cheese, which is determined in large part by the length of time a cheese matures. In general, the longer a cheese matures, the stronger its flavor will be.
I’m going to be honest: I do not usually feel the need to go for a full tray of crazy expensive or fancy cheeses! Crowd-pleasers are popular for a reason. Maybe include one “fancy” option and a couple of basics? You know your crowd best, but just don’t feel like you need to go crazy if you know your people just like what they like! 🙂
Here are some examples to get you started:
- hard- Asiago, cheddar, Parmesan, Pecorino (my favorites!)
- semi-hard- Comte, Manchego, provolone, Swiss
- semi-soft- Fontina, Gorgonzola, Roquefort, stilton
- soft- Brie, burrata, mozzarella, Humboldt fog
If you really want to geek out on types of cheese, this is a great resource for starters!
And if you’re interested in a crazy festive baked brie recipe, don’t miss this one! SO perfect for the holidays!
How to choose charcuterie
When choosing a few meats to complement the cheese, all the same principles apply!
Especially if you’re feeding a variety of adults and kids, you might aim for one mild, kid-friendly option, like salami or even deli turkey, and then a somewhat more exciting option with a pepper or spice coating, for instance.
In truth, nearly any meat from the deli can work on a board like this.
- If you’re having it sliced fresh, ask for it to be cut very thin – this makes it easy to nibble in bite-sized portions, and also makes it easy to fold on the board so it looks attractive!
- You can also often find little packages with an assortment of salami, prosciutto, and the like, just near other packaged meats in the grocery store. This makes it really easy!
Bread, crackers, and more from the pantry
When it comes down to the crackers, fruit, and nuts, honestly most of the time I just use whatever we have in the pantry. If you’re planning and shopping explicitly for a party, or looking for pantry-stocking ideas, here are some of our favorites:
- woven wheat crackers
- sesame sticks
- toasted or torn baguette slices
- roasted almonds
- roasted cashews
- candied walnuts
- sun-dried tomatoes
- dried apricots, figs, orange slices, or pineapple
- banana or apple chips
- pretzels
- wasabi peas
- any kind of dip (hummus, bean, peppers, tomato, you name it!)
Just for fun, this is my most beloved and popular homemade dip that would be SO tasty on a board like this!
And a little something fresh is always a good idea!
Last but not least, if you have any of these on hand, it’s always nice to have a little something fresh, either fruit or veg! Some of our favorites:
- fresh berries
- grapes
- sliced apples or pears
- olives
- cherry tomatoes
- edamame or snow peas
- baby carrots
- cucumber slices
- thinly-sliced bell peppers
If you’re adding fresh berries, olives, pickles, or anything else that is “wet” or has some brine or juice associated with it, I’d recommend placing these inside a little serving bowl, which can rest right on the board. This keeps everything just the texture it ought to be.
And, if you serve pitted olives, don’t forget to set out a little bowl or napkins for the discarded pits!
And remember…
It’s not about having ALL THE THINGS. It’s about having a few things from each category that you like and think your guests will like, too! So don’t stress–just grab a few items and call it a day! It’ll be delicious!
How to assemble it?
OK, shopping’s over- now for the fun part! Again, you can make this as simple or as complicated as you like, but if you’re anything like me, the clock is ticking until either your guests arrive or your family descends on the kitchen like a lunatic horde.
So. Let’s talk about how to do this fast, shall we?
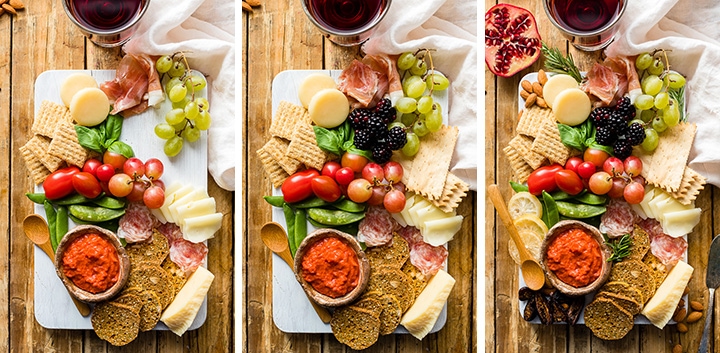
Many cheese board tutorials suggest you start with laying out all your cheeses, then adding the meats, followed by everything else. I actually find a slightly different approach easier, mostly because when I start with all of one category, I too quickly run out of space, or find awkward gaps, and then wish I had put something justalittleleft, but don’t have time to move it, etc.
So here’s my approach- here’s hoping it inspires you, too!
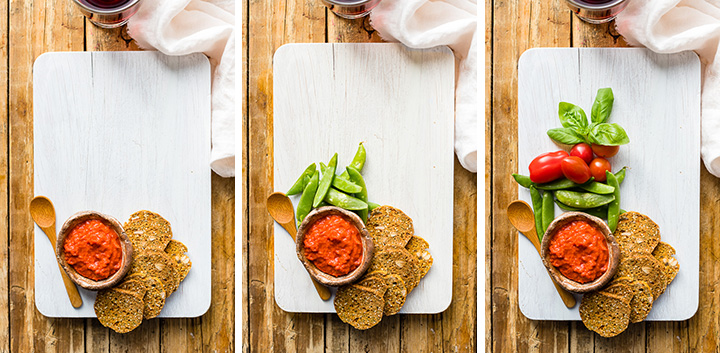
- Gather all your food items first. Set them out on the counter so you can quickly size up what you have.
- Start with one item. Pick something pretty and colorful, and put it down somewhere in the middle of a nice-sized board.
- Pick something that goes with the first item (a veggie for a dip, crackers for a cheese). Put it down next to the first. Bonus points if it’s a pretty contrasting color!
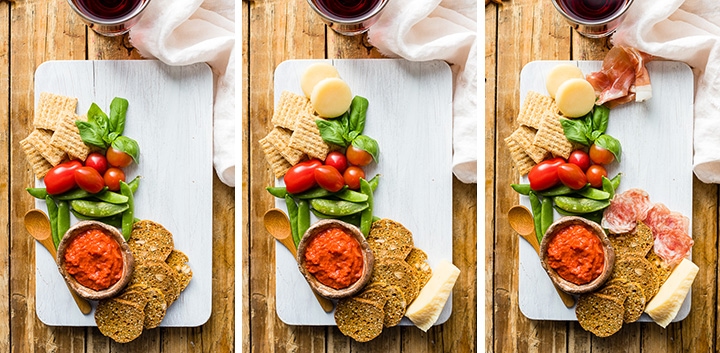
- Just keep going! Work your way out, following these principles, until your board is full.
- If there are any little areas at the end that you want to fill in, either use a few more small bites, like dried fruit or nuts, or a little sprig of fresh rosemary – it always looks beautiful!
Obviously, you want to have some sense of priority as you do this– don’t save all the cheeses for last, that type of thing! But I find this a really simple way to make sure everything “fits” nicely together, makes sense, and is visually appealing.
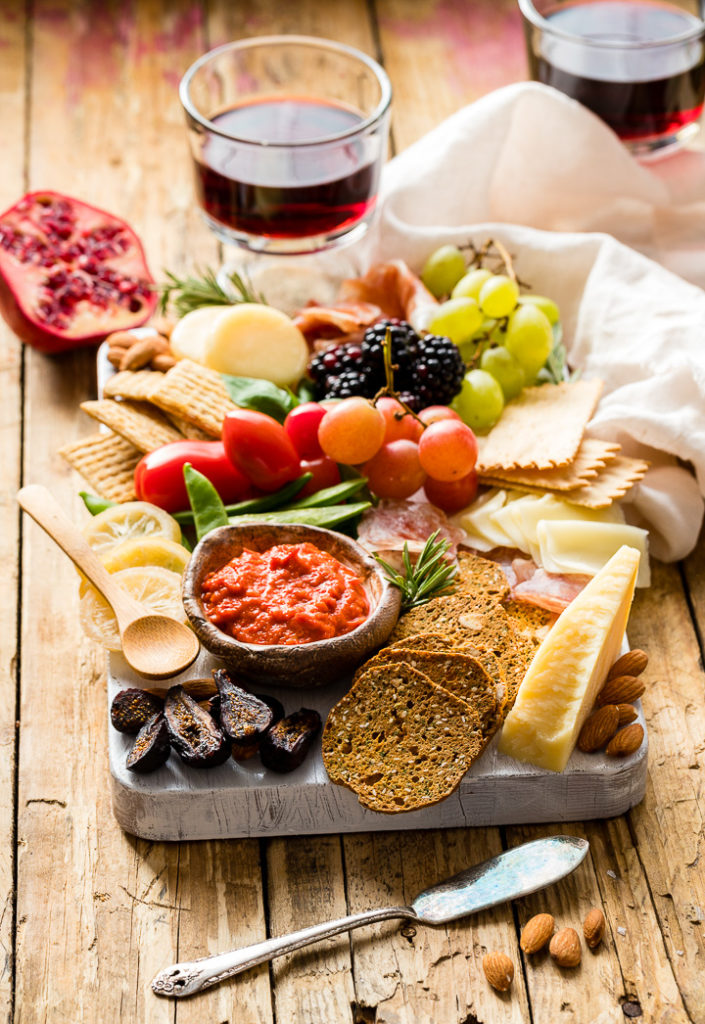
What kind of board/utensils to use?
Do not fall into the trap of thinking you need some giant, specialty board to make a display like this look amazing! I typically just use one of our larger wooden cutting boards, which works great. You could also use any serving tray or plate, or just a sheet pan.
Honestly, by the time you get it piled high with the good stuff, no one is going to be able to see, notice, or least of all CARE what it’s all resting on.
One thing you definitely want to have, however, is a knife to go with every cheese, and/or a small spoon or spreader to go with any dips. Also, toothpicks or small picks for little nibbles like olives or pickles can be a nice touch, especially for a larger crowd!
- Large Jamie Oliver acacia wood cutting board (check price on Amazon!)
- 12″ round slate cheese plate (check price!)
- Small porcelain dip bowls (check price!)
- 6-piece set of teak-handled cheese knives (check price!)
- Or check out this cool all-in-one option!
Don’t forget small plates or napkins! And have the wine glasses near at hand! 🙂
Hopefully with this guide, you have all the info and inspiration you need on how to make a cheese board that will wow your guests in just a few minutes. If you try any of these tips, please rate the “recipe” and leave a comment below. I love hearing from you, and other readers will benefit from your experience!
Happy entertaining, and happy snacking! ♥
How To Make A Cheese Board
Ingredients
- 3-4 cheeses
- 2-3 meats
- 2-3 crackers/breads
- selection of fresh or dried fruit nuts, or other snacks from the pantry
- possibly a fun dip or spread
- possibly fresh berries fruit, veggies, olives, or pickles
- bonus: fresh herbs for garnish!
Instructions
- Gather all your food items first. Set them out on the counter so you can quickly size up what you have.
- Start with one item. Pick something pretty and colorful, and put it down somewhere in the middle of a nice-sized board.
- Pick something that goes with the first item (a veggie for a dip, crackers for a cheese). Put it down next to the first. Bonus points if it’s a pretty contrasting color!
- Work your way out, following these principles, until your board is full. Serve!


Cheese boards are so my thing! Love the step-by-step breakdown. It came out amazing in the end!
Thanks so much, Jasmine, glad it helped you out! 🙂