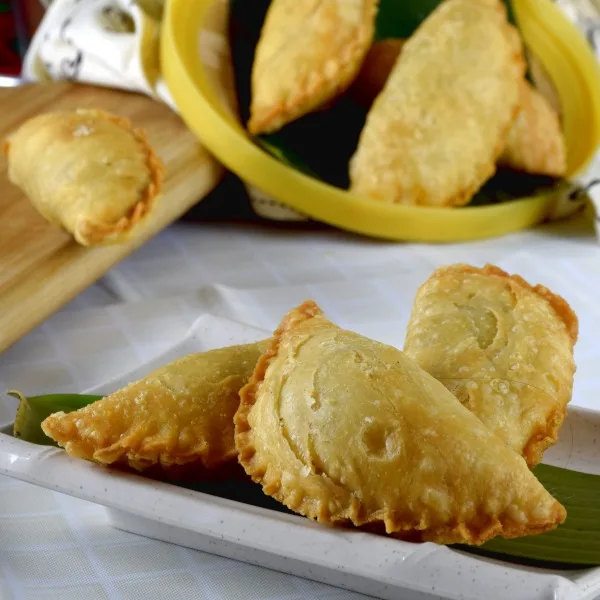
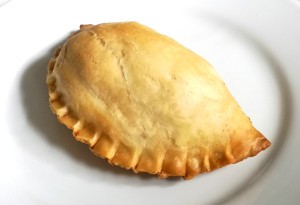
Call it curry puffs, Karipap or 咖哩角, it all means the most lovable snacks that you can find in every turn and corners in Malaysia. It is a snack enjoyed by different ethnic groups in this multicultural country, by everyone, even the kids! I have not met anyone who does not like this all-time favorite Malaysian style curry puffs.
Would you like to give it a try?
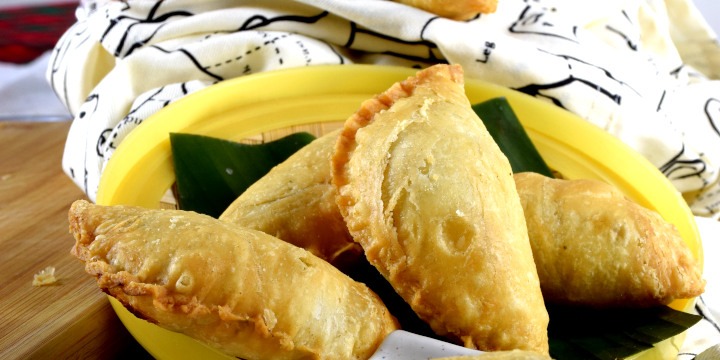
Here is the best recipe for you. I am referring to the greatest curry puffs reckon by the locals. It is called the spiral curry puff (Karipap pusing , 螺旋咖喱角). This type of curry puff is what we sell in our restaurant for many years, endorsed by the diners, and we are here to expose all the trade secrets so that you can replicate it at home.
Many restaurants do not make spiral curry puff because it is tedious. However, we have perfect the method and make very easy, tidy and no mess. The ultimate result: the pockets of fat encase in between the layers of the pastry will melt, the air trapped within expands, creating multiple layers resemble the puff pastry.
The reward is irresistible!
With every bite, you will notice the flakiness of the dough and the delightfulness of the savory filling.

The best curry puffs are those made with flaky pastry. It is the pastry developed by the Chinese, who is also used to make other snacks such as egg tarts, and ‘Siu Pao.’ This type of pastry is much like the western puff pastry, except the dough is not separated by pure butter. Instead, the layers are created by using a mixture of oil and flour. It may take a little extra time to make, but you will never regret once you have tasted it.
Note: This post may contain affiliate links. Please read my privacy policy for more info. I may receive commissions for purchases made through links in this post.
The detail process of making curry puffs.
The instruction in the recipe below is the abbreviated version. I strongly suggest you read through this section, where you can find the in-detail explanation of every step.
Let’s break down the making of curry puffs into three parts: preparing the dough, cooking the fillings and deep-frying the curry puffs.
Part 1: Preparing the dough (Asian puff pastry)
To create layers for the pastry, we need to prepare two doughs- the water dough and the oil dough.
The water dough is equivalent to the ‘dough’ of the western puff pastry, and the oil dough is equal to the butter that separates the dough between the layers.
The significant difference between the Asian pastry and the western puff pastry lies on the oil phase of the pastry. Pure oil (butter or margarine) is used to fold in between layers of the western style puff pastry. As for the Asian version, the oil (butter, margarine or lard) is combined with some flour. This improvisation results in a significant difference in the texture and taste.
This texture is a bit difficult to describe, as I can’t find the suitable English phrase to the word 酥 in Chinese. I would try to explain it as “ the feeling of biting into the puff pastry with multilayers but without any oily feeling.”. Yes, it is not oily at all due to the inclusion of flour in the oil dough.
How to prepare Asian puff pastry (no mess, not dirtying your hands)
Many people are deterred from making puff pastry because they think it is messy.
The butter tends to ooze out from the pastry, causing the pastry sticking to your hand and ruin the layers. When you fix it by patching the leakage with more flour, the sticky mass will be all over the table, your hand and on the rolling pin.
I will show you how to avoid all this mass. You won’t find a drop of oil and flour on the table with this method.
How?
What you need is a food processor, a sharp knife, a metal spoons, a flexible rubber spatula, cling film (or large plastic sheets), and a smooth working surface preferably aluminum or marble top.
Let take a look at the details:

Making the water dough
- Always make the water dough first, then followed by the oil dough. Reason? Water dough can be removed easily from the bowl of the food processor. The remaining small amount of flour, oil, etc. will not affect the outcome if you use it unwashed to prepare the oil dough subsequently. I usually add the ingredients of the oil dough into the unwashed food processor bowl. It saves me time.
- Place the flour, sugar, salt, and water into the food processor. Cut the cold butter into small pieces and add to the rest of the ingredients.
- Set the speed to low. Blend the ingredient until it is homogenous.
- If you make a large batch, blend in small portions which can fit into the food processor.
- Do not overmix. The duration required depends on the speed, the amount of dough and the power of the food processor. It takes less than one minute for the amount in the recipe below.
- Once the dough is formed, use a flexible rubber spatula (the best tool for this purpose) to remove it from the food processor. Keep it in a plastic container, lid on. Keep refrigerated if you do not use it immediately.
Make the oil dough
- Add the flour and shortening (or you can use butter) into the food processor.
- Combine both ingredients until it becomes homogeneous. It is very soft and is OK if it looks like a paste.
- If you do not use it right away, use the flexible rubber spatula to remove all the dough into a plastic box. Keep refrigerated. If you use it immediately, transfer the oil dough directly onto the water dough that has been rolled out into a rectangle, I transfer it with a metal spoon and the plastic spatula- no mess! Keep your hand away from the dough. This is the best way to deal with the sticky mass and keep everything clean and tidy.
Create the layers of the dough
Creating the layers is fun but tricky which can put many people away from making this pastry.
My method may not be the best but surely is clean and tidy. Here are the details:
- Place a large piece of cling film (or plastic sheet) on the table.
- Put the water dough at the center of the plastic sheet.
- Place the second piece of cling film to cover the oil dough. The film should be large enough to take into consideration the final size of the water dough after it is rolled out.
- Roll out the dough slowly with a rolling pin with short strokes to form a long rectangle. Ideally, the length of the rectangle should be about four times of the width. (Imagine four squares doughs arrange in a row.)
- If you find the dough is too hard after refrigerated, wait for a while or place your palm on the dough to warm it for a while.
- Remove the top film.
- Hold both corners of the shorter side of the cling film, fold inward to place the first square on the second. Do the same for the other half of the dough. (Refer to the video below.)
- Hold any of two corners of the shorter side of the cling film again and fold inward once more. Now all the four squares of the dough are stacked up. This is the first ‘book-forming’ folding. (Refer to the video.)
- Wrapped up the dough and refrigerate for 30 minutes or longer until it is firm enough to handle. If it is too soft, the oil dough can rupture the water dough while rolling, and the oil will ooze out and reduces the number of layers formed in the process.
- Once it is firm enough, place the dough on a cling film again and roll out as before. Now you have completed the second ‘book-forming’ folding.
- Repeat once more. So all in there are three ‘book-forming’ foldings.

Final folding and wrapping the puffs.
- Roll out the dough into a rectangle as before. After that, roll it up like making a Swiss roll.
- Wrap with cling wrap or plastic sheet, keep the ‘Swiss Roll’ refrigerated if it is too soft to handle.
- Use your palm to roll and stretch the dough to make it longer. The pastry is NO LONGER sticky at this point.
- Cut the ‘Swiss roll’ into individual pieces, lengthwise. You can cut the dough into 20 portions if you follow this recipe. Each portion is the amount to make one curry puff with the 10cm diameter cutting mold. Roll out the pastry into a round shape, slightly bigger than the mold.
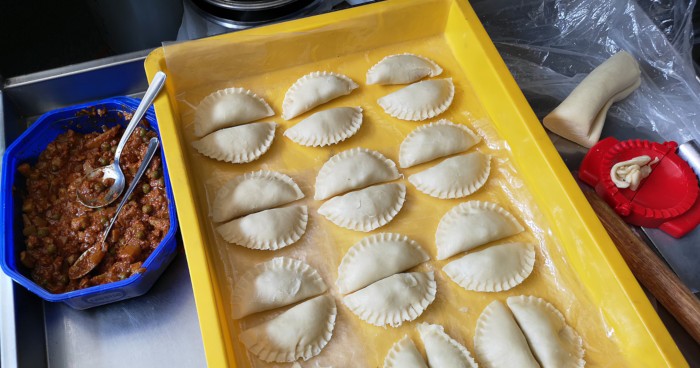
- Place it on the pastry mold. Put the filling at the center of the pastry. The amount of filling in this recipe matches the number of curry puffs.
- Do not attempt to be too ‘greedy’ by adding too much filling as it may leak out during folding and deep-frying.
- Close the mold, Press firmly so that the edge is sealed up completely. It is essential to have sufficient amount of pastry and press firmly. Otherwise, the curry puffs may break during deep-frying.
- Remove any extra pastry sticking at the outside of the mold. Place it on the next piece of cut dough for making the next curry puff.
- Open the mold, remove the curry puff.
The origin of Malaysian curry puffs
I guess everyone will love to know how curry puffs are evolved. Below are two popular beliefs of the origin.
Curry puffs are purportedly introduced to Malaysia in the 15th century by the Portuguese. During that time, the Portuguese conquered Malaysia, which became a settlement of the Portuguese empire. The Portuguese introduced their version of the empanada, a type of pastry usually with beef fillings. It is said that the locals incorporate the staple food such as potato, chicken with the curry spices and evolves into a local delicacy in its own right.
Curry puffs may also have derived from samosa, a triangle shaped deep-fried Indian snack. Whichever is true; curry puffs have become the most popular snack that is liked by everyone.
Part 2: Cooking the fillings
Preparing the filling is straightforward compared to making the dough.
Below is the detailed explanation of how do we prepare the filling in our restaurant.
Preparation:
- Peel and chop the onions. Cut the onions into small cubes.
- Cut the chicken breast meat into small dices. Set aside.
- Peel and cut the potato into small dices, just like the chicken meat. Soak them in water to prevent the potato cubes from changing color.
- Cut the lemongrass into small pieces, then mince it. Use only the white section always. Discard the green section and the outer sheath.
- Minced the ginger.
- Chop the red chili into small pieces.
Cooking:
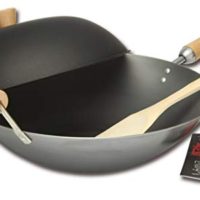
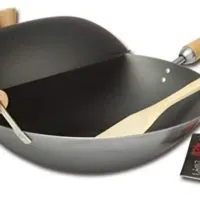
- Saute the lemongrass, ginger, and chili with some vegetable oil in the wok until fragrant.
- Add the onions to the wok. Saute until translucent. Remove and set aside.
- Place the chicken meat in the wok. Stir-fry with some oil until it is cooked. Add back the onion, lemongrass, chili, and ginger into the wok.
- Add the potato cubes, curry powder, chili powder, light soy sauce, sugar, ground white pepper, salt, and water.
- Cook over low to medium heat until the potato cubes are soft. Add water if it is too dry. Stir occasionally to prevent the ingredients from sticking to the wok.
- Add the green peas when the potato cubes are soft.
- Simmer over low heat until the gravy is almost dry.

Part 3: Deep-frying the curry puffs
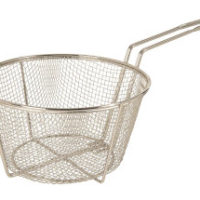
- Deep-fry the curry puffs in vegetable oil at 180°C/350°F. You can either use an electric deep-fryer or a round wire fried basket.
- It takes about 6 minutes to turn golden brown for the curry puffs I made. It takes longer to deep-fry for larger curry puffs.
- Increase the duration of frying for one to two minutes if you deep-fried the frozen curry puffs. (You can make the curry puffs in advance and freeze them.)
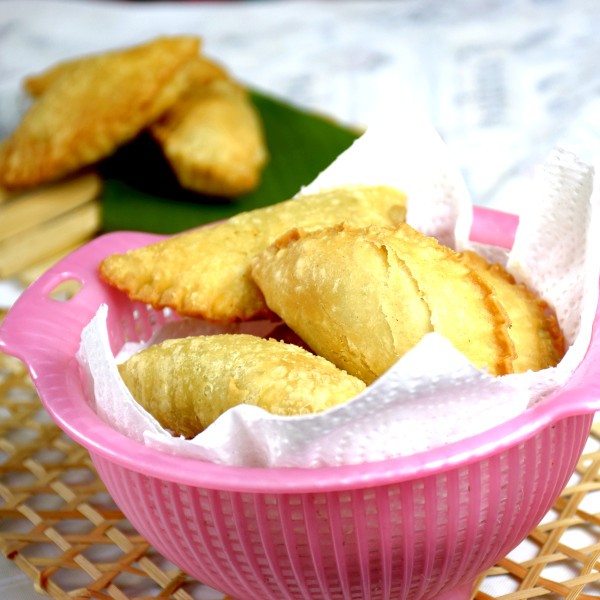
- Drain on kitchen towels and serve.
How to store the curry puffs
- Arrange the freshly made curry puff in a tray, single layer, separate from one with another.
- Keep the puffs in the freezer until they are frozen. By then, they will not stick to each other anymore even if you stack them up.
- Keep the frozen curry puffs in an airtight plastic container. It can be kept in the freezer for several weeks.
Update: Can I bake the curry puffs instead of deep-frying it?

Short answer: Yes, but not great.
Long answer: This recipe is for deep-frying curry puffs, not for baking. I put the puffs into the oven and bake it at 185°C for 40 minutes. Here is the summary of the differences.
1. It does not puff up as much as deep-frying. You can hardly see the spiral layers of the baked pastry.
2. Since the puff is placing on a metal tray during baking, the bottom side becomes flat and compact. The deep-fried curry puffs have both sides puffed up nicely and with distinct layers.
3. The pastry of the baked puffs (with this recipe) is not as light and fluffy of the deep-fried counterpart. I suspect the oil helps to moisten the pastry as well as the fillings.
A different recipe is required to make the better curry puffs for baking.
Malaysian style spiral curry puffs

Here is the best recipe for the greatest curry puffs reckon by the locals. It is called the spiral curry puff (Karipap pusing 螺旋咖喱角).
Ingredients
For the filling
- 2 tbsp vegetable oil
- 1 Onion, about 100g
- 1 tbsp curry powder, or if you want
- 1 tsp chili powder
- 1.5 tsp light soy sauce
- 125 g chicken breast meat, cut into small dices
- 125 g potato
- 1 tsp sugar
- 1/4 tsp ground white pepper
- 1 tsp salt
- 100 ml water
- 2 tbsp frozen green peas
- 1 stalk lemongrass
- 1 red chili, medium size
- 1 tsp chopped ginger
For the water dough
- 160 g cake flour
- 35 g butter
- 15 g sugar
- 85 ml water
- 1/4 tsp salt
For the oil dough
- 125 g cake flour
- 70 g shortening
Instructions
For the filling
- Peel and chop the onions. Cut the onions into small cubes.
- Cut the chicken breast meat into small dices. Set aside.
- Peel and cut the potato into small dices.
- Cut the lemongrass into small pieces, then mince it. Use only the white section always.
- Minced the ginger and chop the red chili into small pieces
- Saute the onions, lemongrass, ginger, and chili with some vegetable oil in the wok until fragrant. Set aside.
- Sti -fry the chicken meat until it is cooked. Add back the onion,
- Add all the ingredients (except the green peas) to the chicken Stir occasionally to prevent the ingredients from sticking to the wok.
- Add the green peas when the potato cubes are soft.
- Simmer over low heat until the gravy is almost dry.
For the dough
- Combine all the ingredients for the water dough in the food processor. Remove and roll it into a long rectangle on a piece of plastic sheets.
- Combine all the ingredients for the oil dough in the food processor. Remove and transfer it to the center of the water dough.
- Place the second piece of cling film to cover the oil dough.
- Roll out the dough to form a long rectangle.
- Remove the top film.it stacks up
- Told the dough like closing a book so that it stacks up into 4 layers.
- Chill the dough. Repeat twice of the folding.
- Roll out the dough to a rectangle for the last time. Roll it up like making a Swiss roll.
- Cut the ‘Swiss roll’ into 20 portions.
- Roll out the pastry into a round shape.
- Place it on the pastry mold. Put the filling at the center of the pastry.
- Close the mold, Press firmly so that the edge is sealed up completely.
- Open the mold to remove the curry puff.
- Deep-fry in vegetable oil at 180°C/350°F for 6 minutes or until golden brown.
Recommended Products
As an Amazon Associate and member of other affiliate programs, I earn from qualifying purchases.


Nutrition Information:
Yield:
20Serving Size:
20Amount Per Serving: Calories: 164Total Fat: 8gSaturated Fat: 3gTrans Fat: 0gUnsaturated Fat: 5gCholesterol: 16mgSodium: 293mgCarbohydrates: 17gFiber: 1gSugar: 2gProtein: 5g
This data was provided and calculated by Nutritionix on 6/19/2019
Annie
Thursday 23rd of July 2020
Hi l couldn’t find the video, are you able to send it to me Annie.flavel@yahoo.com.au Thanks
KP Kwan
Thursday 23rd of July 2020
Hi Annie, If there is a problem viewing the video in the article, you can also view it on YouTube. Here is the link to the curry puff video: https://youtu.be/vdY0OP-wUE0 Best regards, KP Kwan
Annie Cambell
Wednesday 3rd of June 2020
Hello JPKwan, thanks, enjoyed your butter and orange cake videos. Also loved the karipap recipes. This sure brings back memoreis for me. You make it look so simple...but will continue to watch until I gather enough courage to give it a go. Thank you.
KP Kwan
Wednesday 3rd of June 2020
Hi Annie, Please try! Every time I make it again, I learn something. Just go ahead :) KP Kwan
Jeff Morris
Wednesday 27th of May 2020
What kind of flour? Bleached? Unbleached? Pastry (lower protein)? Bread (higher protein)? Thanks!
KP Kwan
Wednesday 27th of May 2020
Hi Jeff, I just use the all-purpose flour, and it works wells. KP Kwan
Chelvakumari
Wednesday 20th of May 2020
Hi Kwan Can I replace the butter and shortening in the water and oil dough to all buttercup? Does the ratio to flour and fat have to be adjusted? Please advice. You are really amazingly clear in your videos.
KP Kwan
Thursday 21st of May 2020
Hi Chelvakumari, You can replace it with buttercup for sure. I am glad that the explanation is clear. Enjoy making the puffs! KP Kwan
Shanti
Tuesday 7th of April 2020
Hi Kwan What is cake flour? I live in UK We have Self raising, Plain, Gluten free, Pizza flour etc. What would you recommend? Thanks Shanti
KP Kwan
Tuesday 7th of April 2020
Hi Shanti, Haha, we have some terminology differences. I live in Malaysia. :) What I mean by cake flour is the plain flour you mentioned. Since you want to make curry puffs, you do not need self-raising flour (Self-raising flour contain baking powder). Gluten-free flour is not what you need neither. Pizza flour is more for making pizza and bread, which has a higher quantity of protein that will form gluten. I suggest you use plain flour for making curry puffs. Thanks. KP Kwan