CHALLAH FOR BODY AND SOUL (OR YEAST MEETS WEST, FROM DAD)
Today's post is written by none other than Rina's amazing mama bear, Ruth! Welcome to the blog, Mama.

While cooking, listen to this: Next to You (Live at Rockwood Music Hall) - Sting

Rina always stood on the little green stool. I stood behind her, her crazy curls tickling my nose as she stretched her tiny fingers to reach the kneading bowl. My grown up hands guided her child hands. Palm down, fold and turn, palm down, fold and turn, again and again. If the dough was too sticky Rina would make monster fingers with the tacky mess, and I would slowly add small pinches of flour to the bowl. “Does it feel like an earlobe, yet?” When Rina’s crazy curls bobbed up and down I would announce, “Then it’s done!”

That was how we made challah every Friday after nursery school. I showed Rina how to check an egg for blood spots, how to wake up the yeast with warm water and feed it with sugar and then proof it— wait patiently (or not so patiently) for it to froth in the bowl. This, Rina understood, was what it meant to “make Shabbos.” The Sabbath did not come on it’s own—if we wanted Friday night to become Shabbos, then we had to make it so. We had to invite the guests, shop for groceries, prepare the meal and set the table. In this way we transformed the mundane into the holy. A key step to turning an ordinary end-of-the-week dinner into a Shabbos feast was to bake the challah.


If you want to know what Shabbos (the Jewish Sabbath) tastes like, you must eat this challah. It tastes like warmth, joy, and the reward for making it through a long week. This challah is not merely a braided bread—it’s not bread at all. It is its own category of deliciousness: brown and crusty on the outside, and soft and chewy on the inside. I doubt you will have left-overs (unless you hide it), but if you do, it will make the best french toast casserole—but that’s a whole other conversation!
Although I had learned how to bake challah in Camp Ramah (yay—Nyack!) my challah journey began in earnest when I moved to Michigan with my husband and three-week old Rina. The kosher bakery too far away for me to schlepp there—baby Rina in tow—every Friday and before every holiday. One day my friend Karen gave me this recipe (she got it from someone who got it from someone who got it . . . . you get the idea). I have been making it ever since.
I have made some small changes to the recipe over the years, but basically it is the same as always. I use a little less flour than the original recipe calls for; for the benefit of the vegans in my family I use a chia-seed-water combo to replace the egg, and almond or cashew milk in place of the egg wash. Feel free to add garlic, onion bits, caraway, sesame, or poppy seeds (I’ll tell you how and when) or leave it plain—it’s good in all its incarnations!

For those of you who are terrified of working with yeast—don’t be—it’s all hype. I have baked with fresh yeast and dry, and both are easy. Here are a few tips:
- Buy a “yeast-roast” thermometer if you are really nervous. When the tap water is warm measure it into a cup and stick in the thermometer. It will tell you if the water is too hot, too cold, or just right. After a few weeks you won’t need it any more—you’ll feel the water on your wrist and you’ll know.
- “Proof the yeast.” This means you take your warm water and sprinkle the yeast in (or dump, I’m not always so gentle). Then add your sugar—it will feed the yeast. Let it sit while you do other things, and after a few minutes you will see the mixture froth—this is “proof” that the yeast is good and will make your dough rise.


The other thing that scares people is “guesstimating.” Many things affect yeast dough, especially how much moisture is in the air. I can tell you how many cups of flour to use, but if it is muggy or very dry in your kitchen you might need a bit more or less flour. But I’ve got your back! The amount I tell you is slightly less than you might need so you won’t add too much (which makes a dry and unappetizing dough). Remember—you can always add a smidge of flour, but you can’t remove it once it’s in.
Love and meows, Ruth

CHALLAH FOR BODY AND SOUL
Servings: 2 large or 3 medium challahs
Cook Time: 2h/2h 30m
Category: Vegan-Friendly, Baked Goods, Holiday
Source: Generations of bad-ass women
Ingredients:
2 Tablespoons dry yeast
2 cups warm water
½ cup sugar
1 Tablespoon salt
1 egg OR 1 Tablespoon ground chia seeds, mix with 3 Tablespoons water and a pinch baking powder
½ cup Oil (vegetable or olive)
6 ½ cup flour, divided
Instructions:
Add warm water to a mixing bowl and sprinkle in yeast and sugar. Swirl a bit to mix.
Wait 5 minutes for yeast to begin to foam. This is when I make my vegan egg (or crack and check my real egg), measure my oil—it keeps me busy so I don’t get too antsy waiting for the froth to appear!
Add 3 ¼ cups flour and mix with dough hook (or by hand).
Add salt, oil and egg or chia “egg.” Mix for about 1 minute.
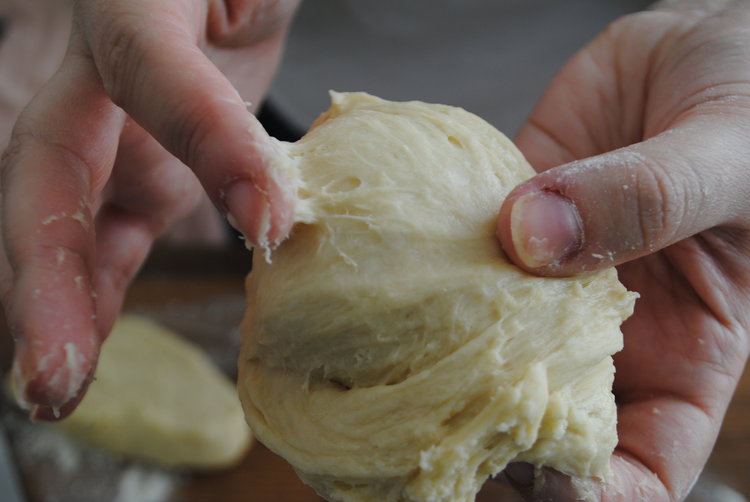
Add 3 cups flours and mix with dough hook/knead but not too much. The dough should be slightly tacky (spring‑y) and feel like your ear lobe but with slightly tacky edge. If you need to, add more flour but just small bits at a time (hence the extra 1/4 cup in the ingredients list).
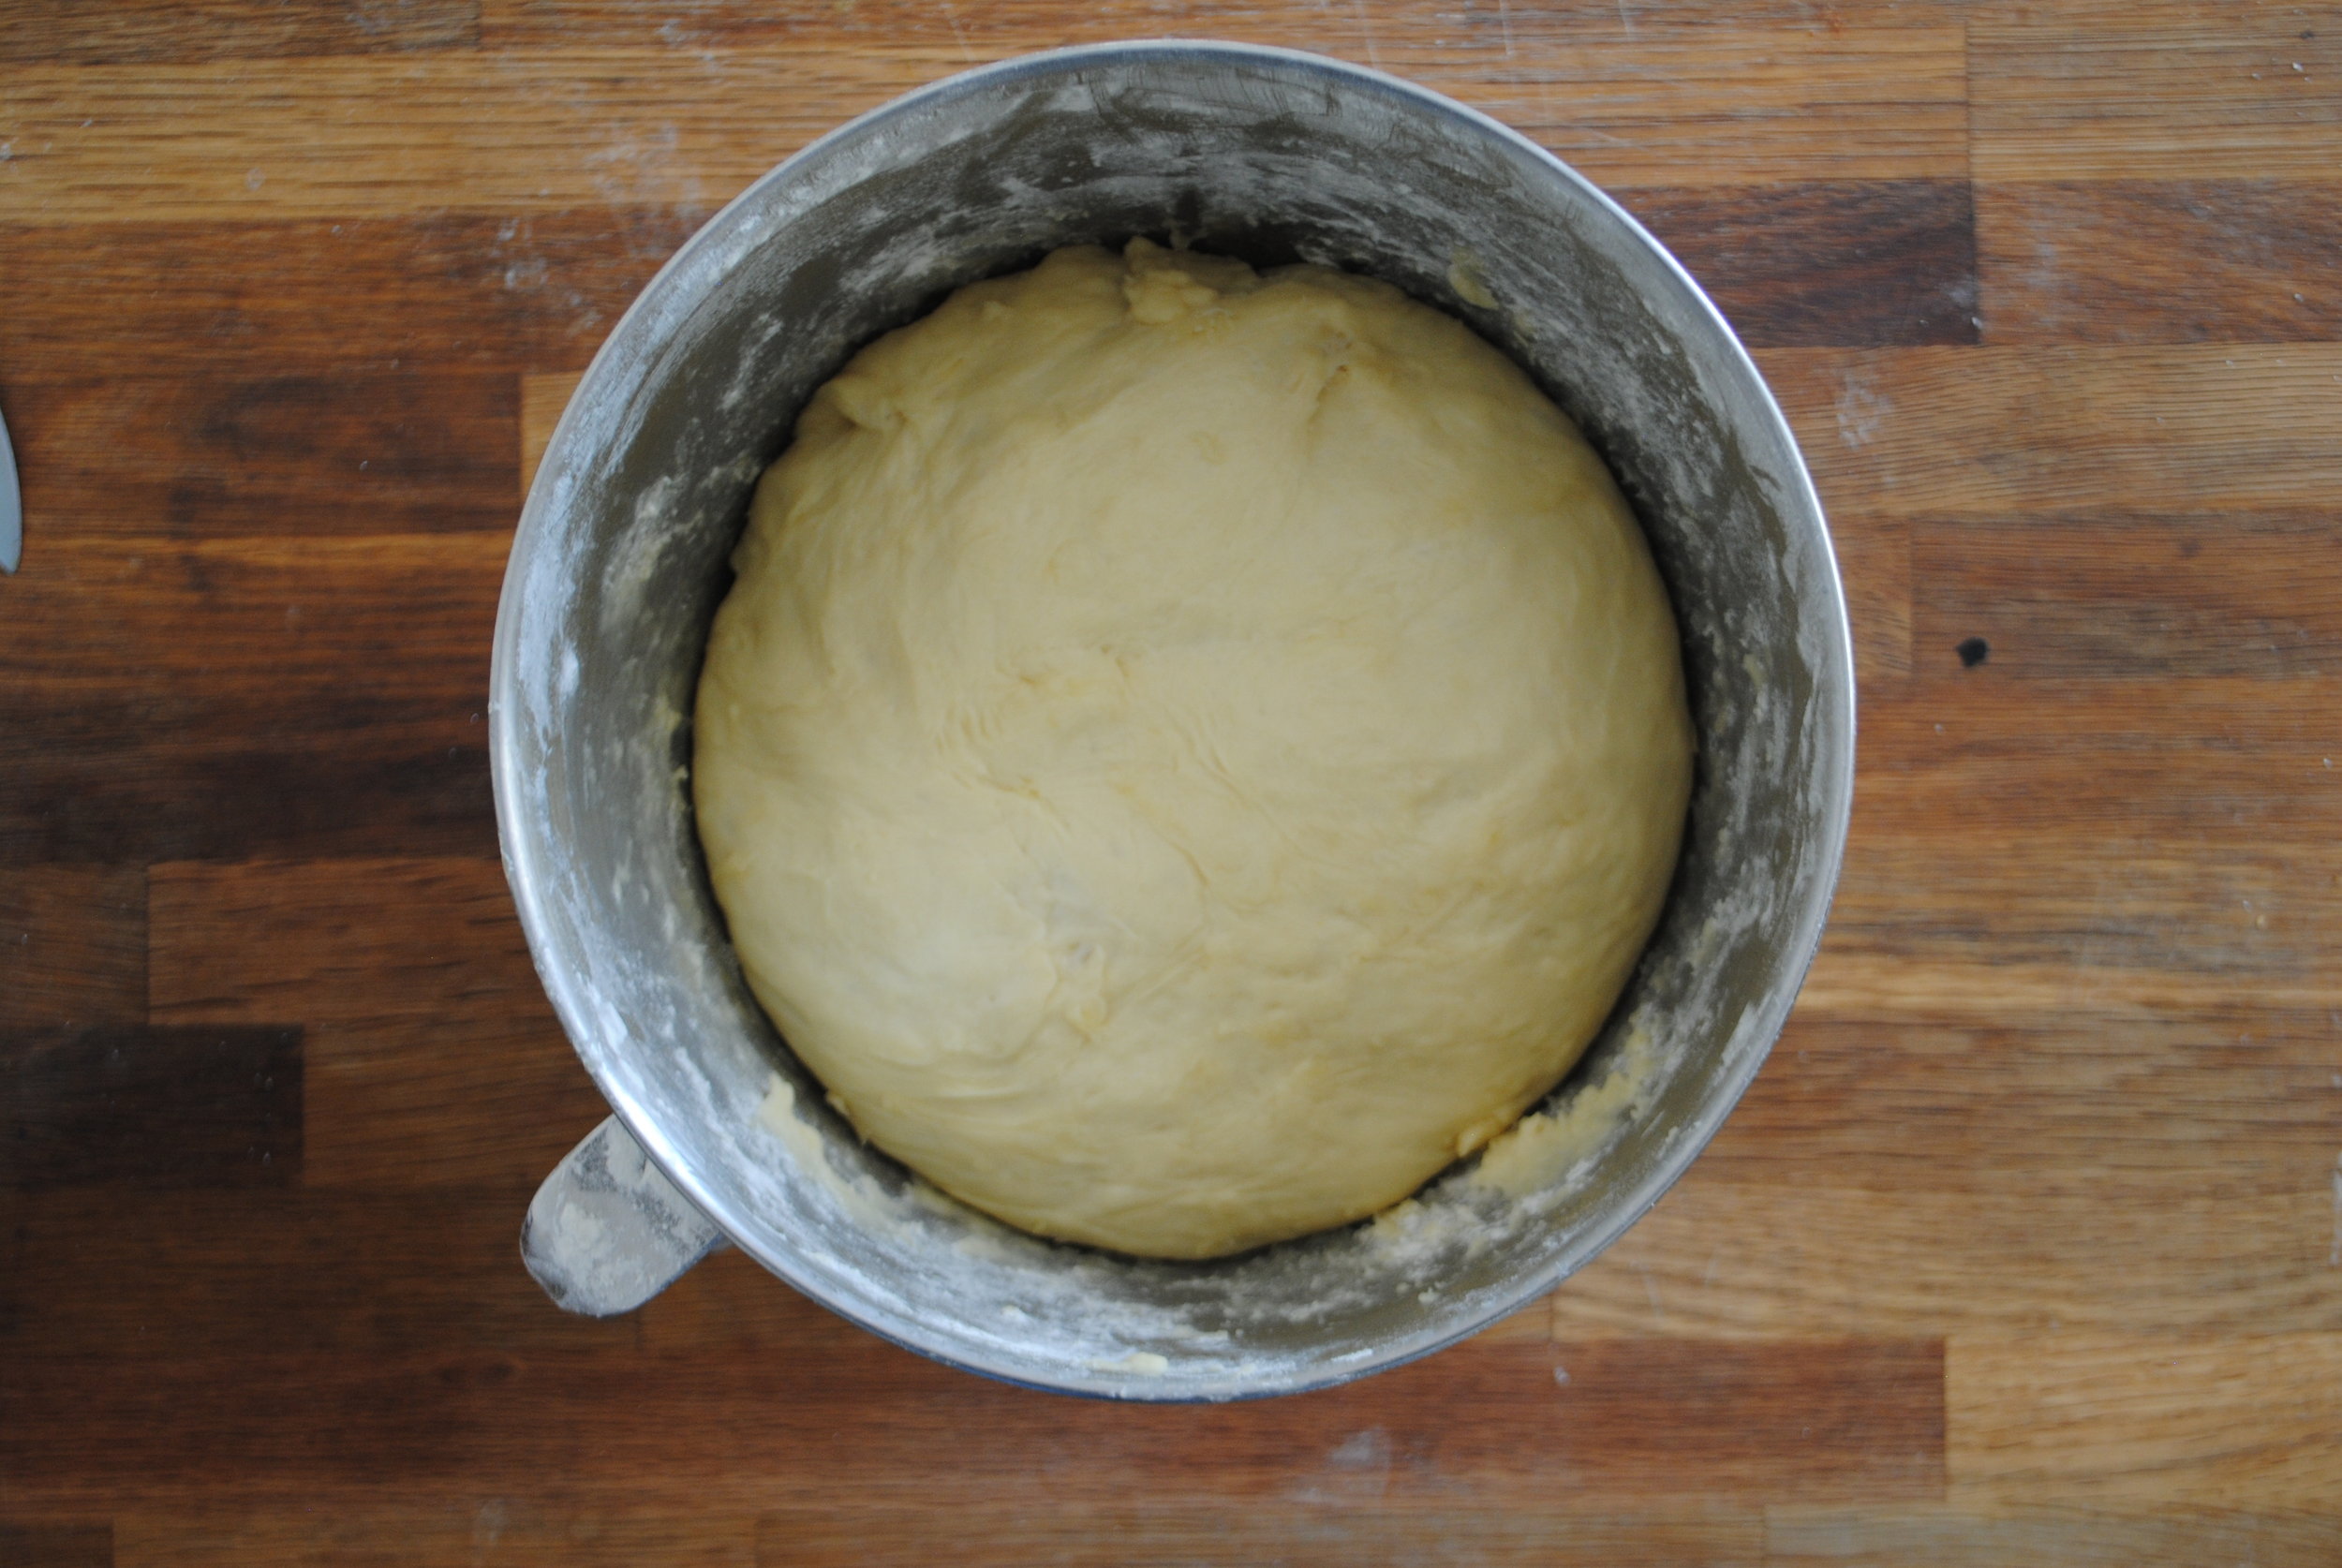
Form dough into a ball and knead by hand for just a minute or so, to make sure that there are no flour bits hanging around. Put the dough back into bowl, spray the top with cooking spray (or brush with a pastry brush just barely wet with olive oil) and cover with plastic wrap. Let rise 1 hour, punch down*, rise another hour. **
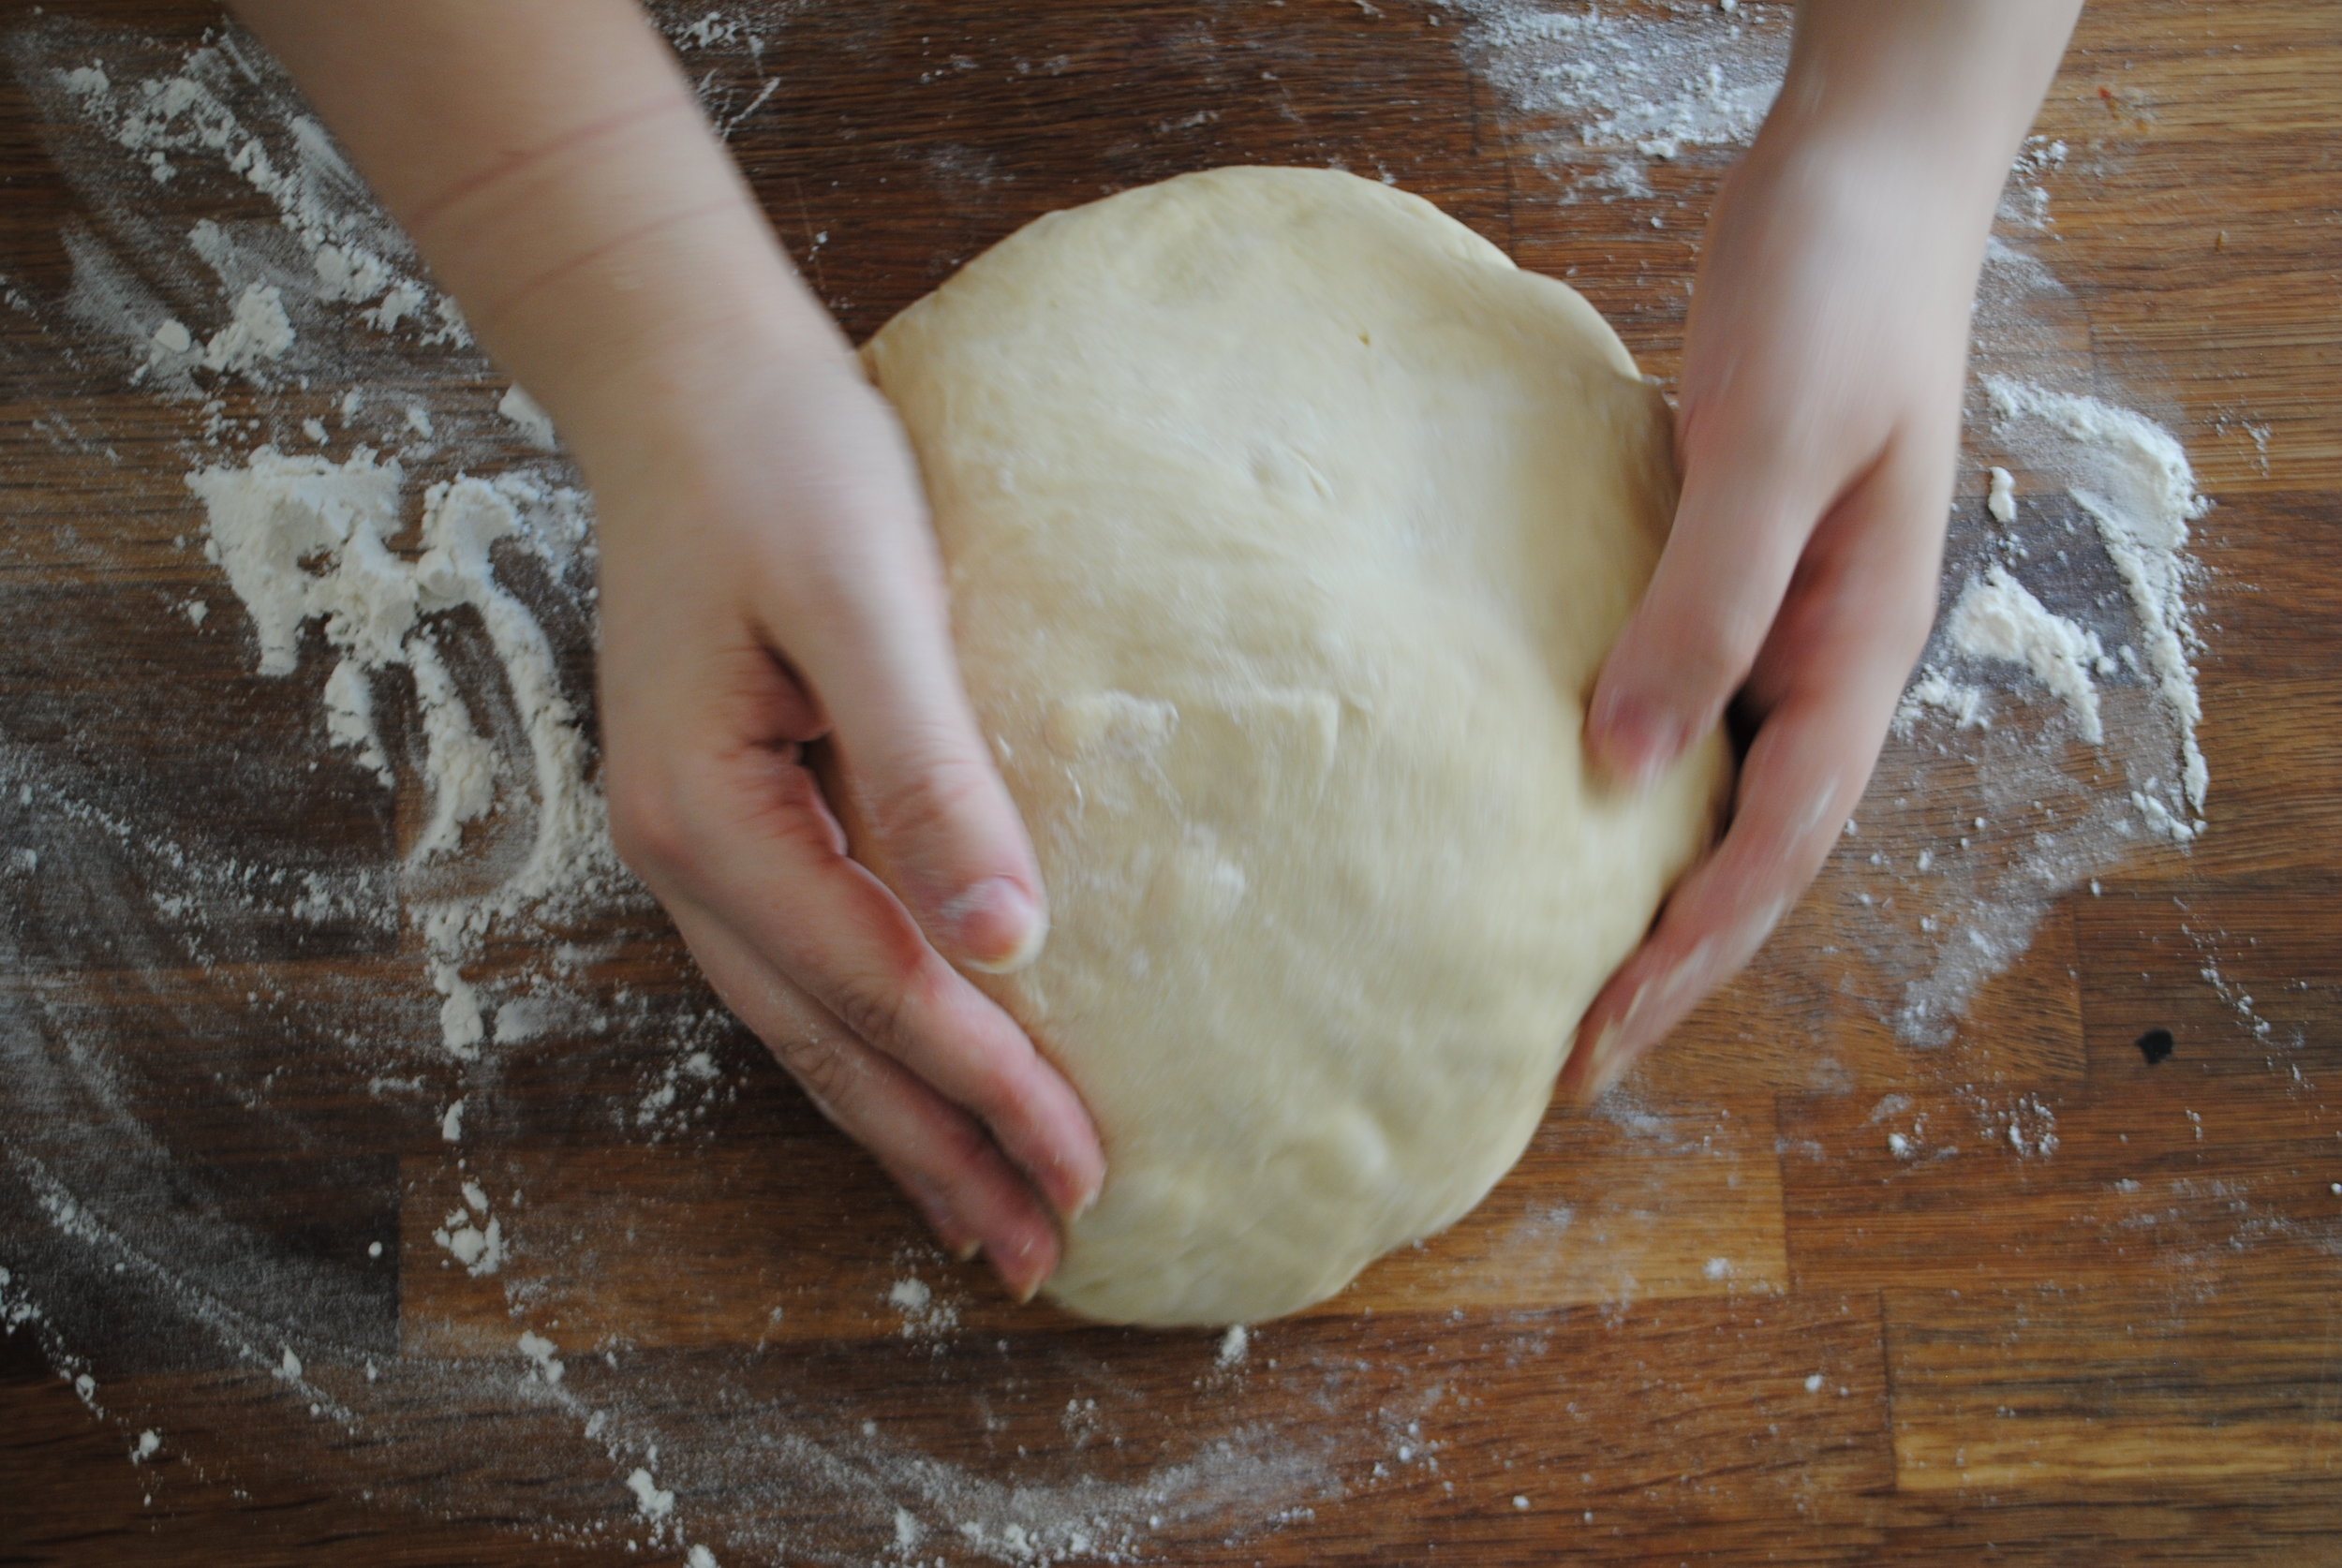
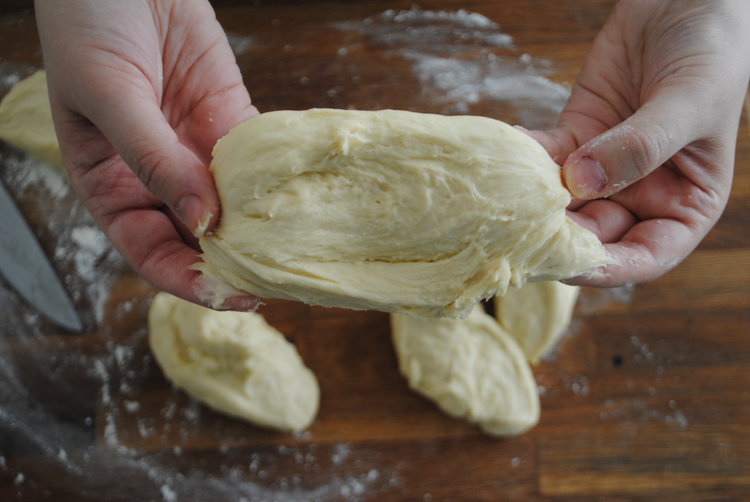
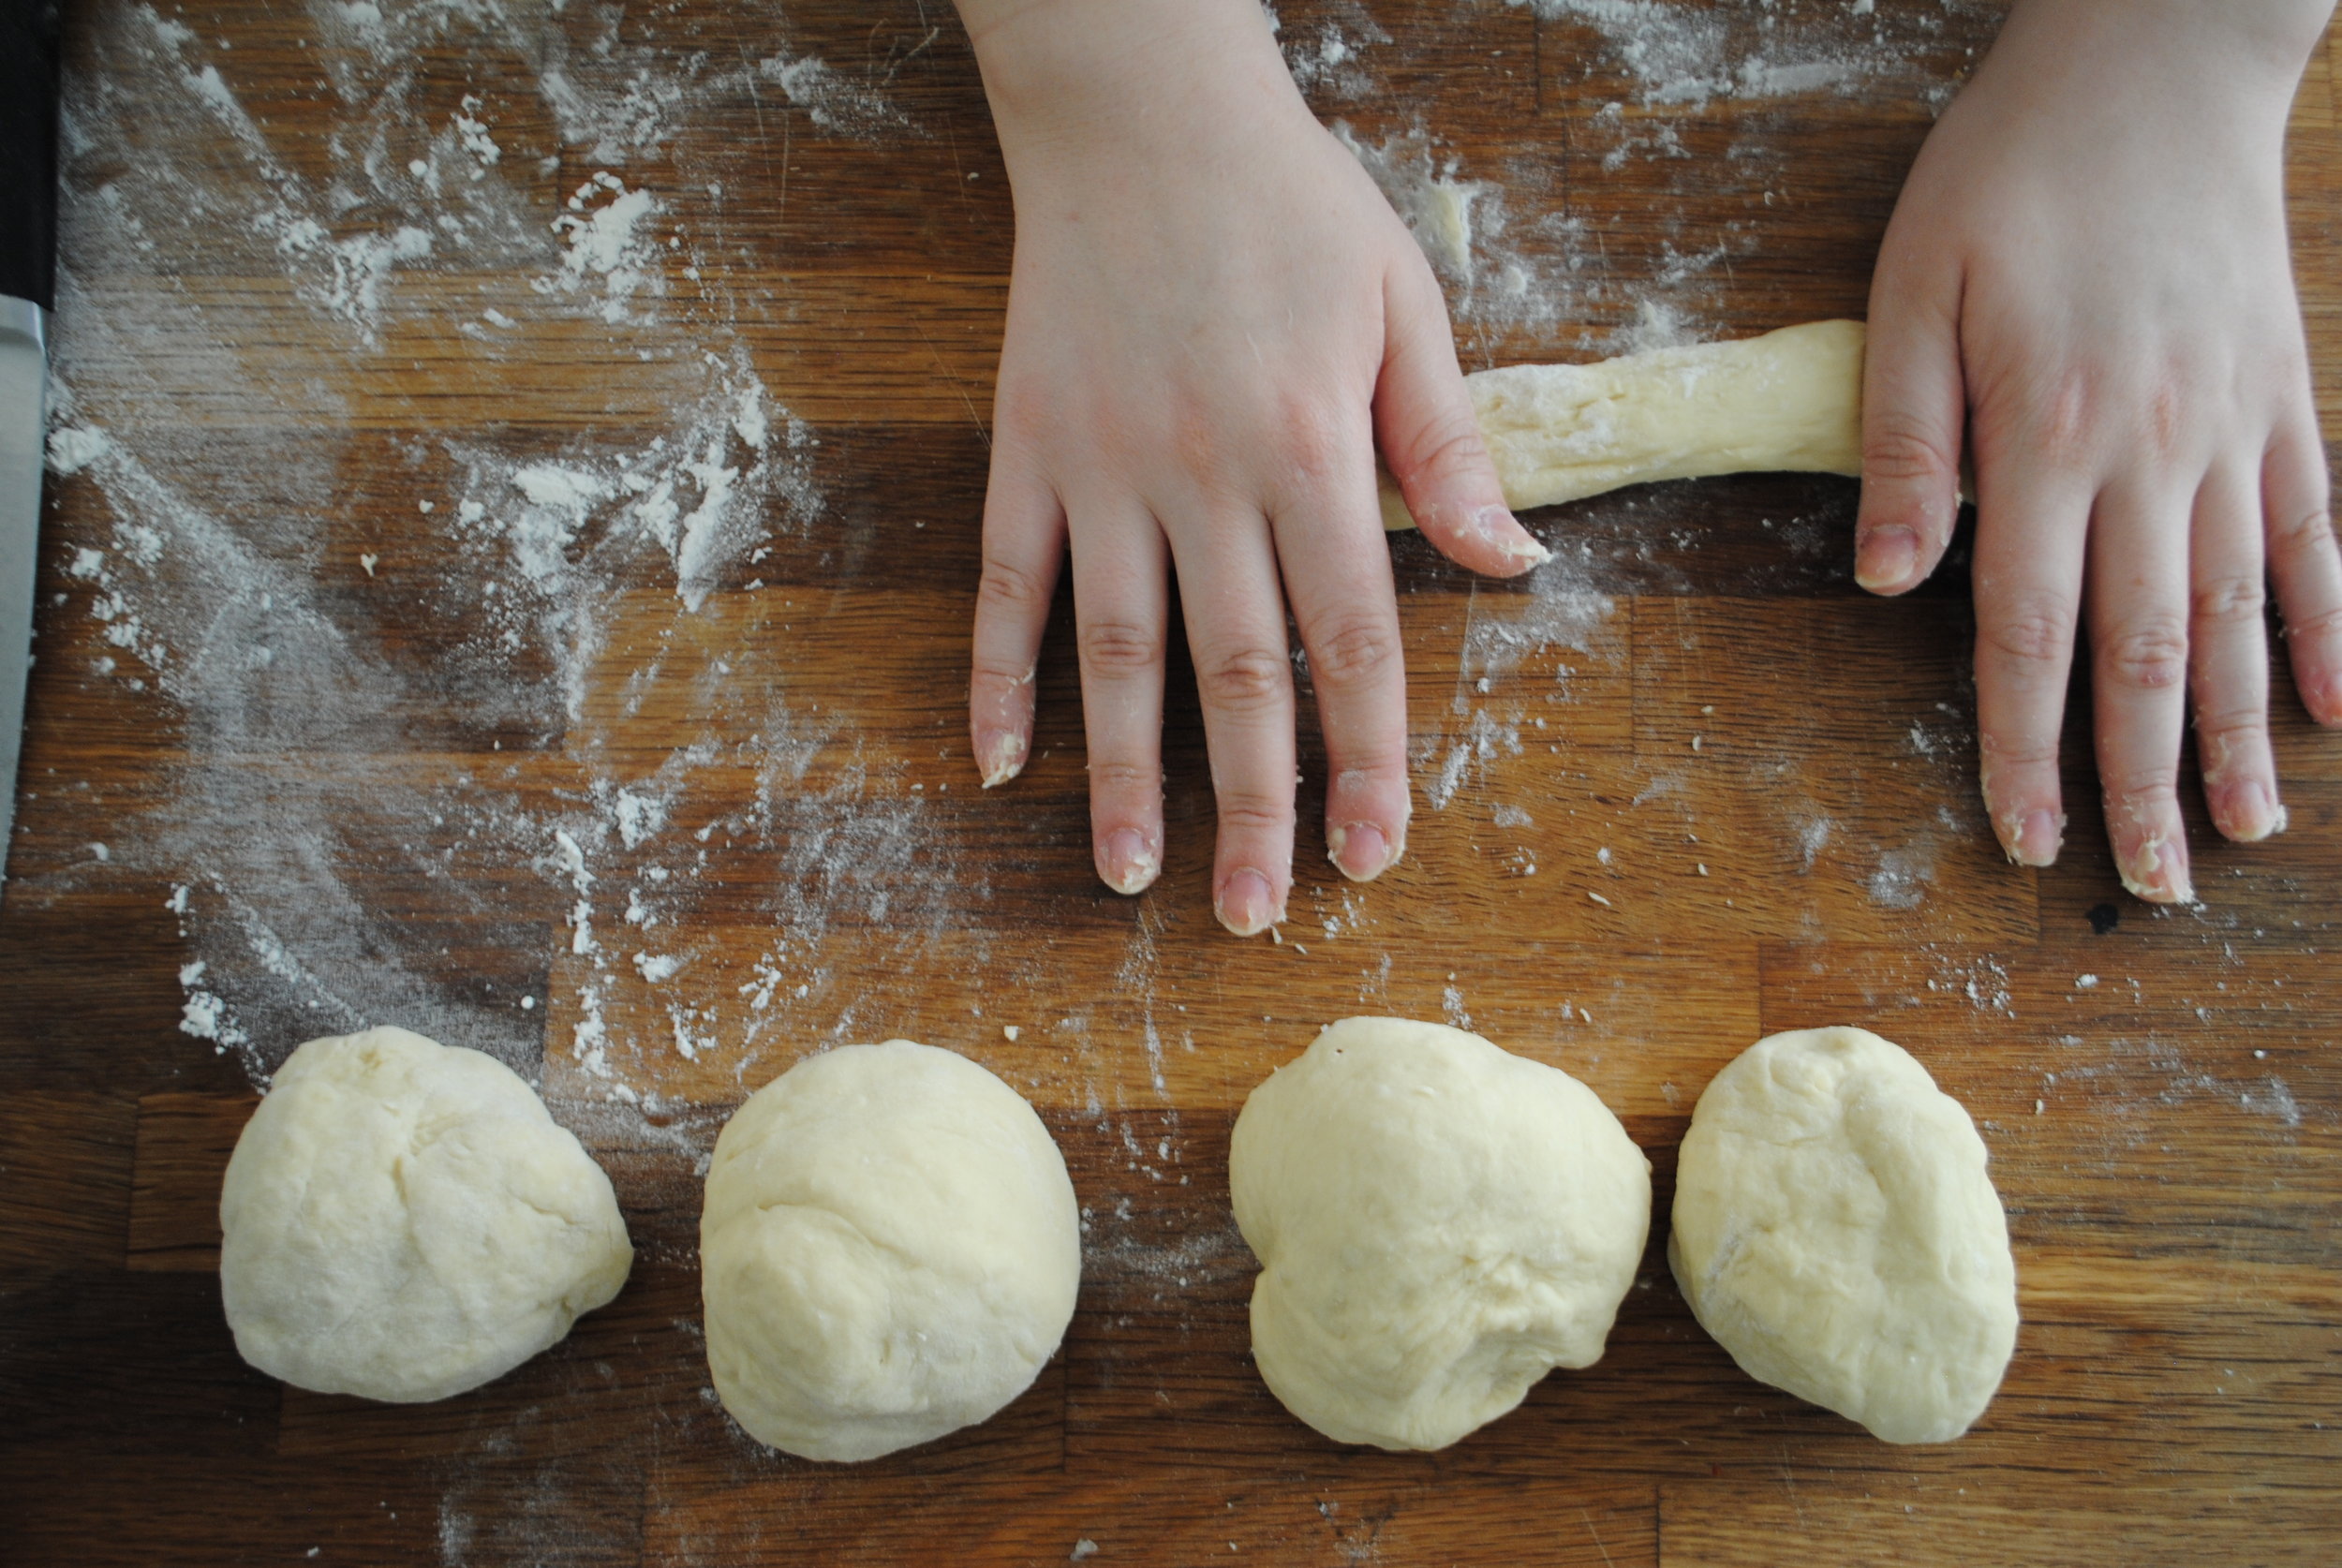
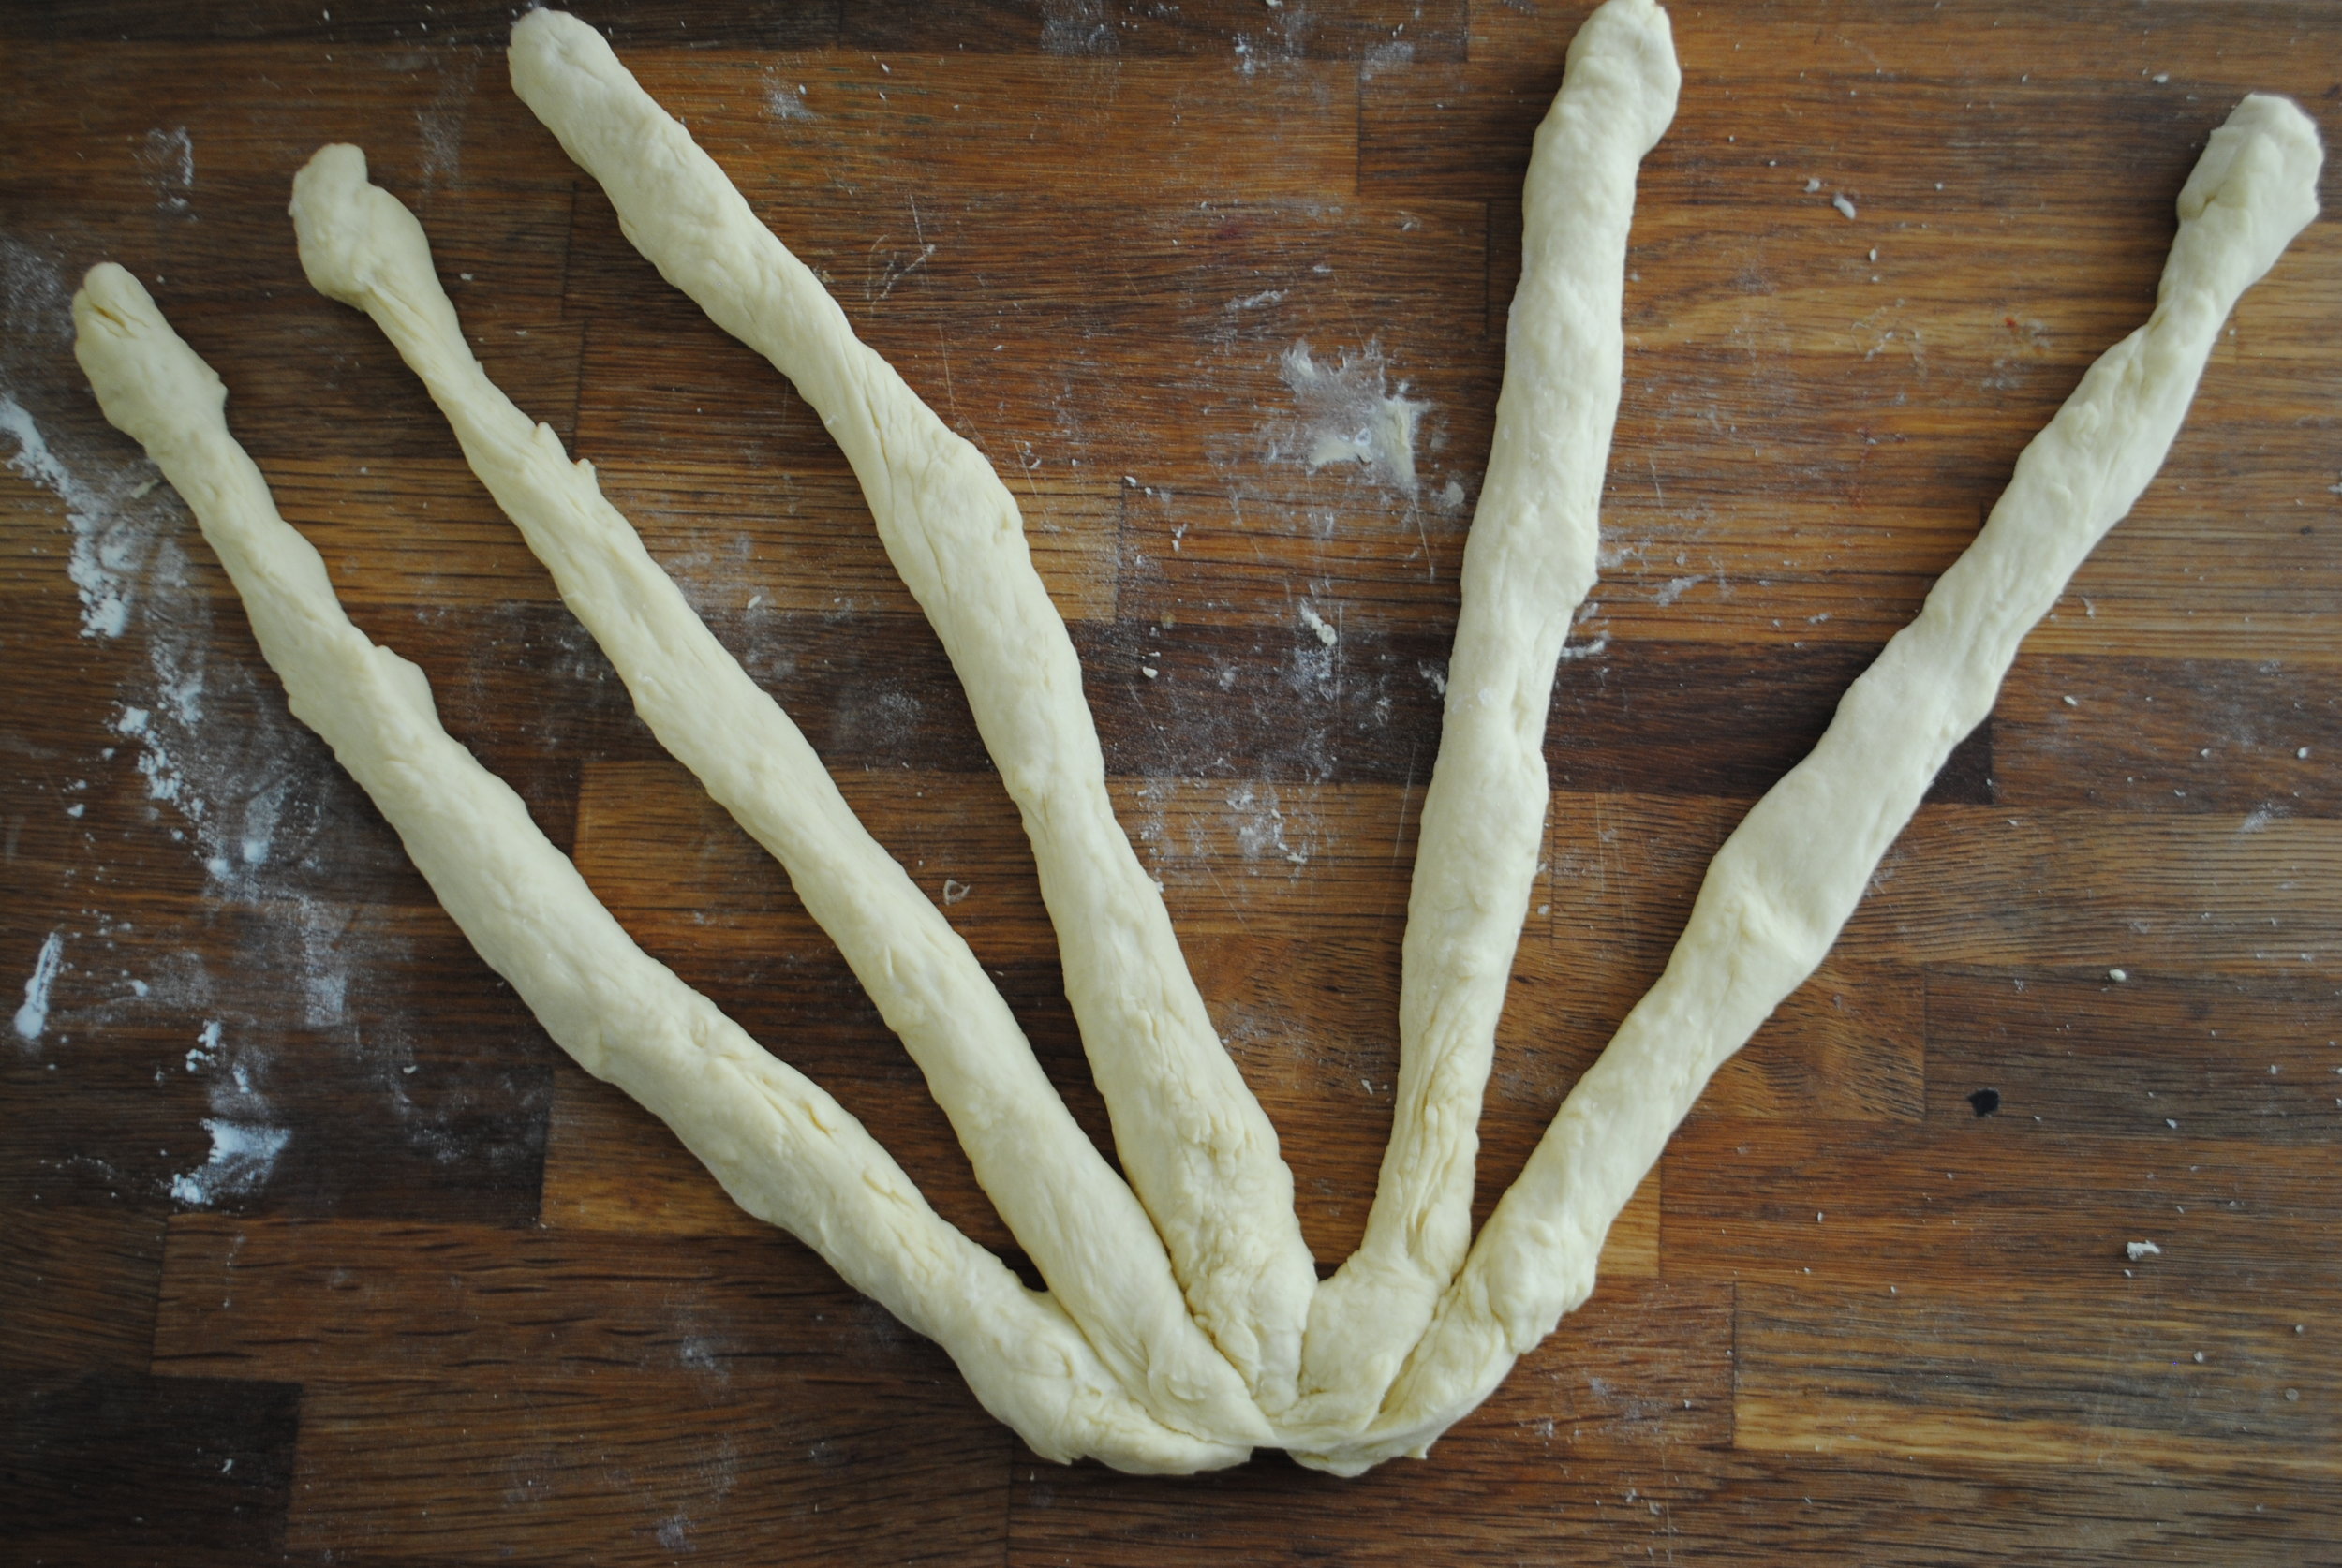
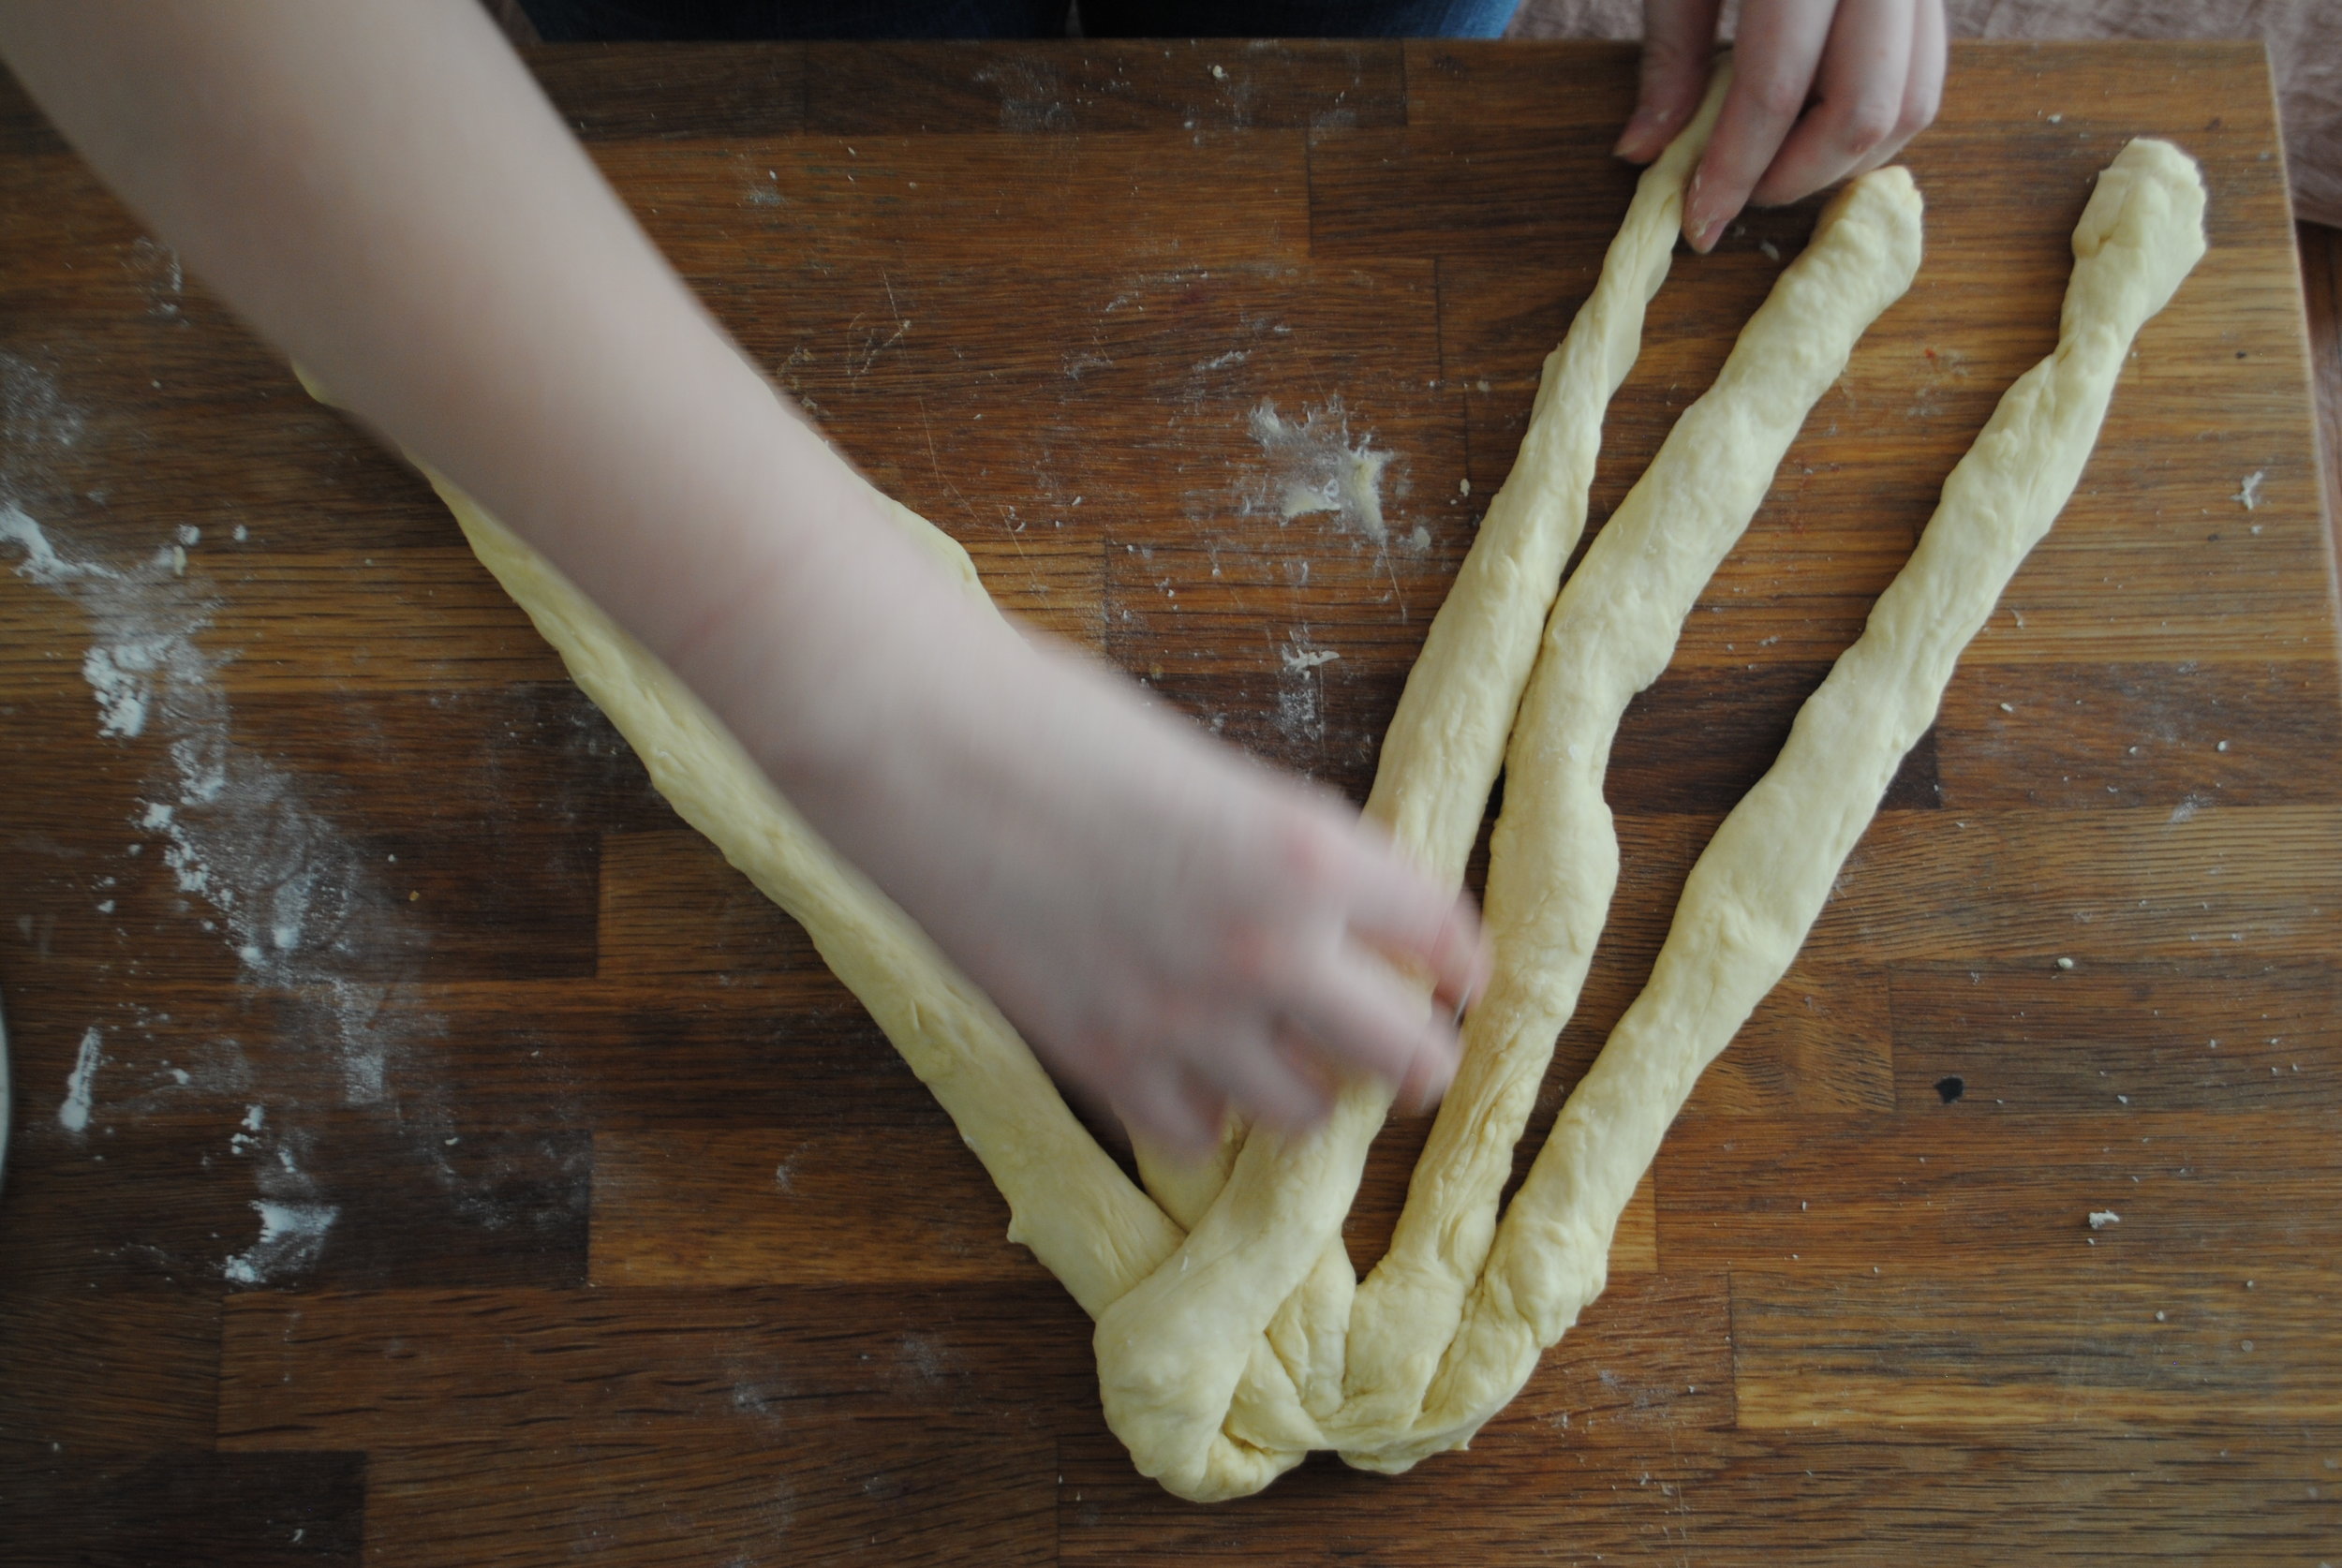
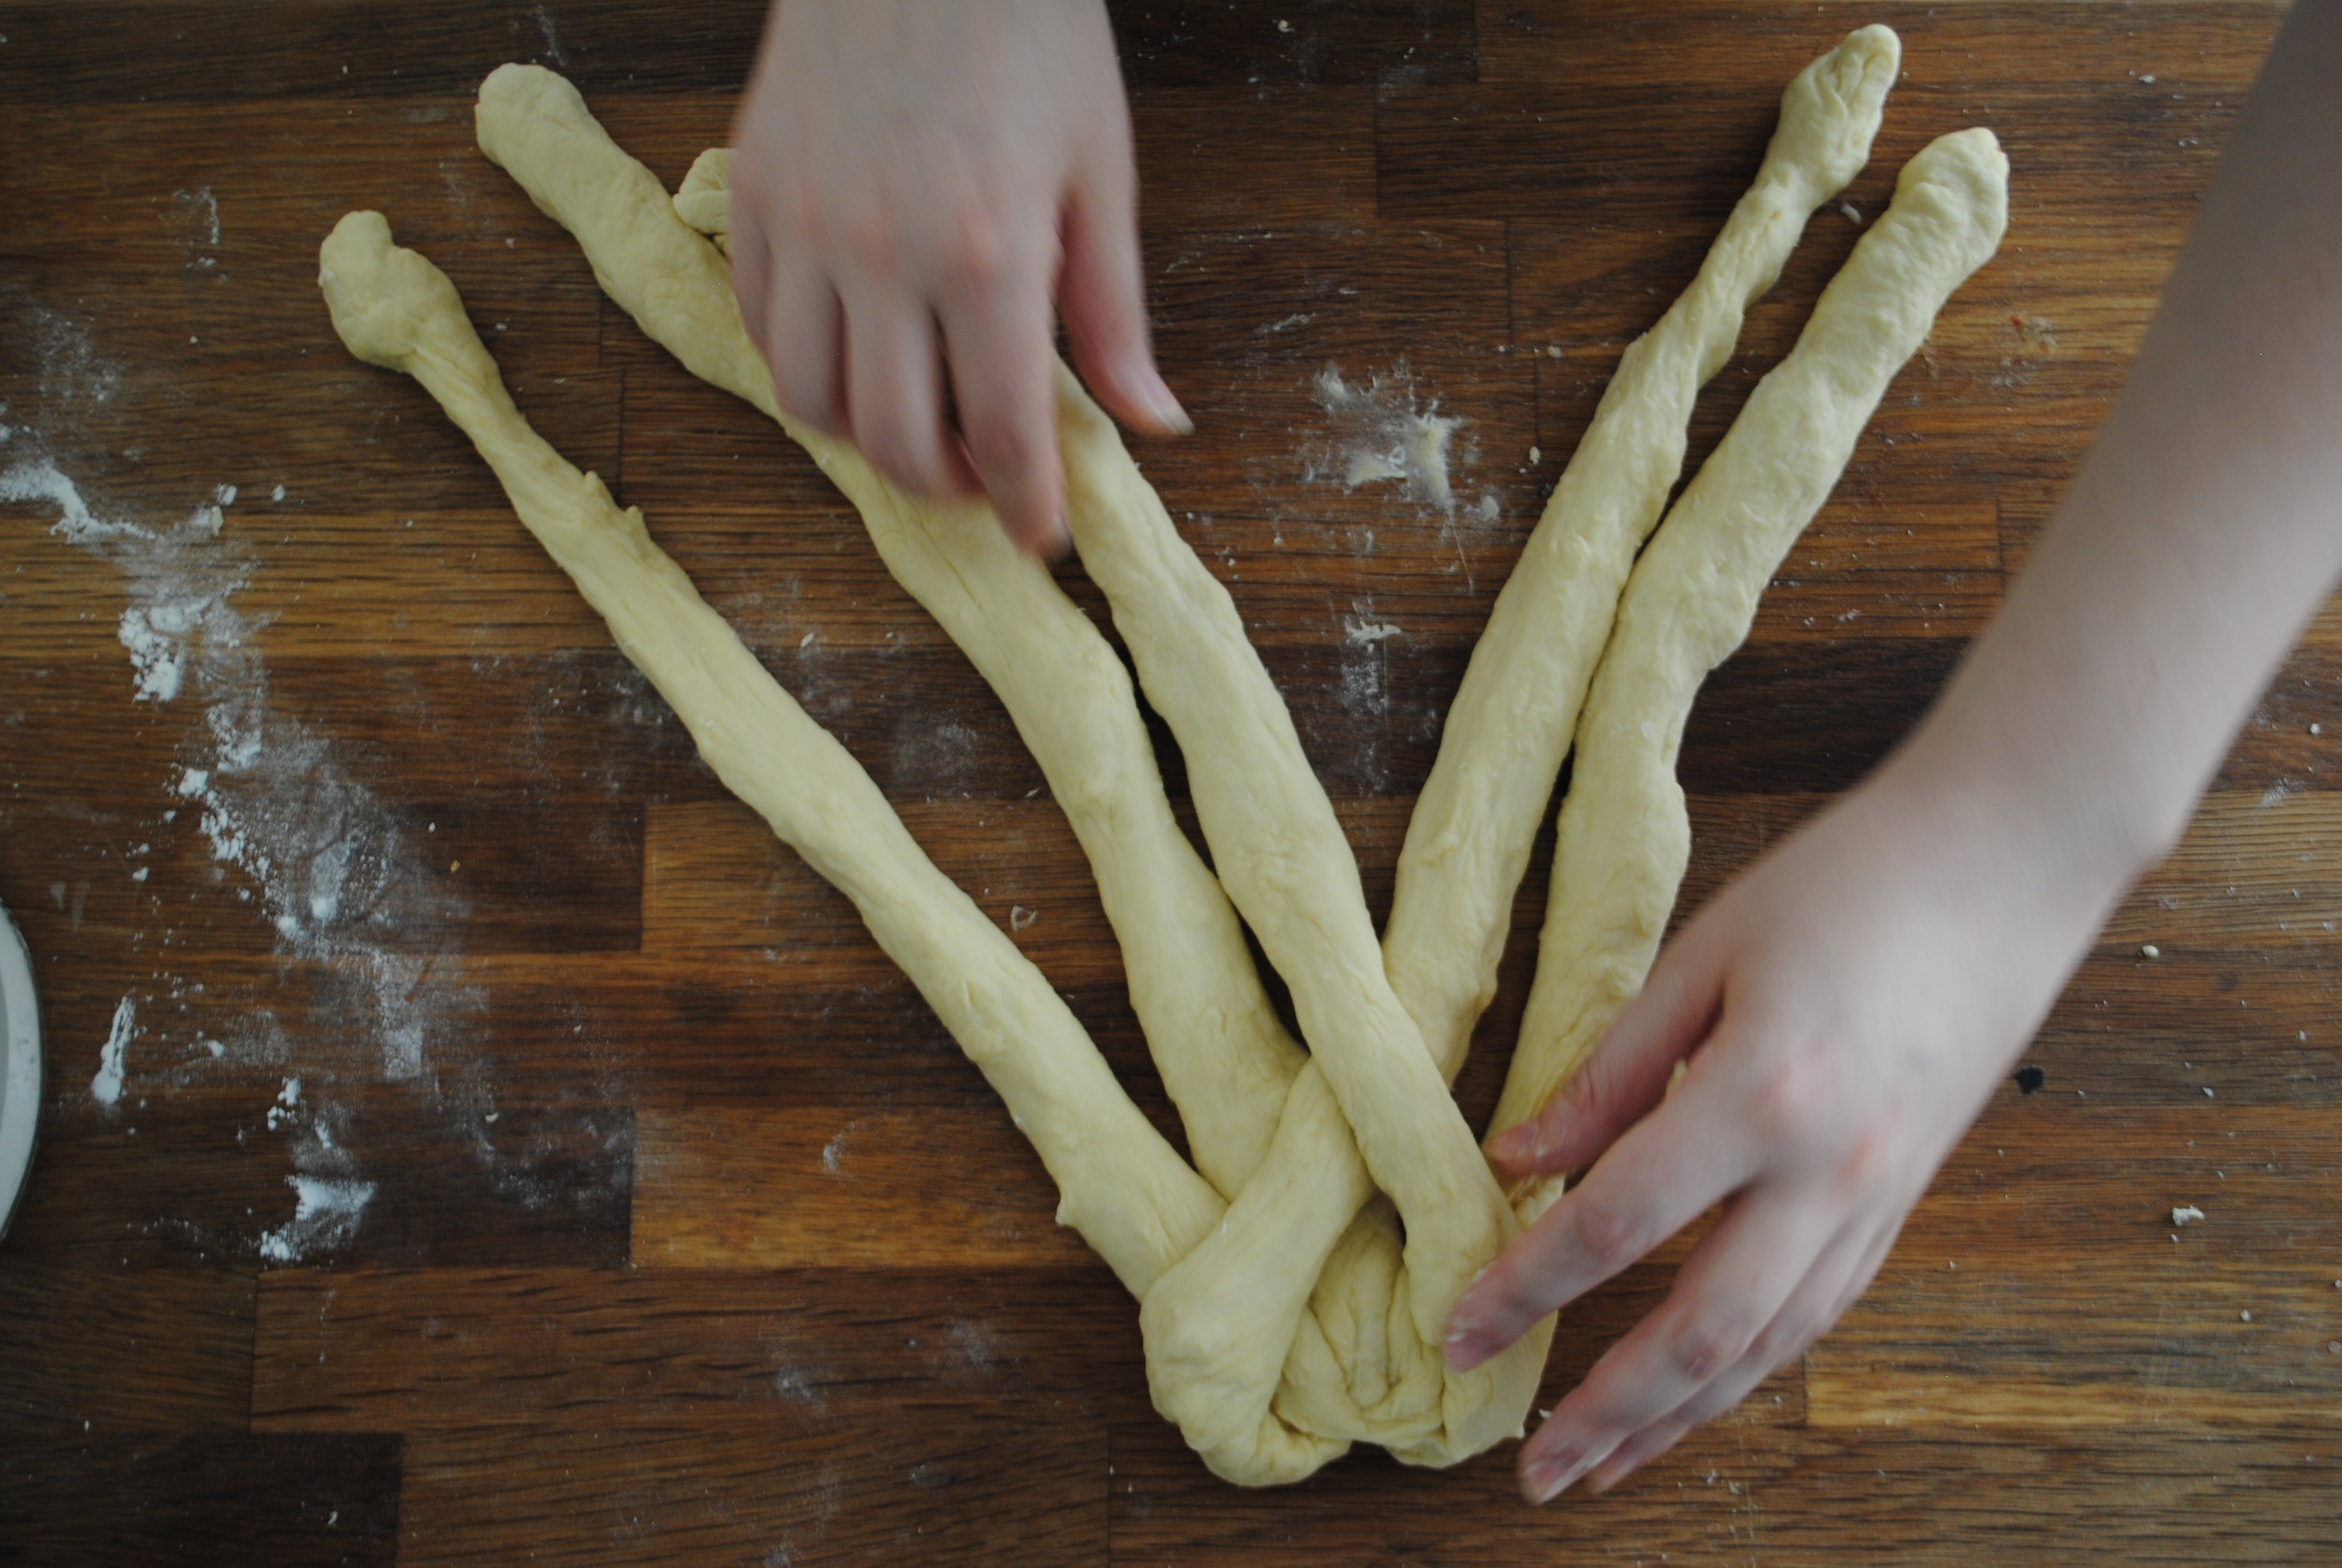
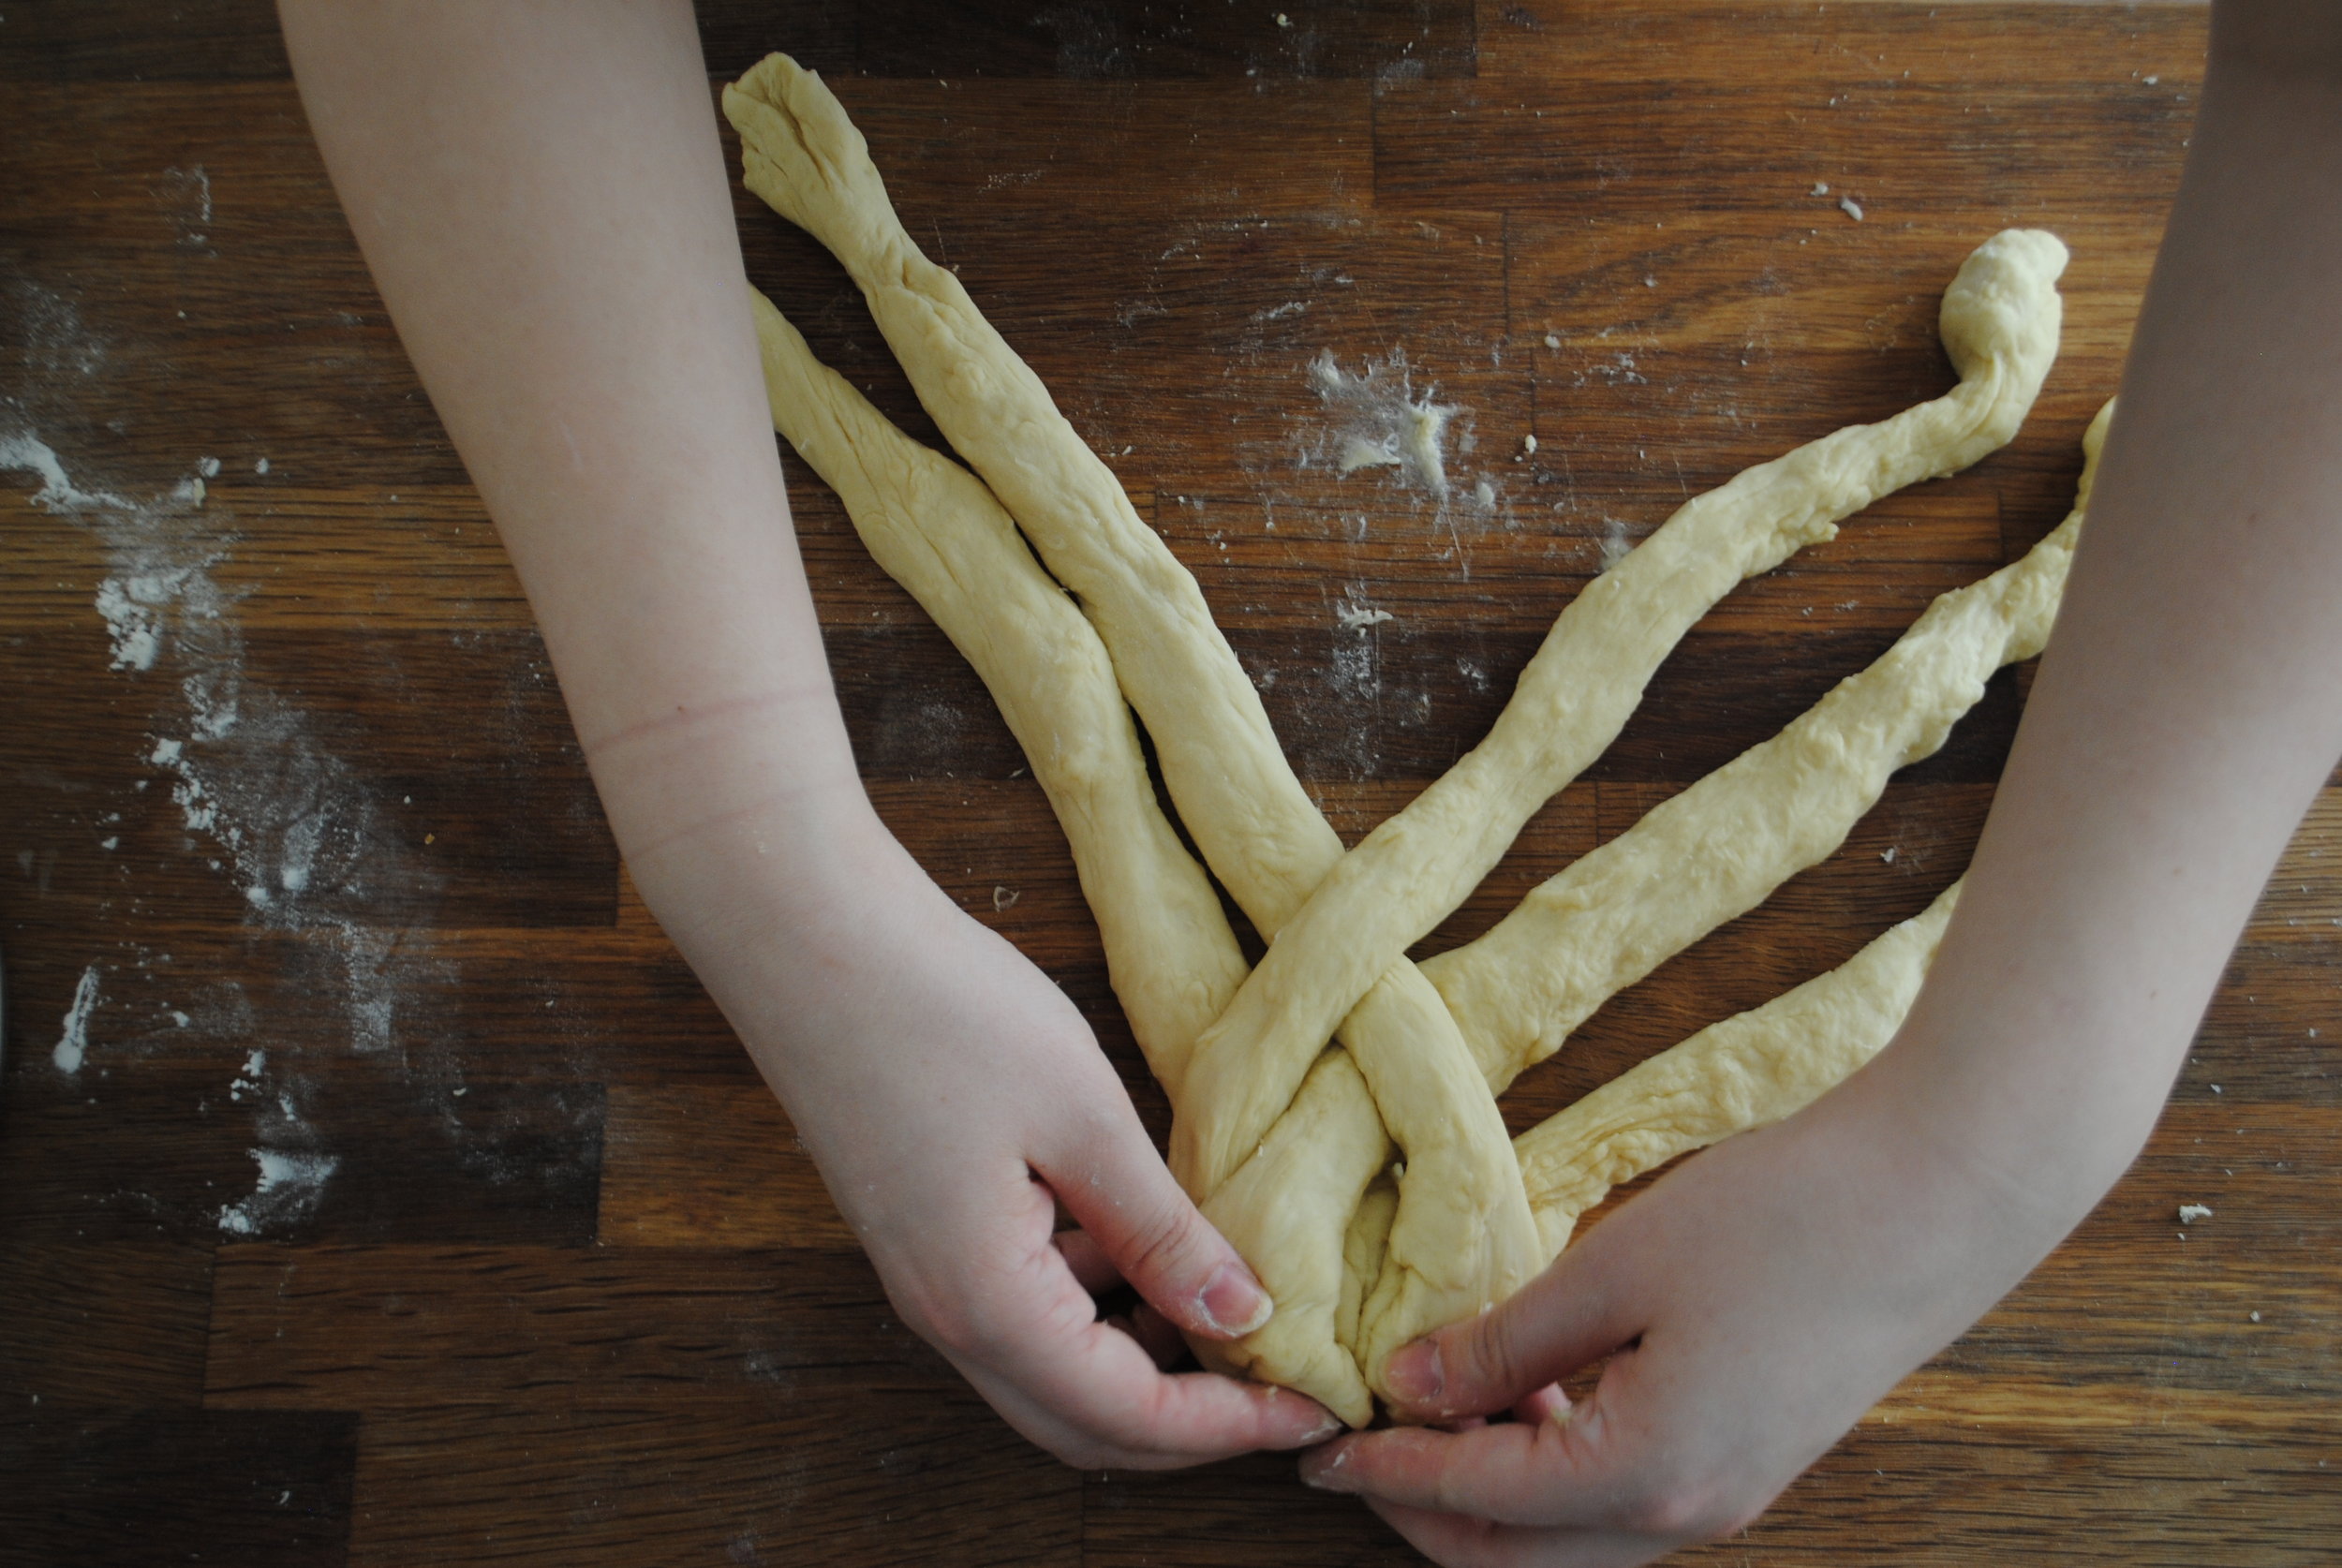
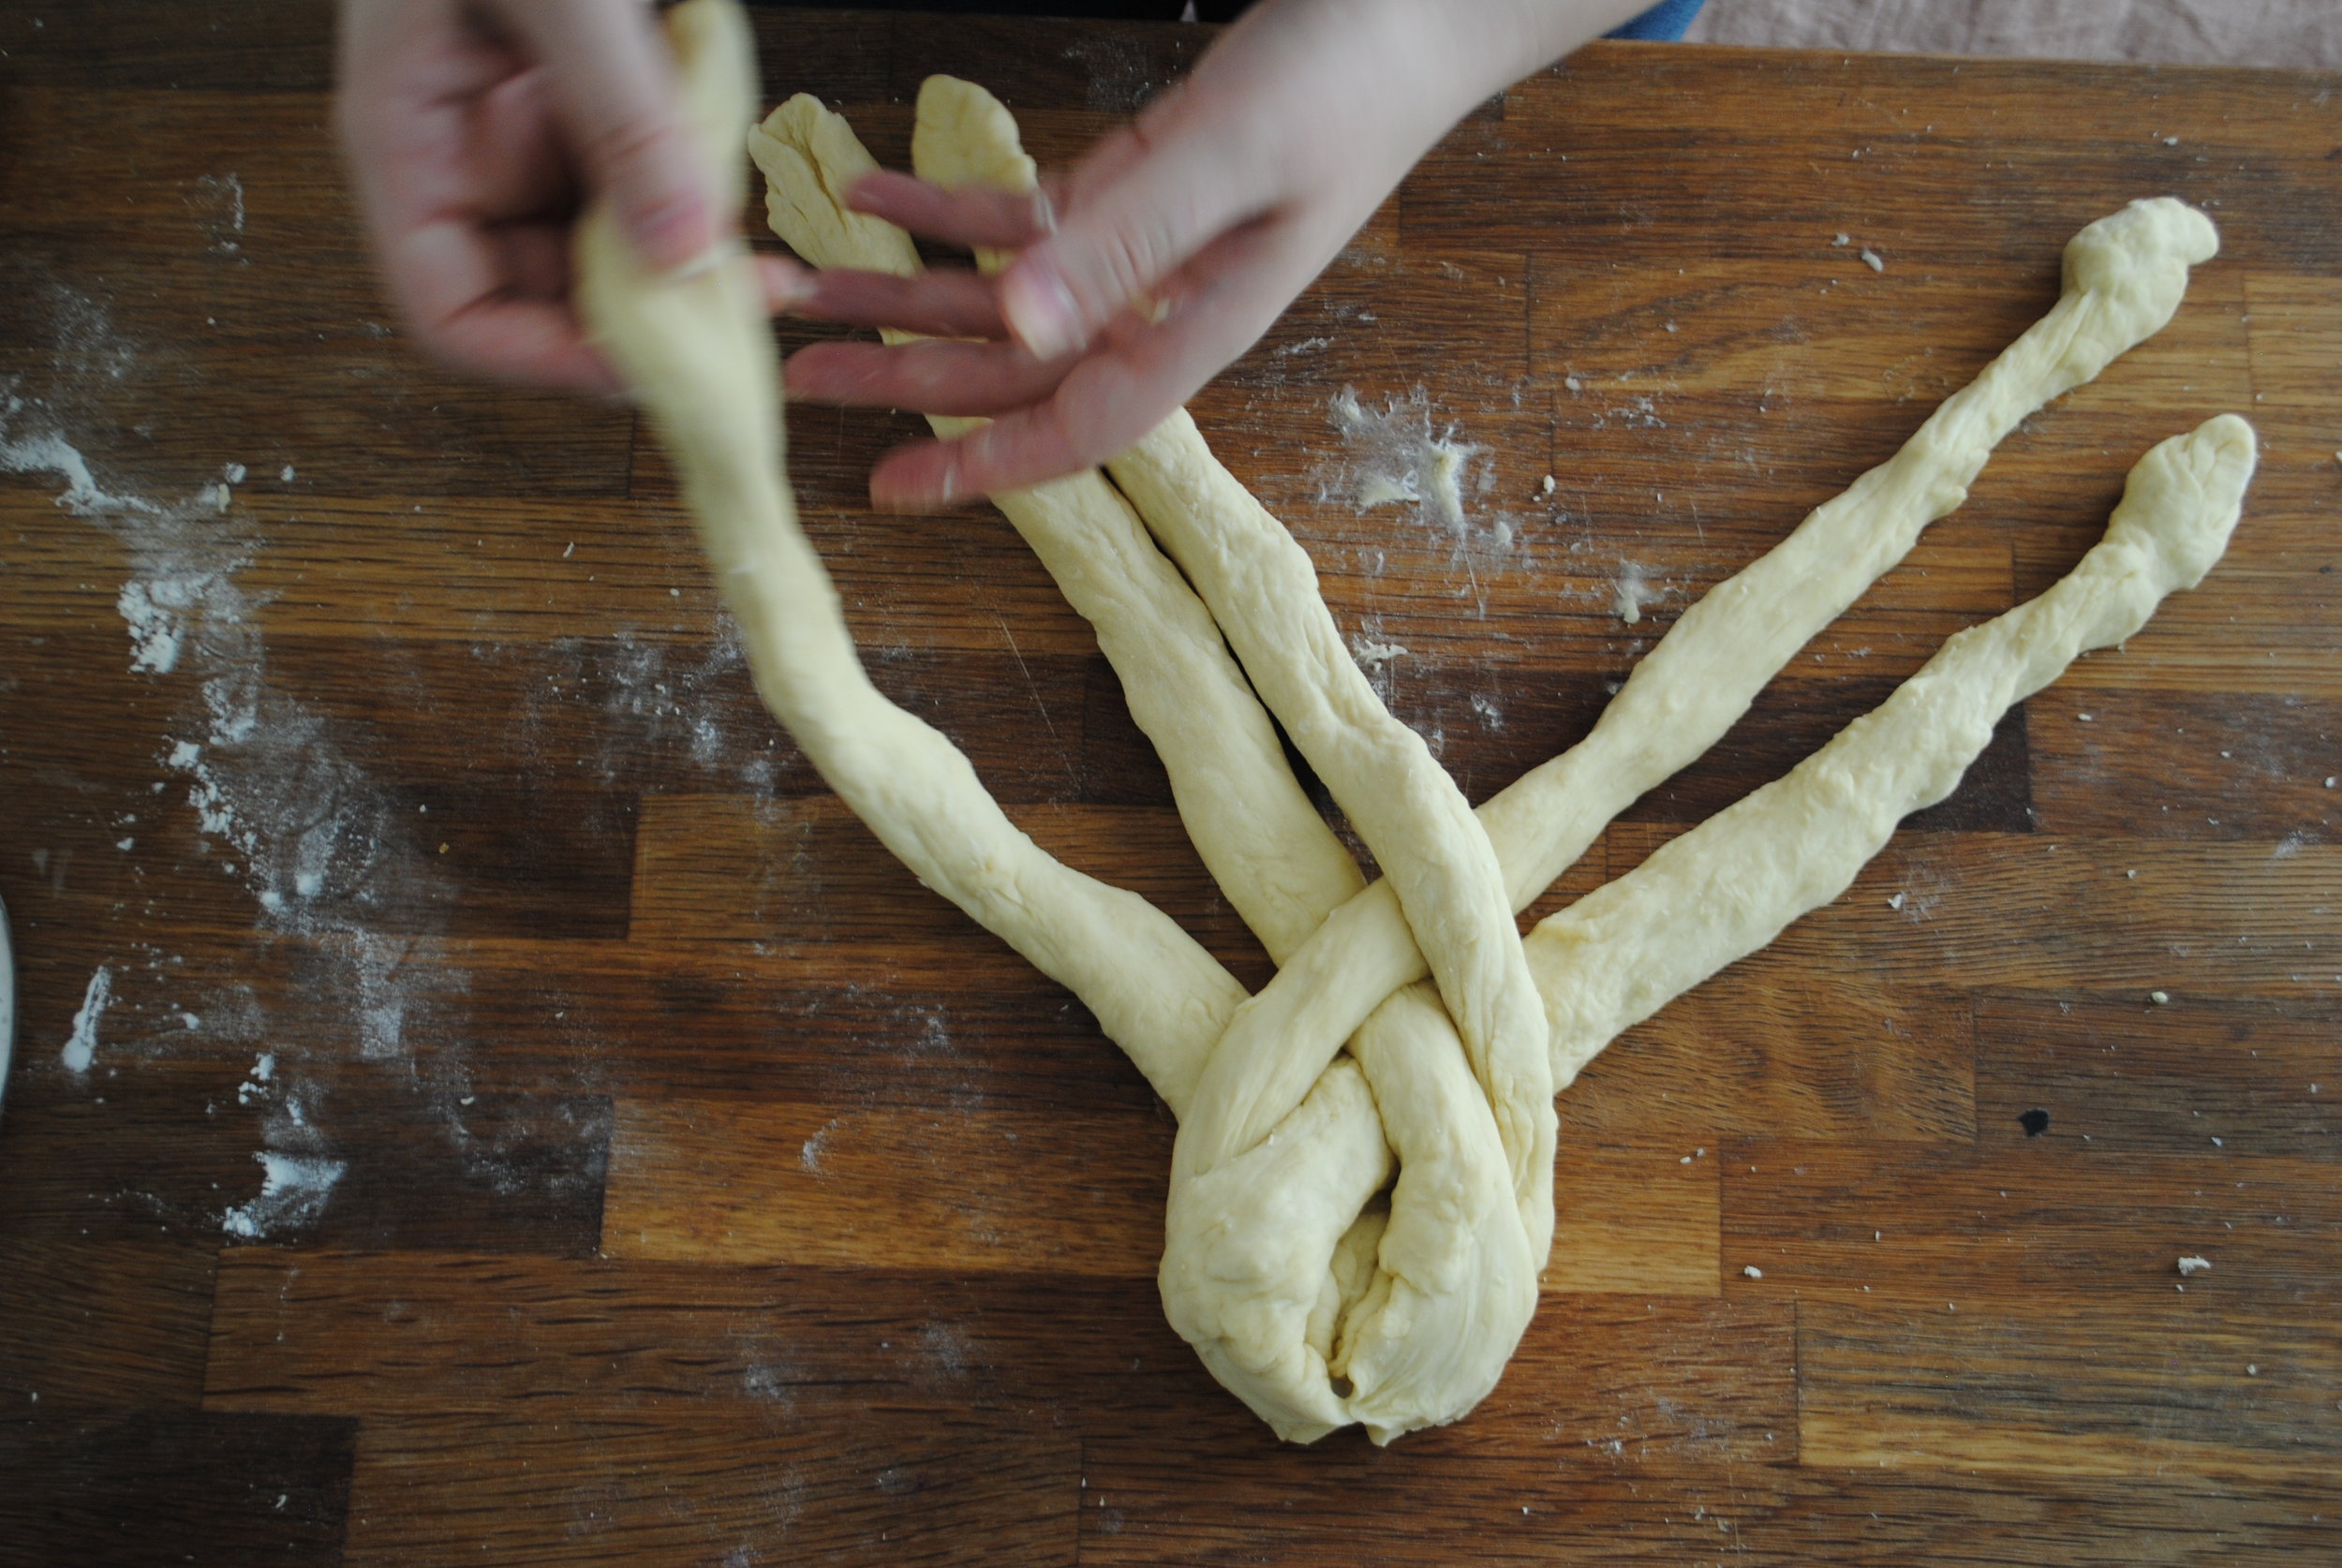
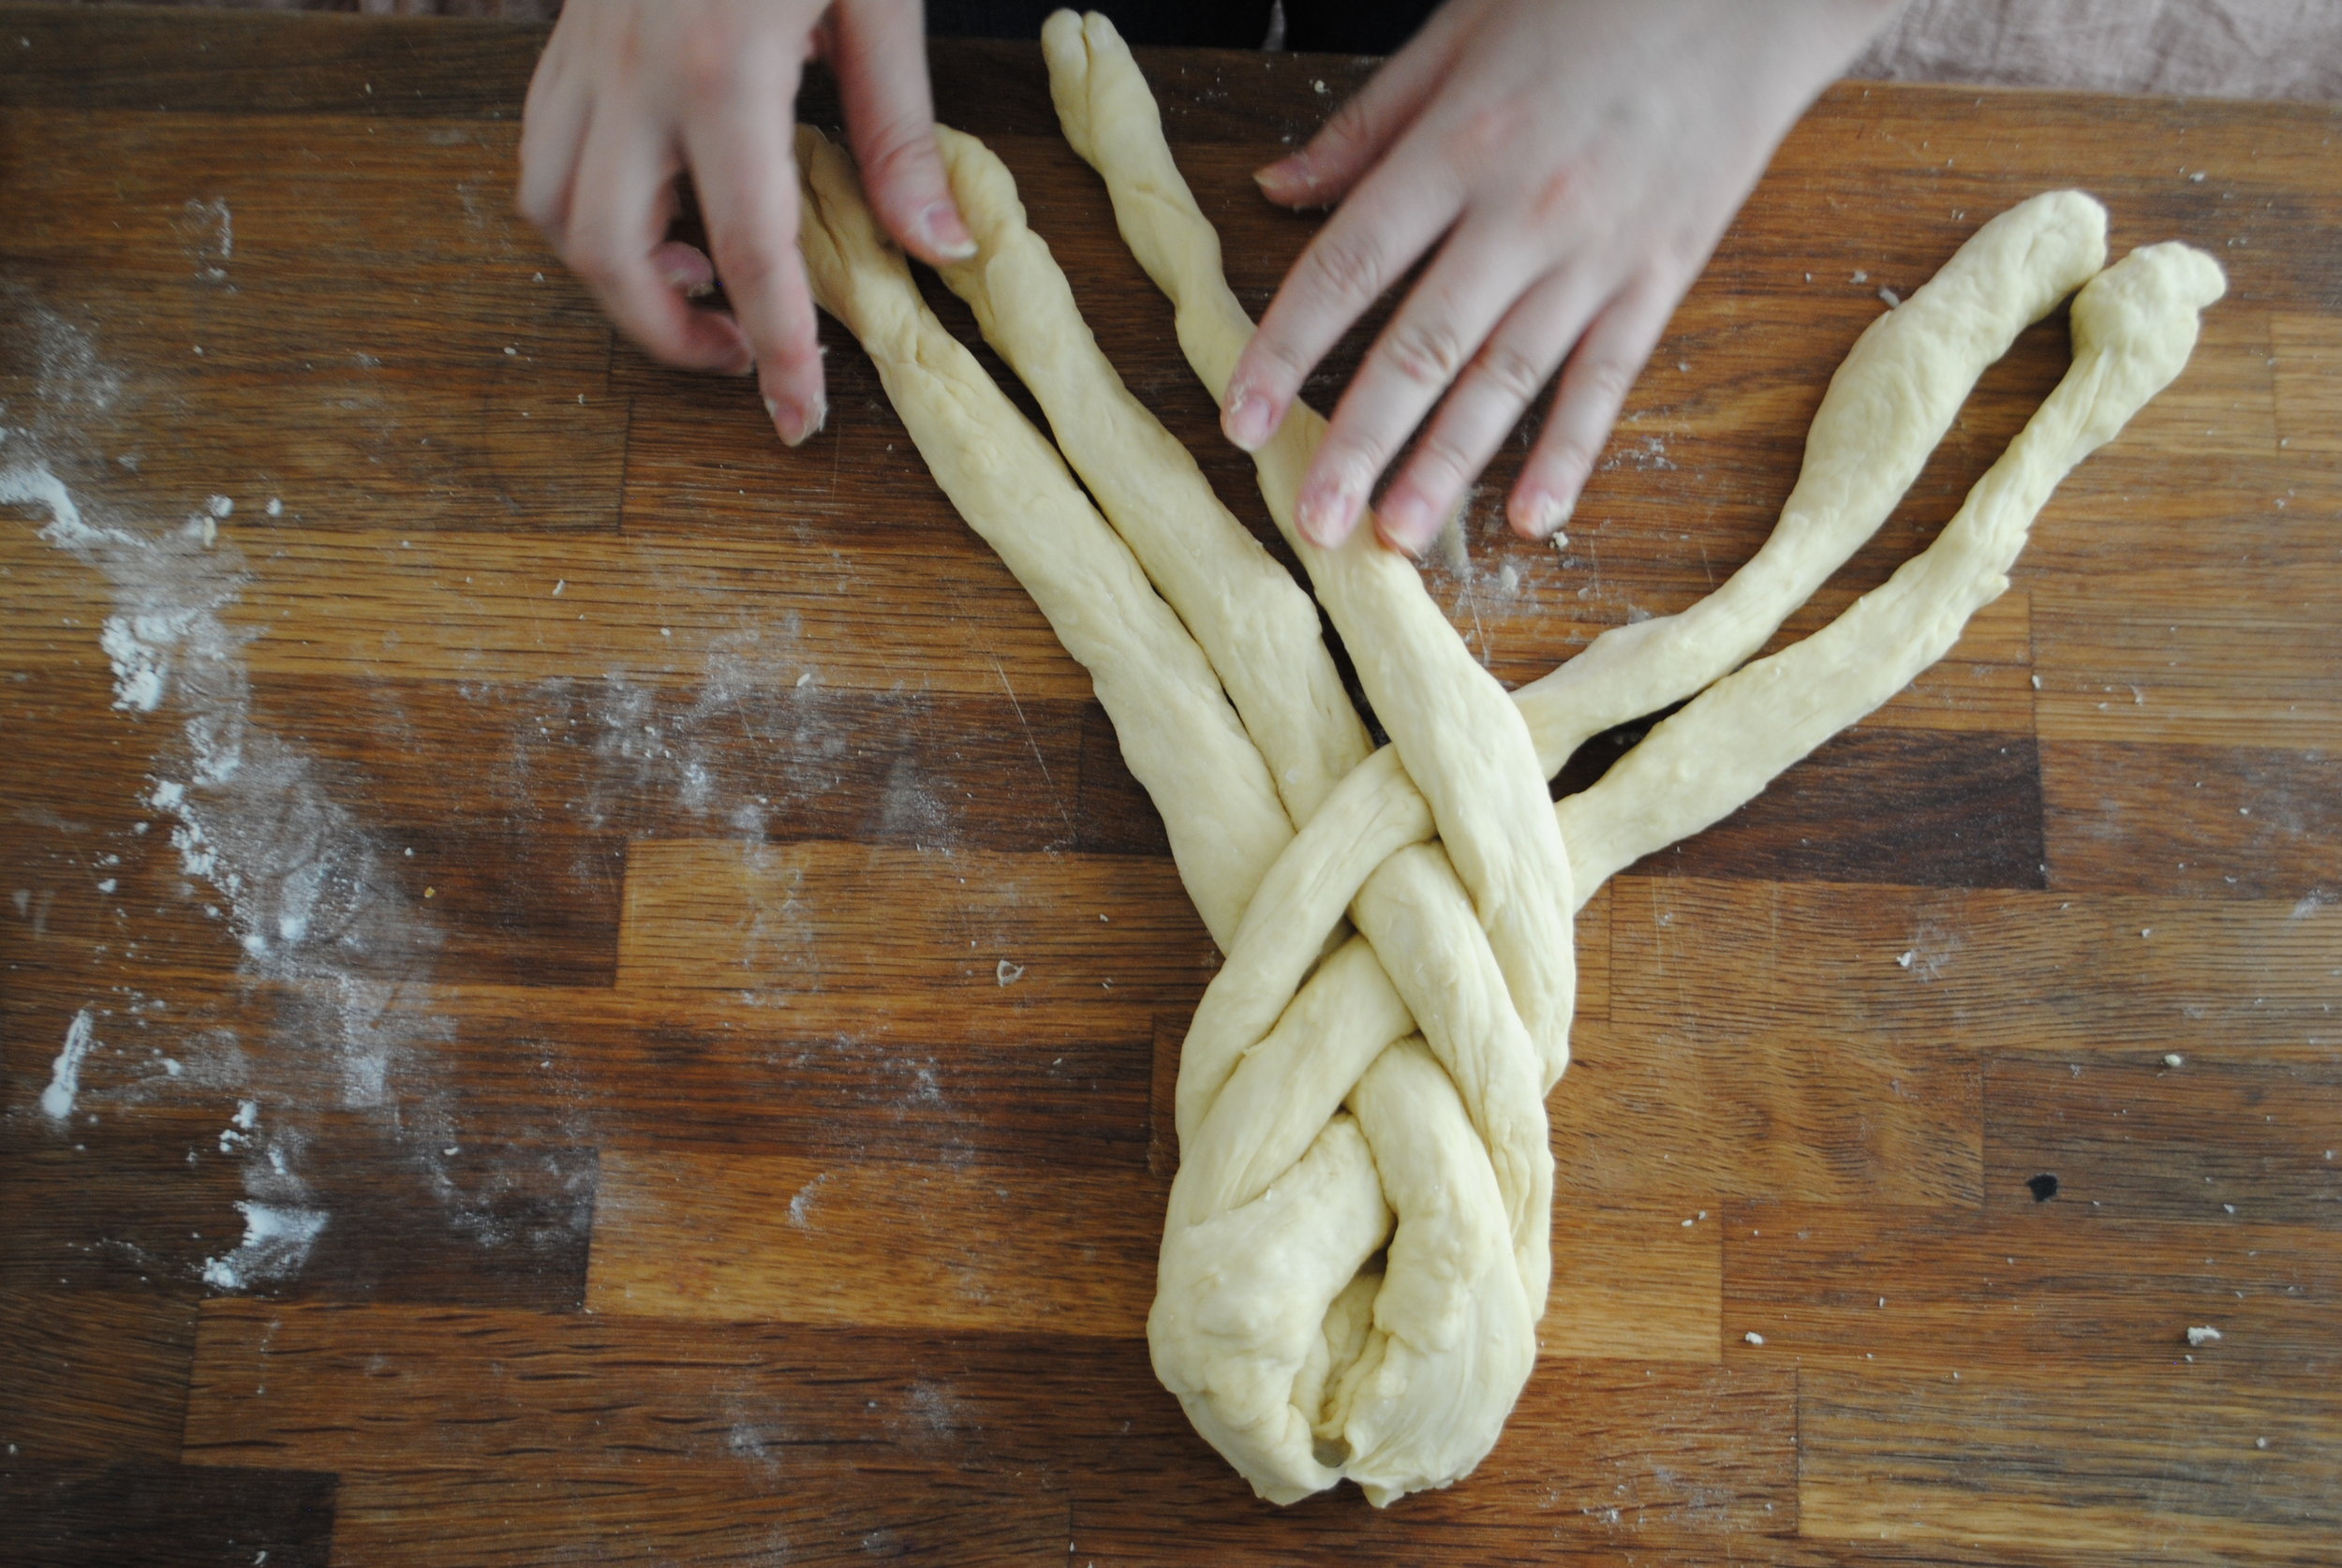
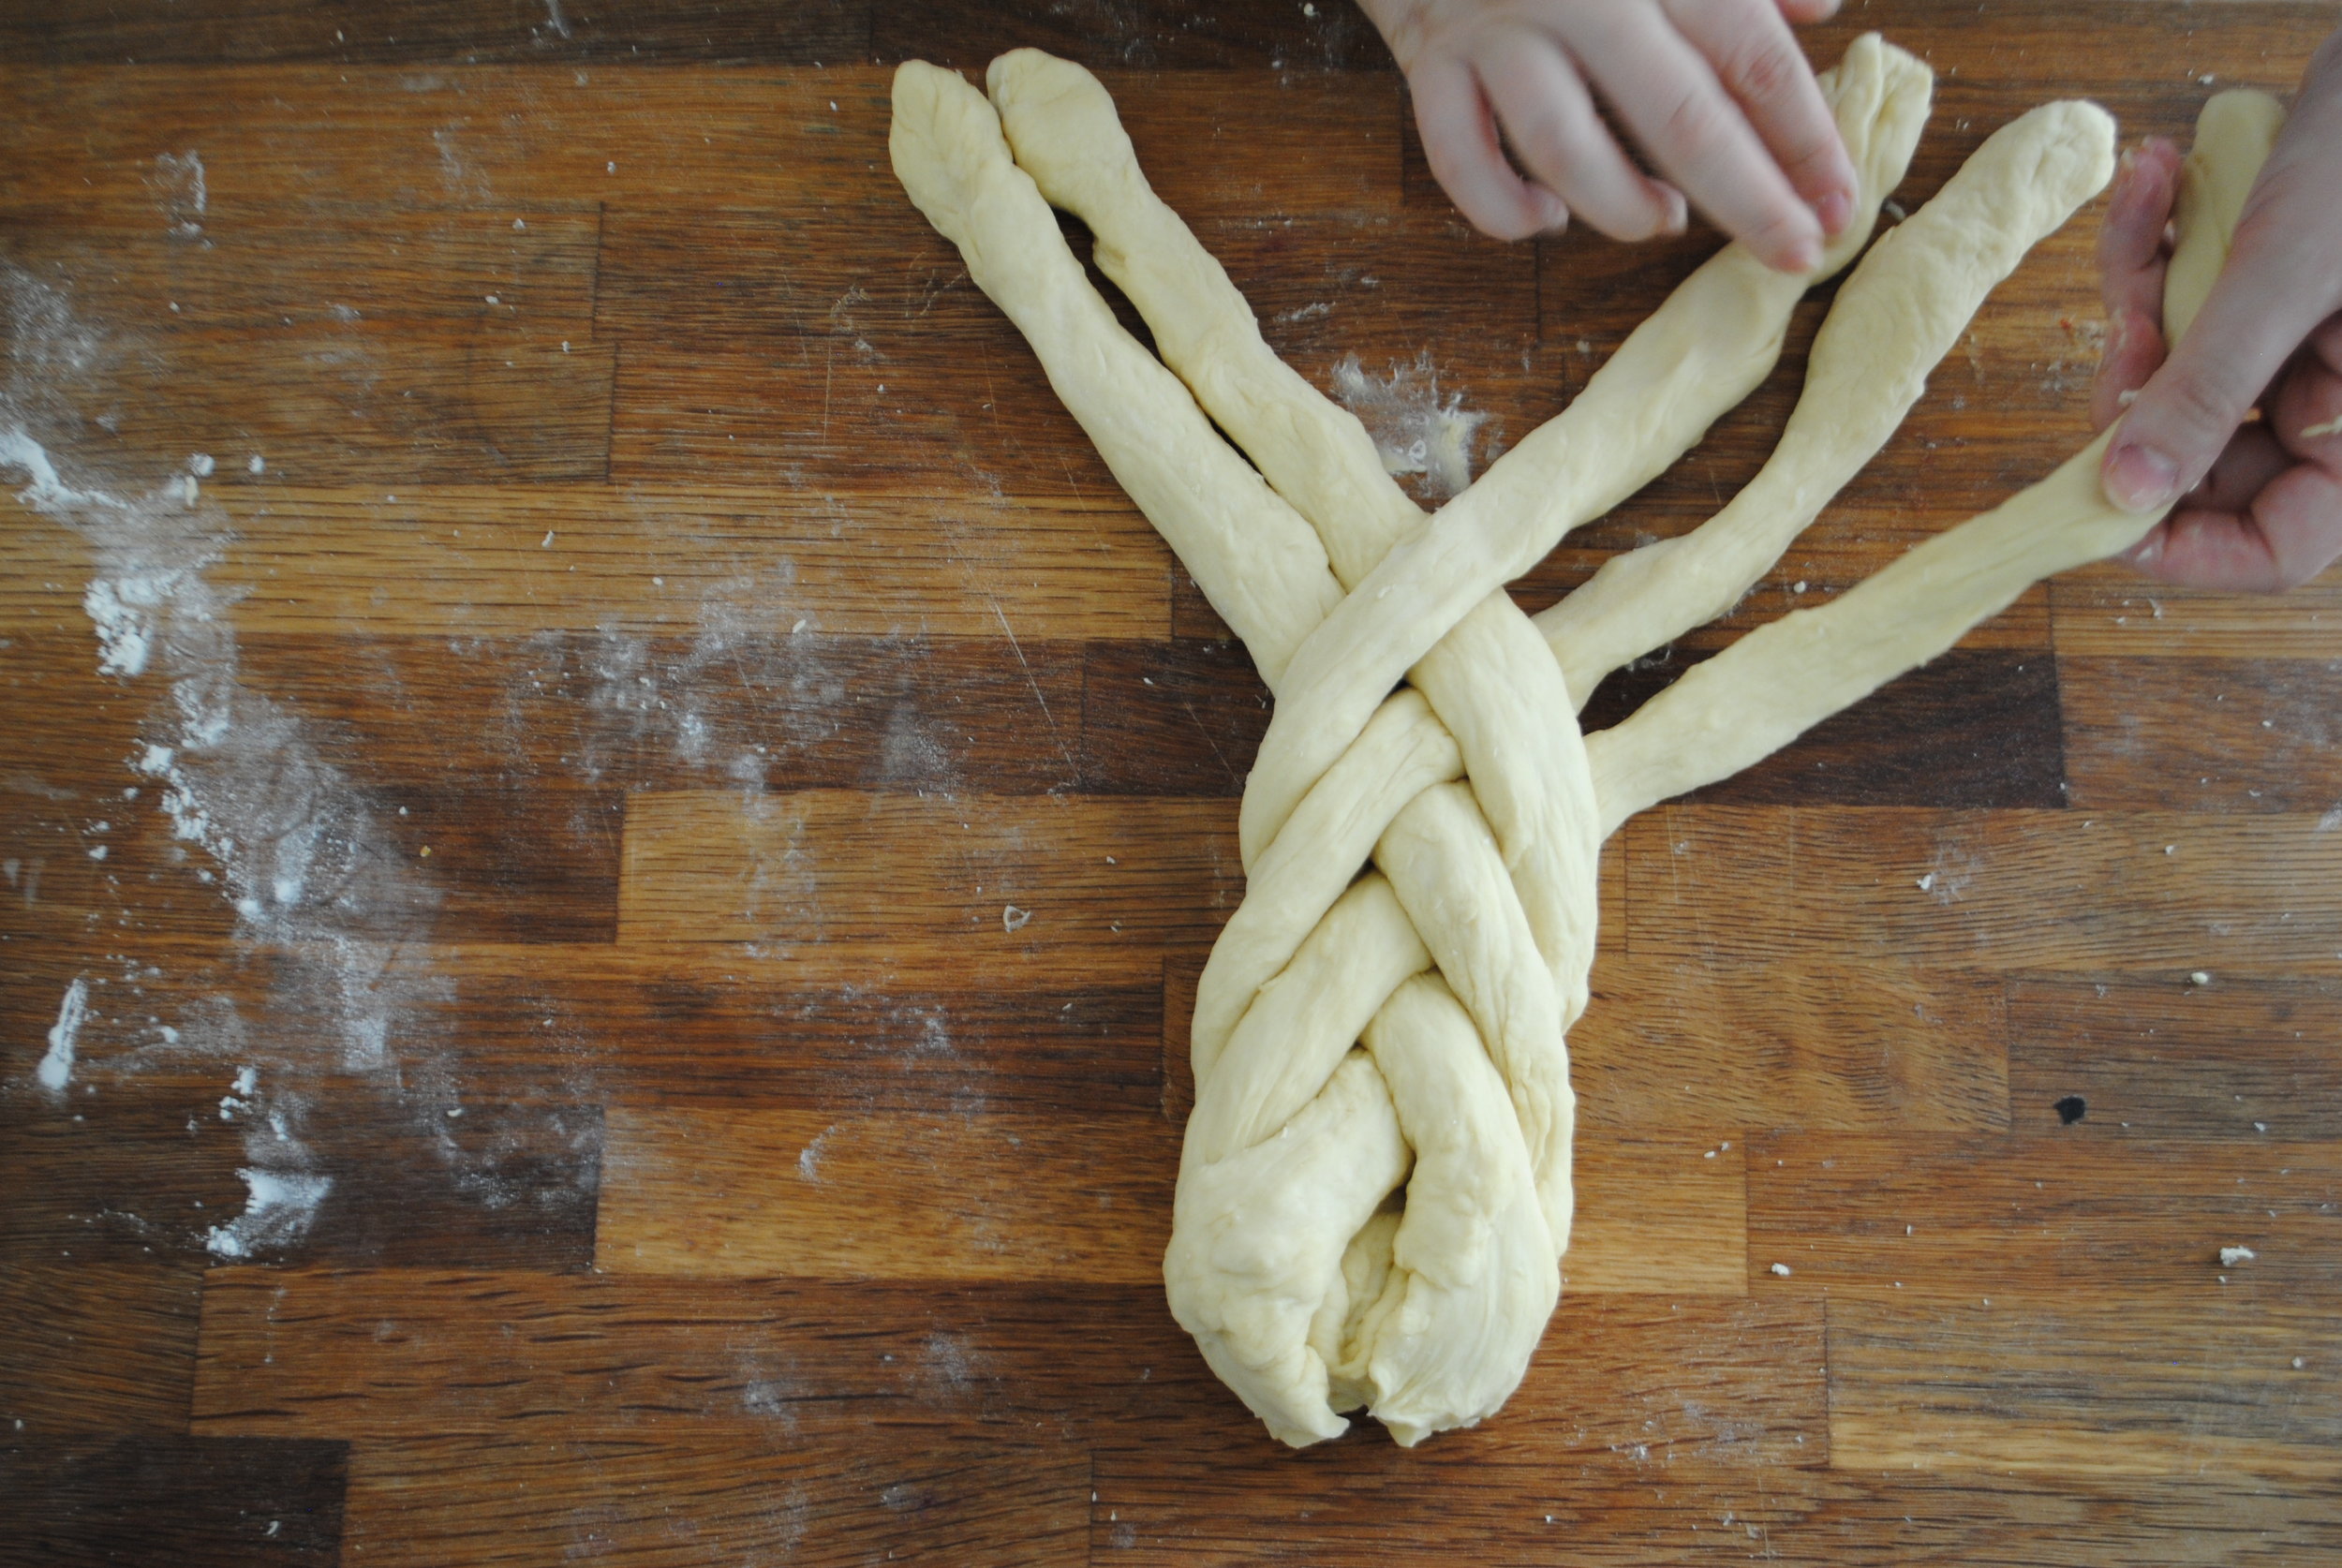
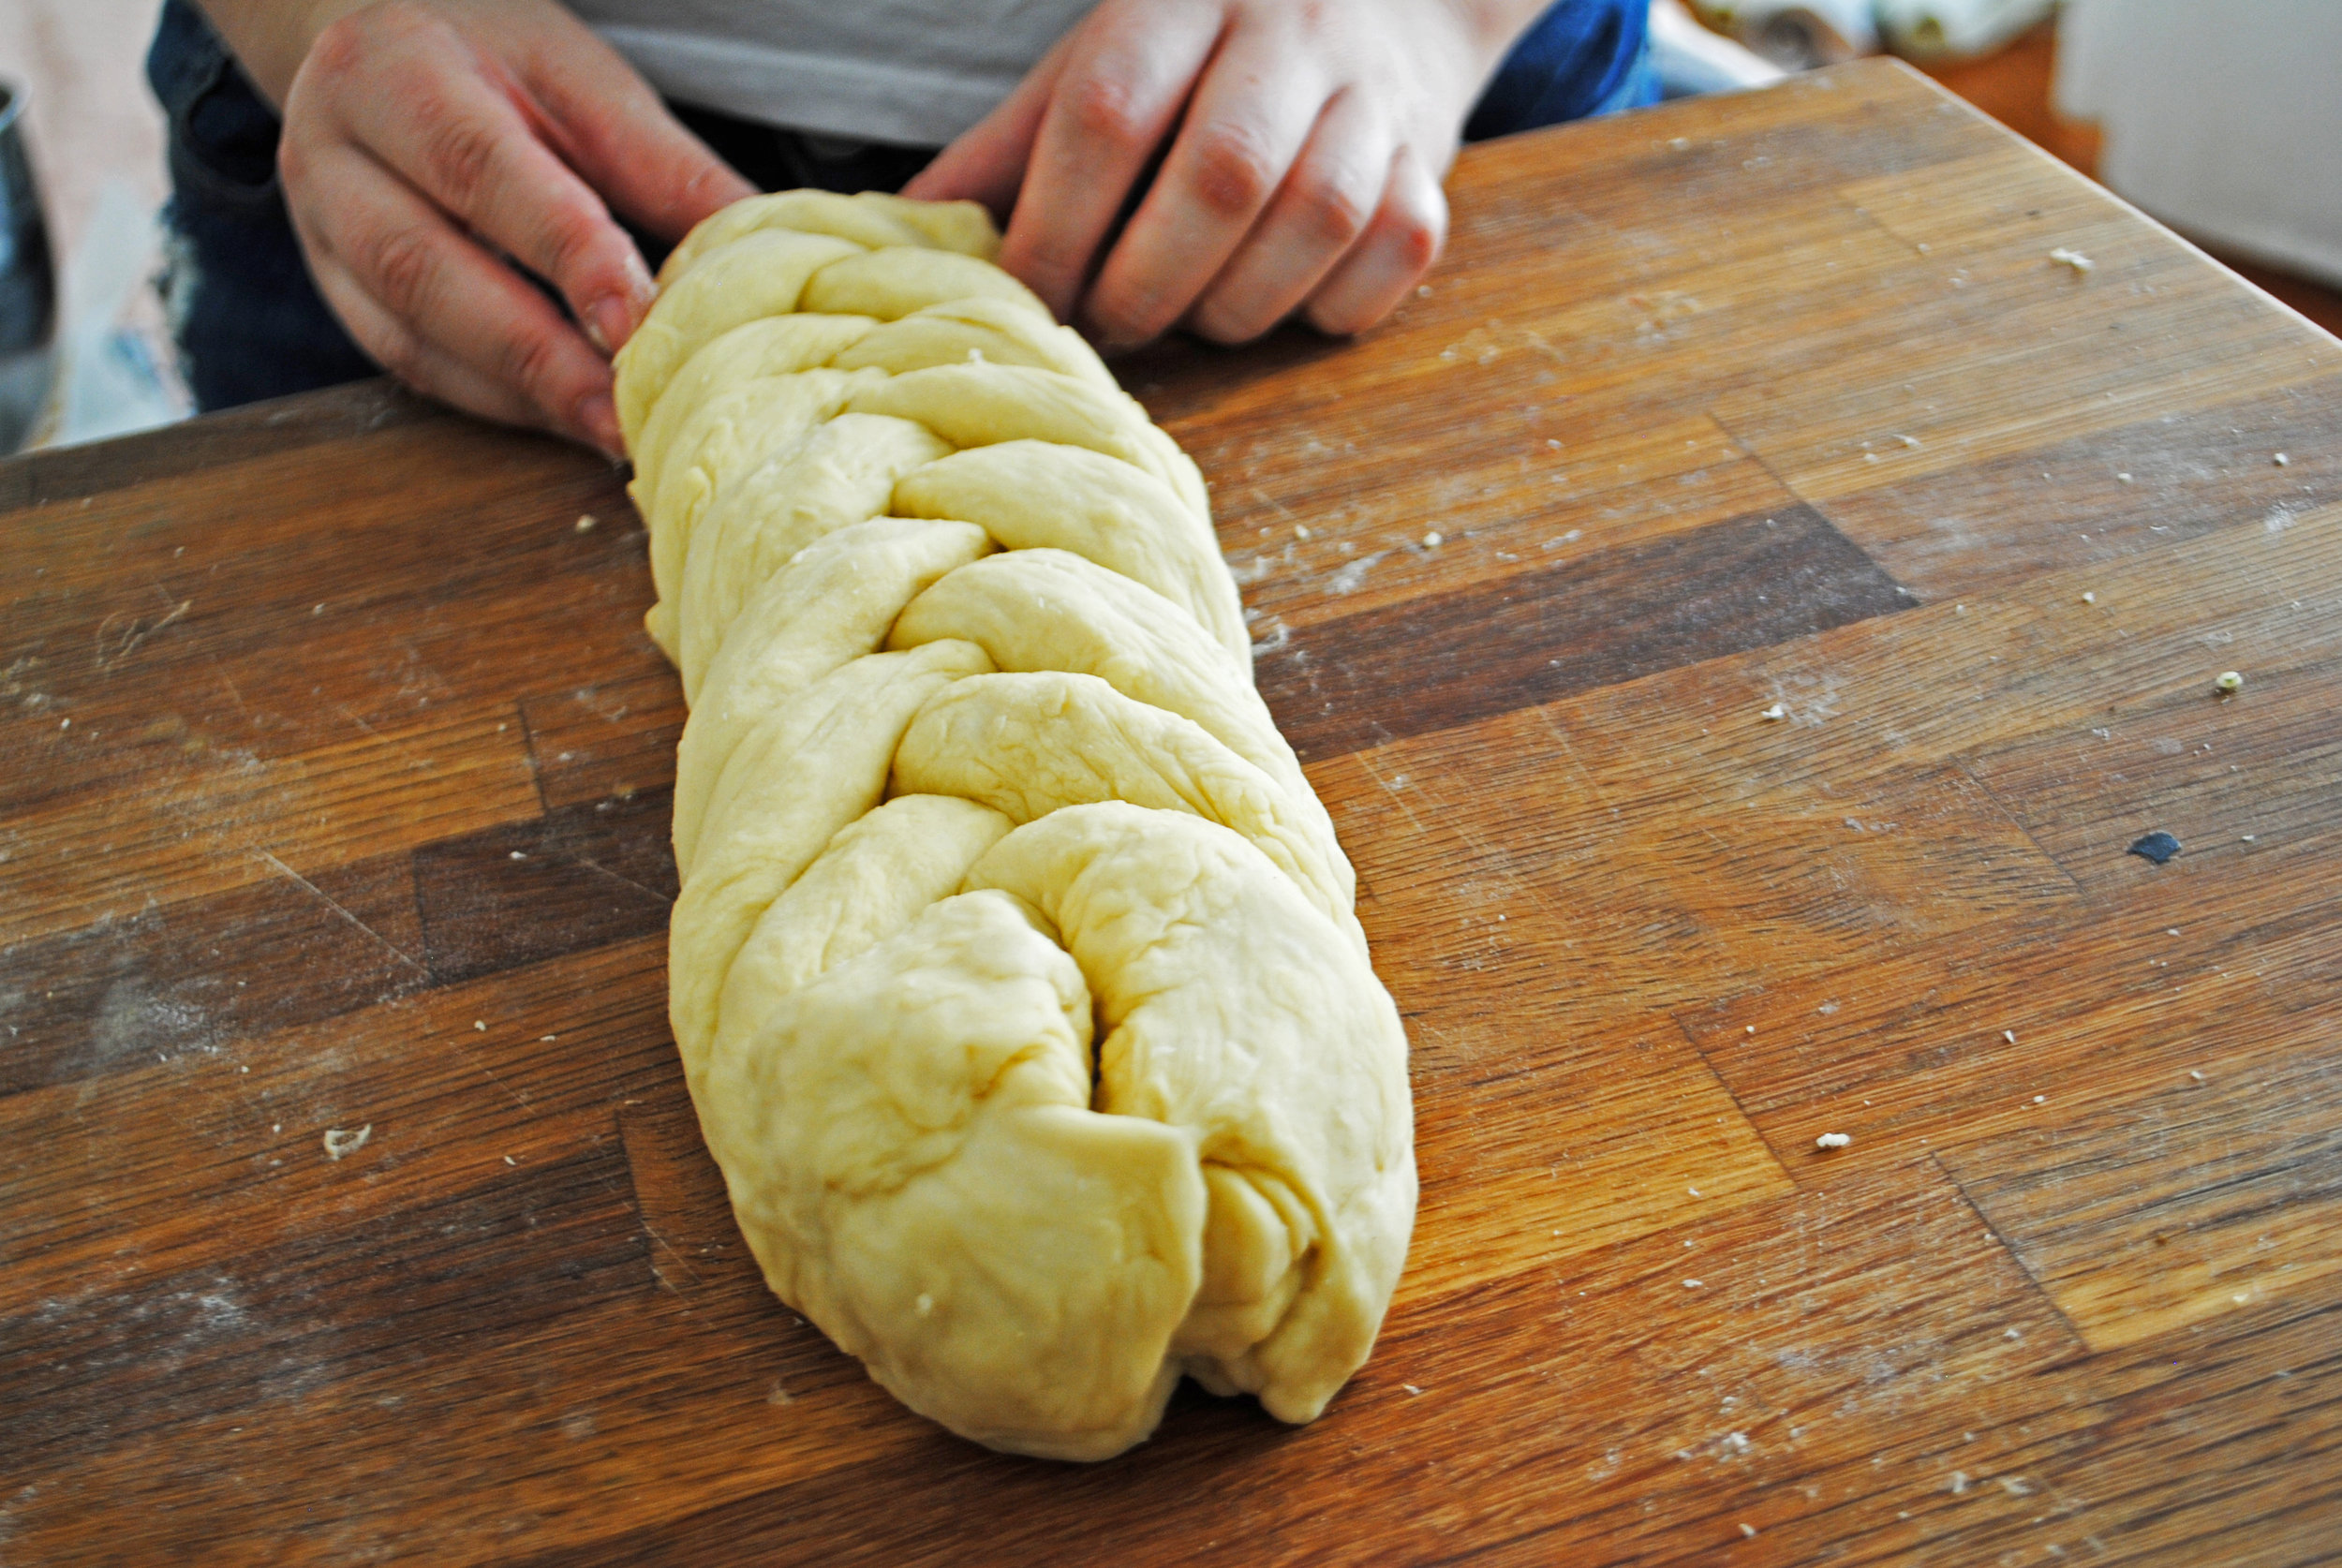
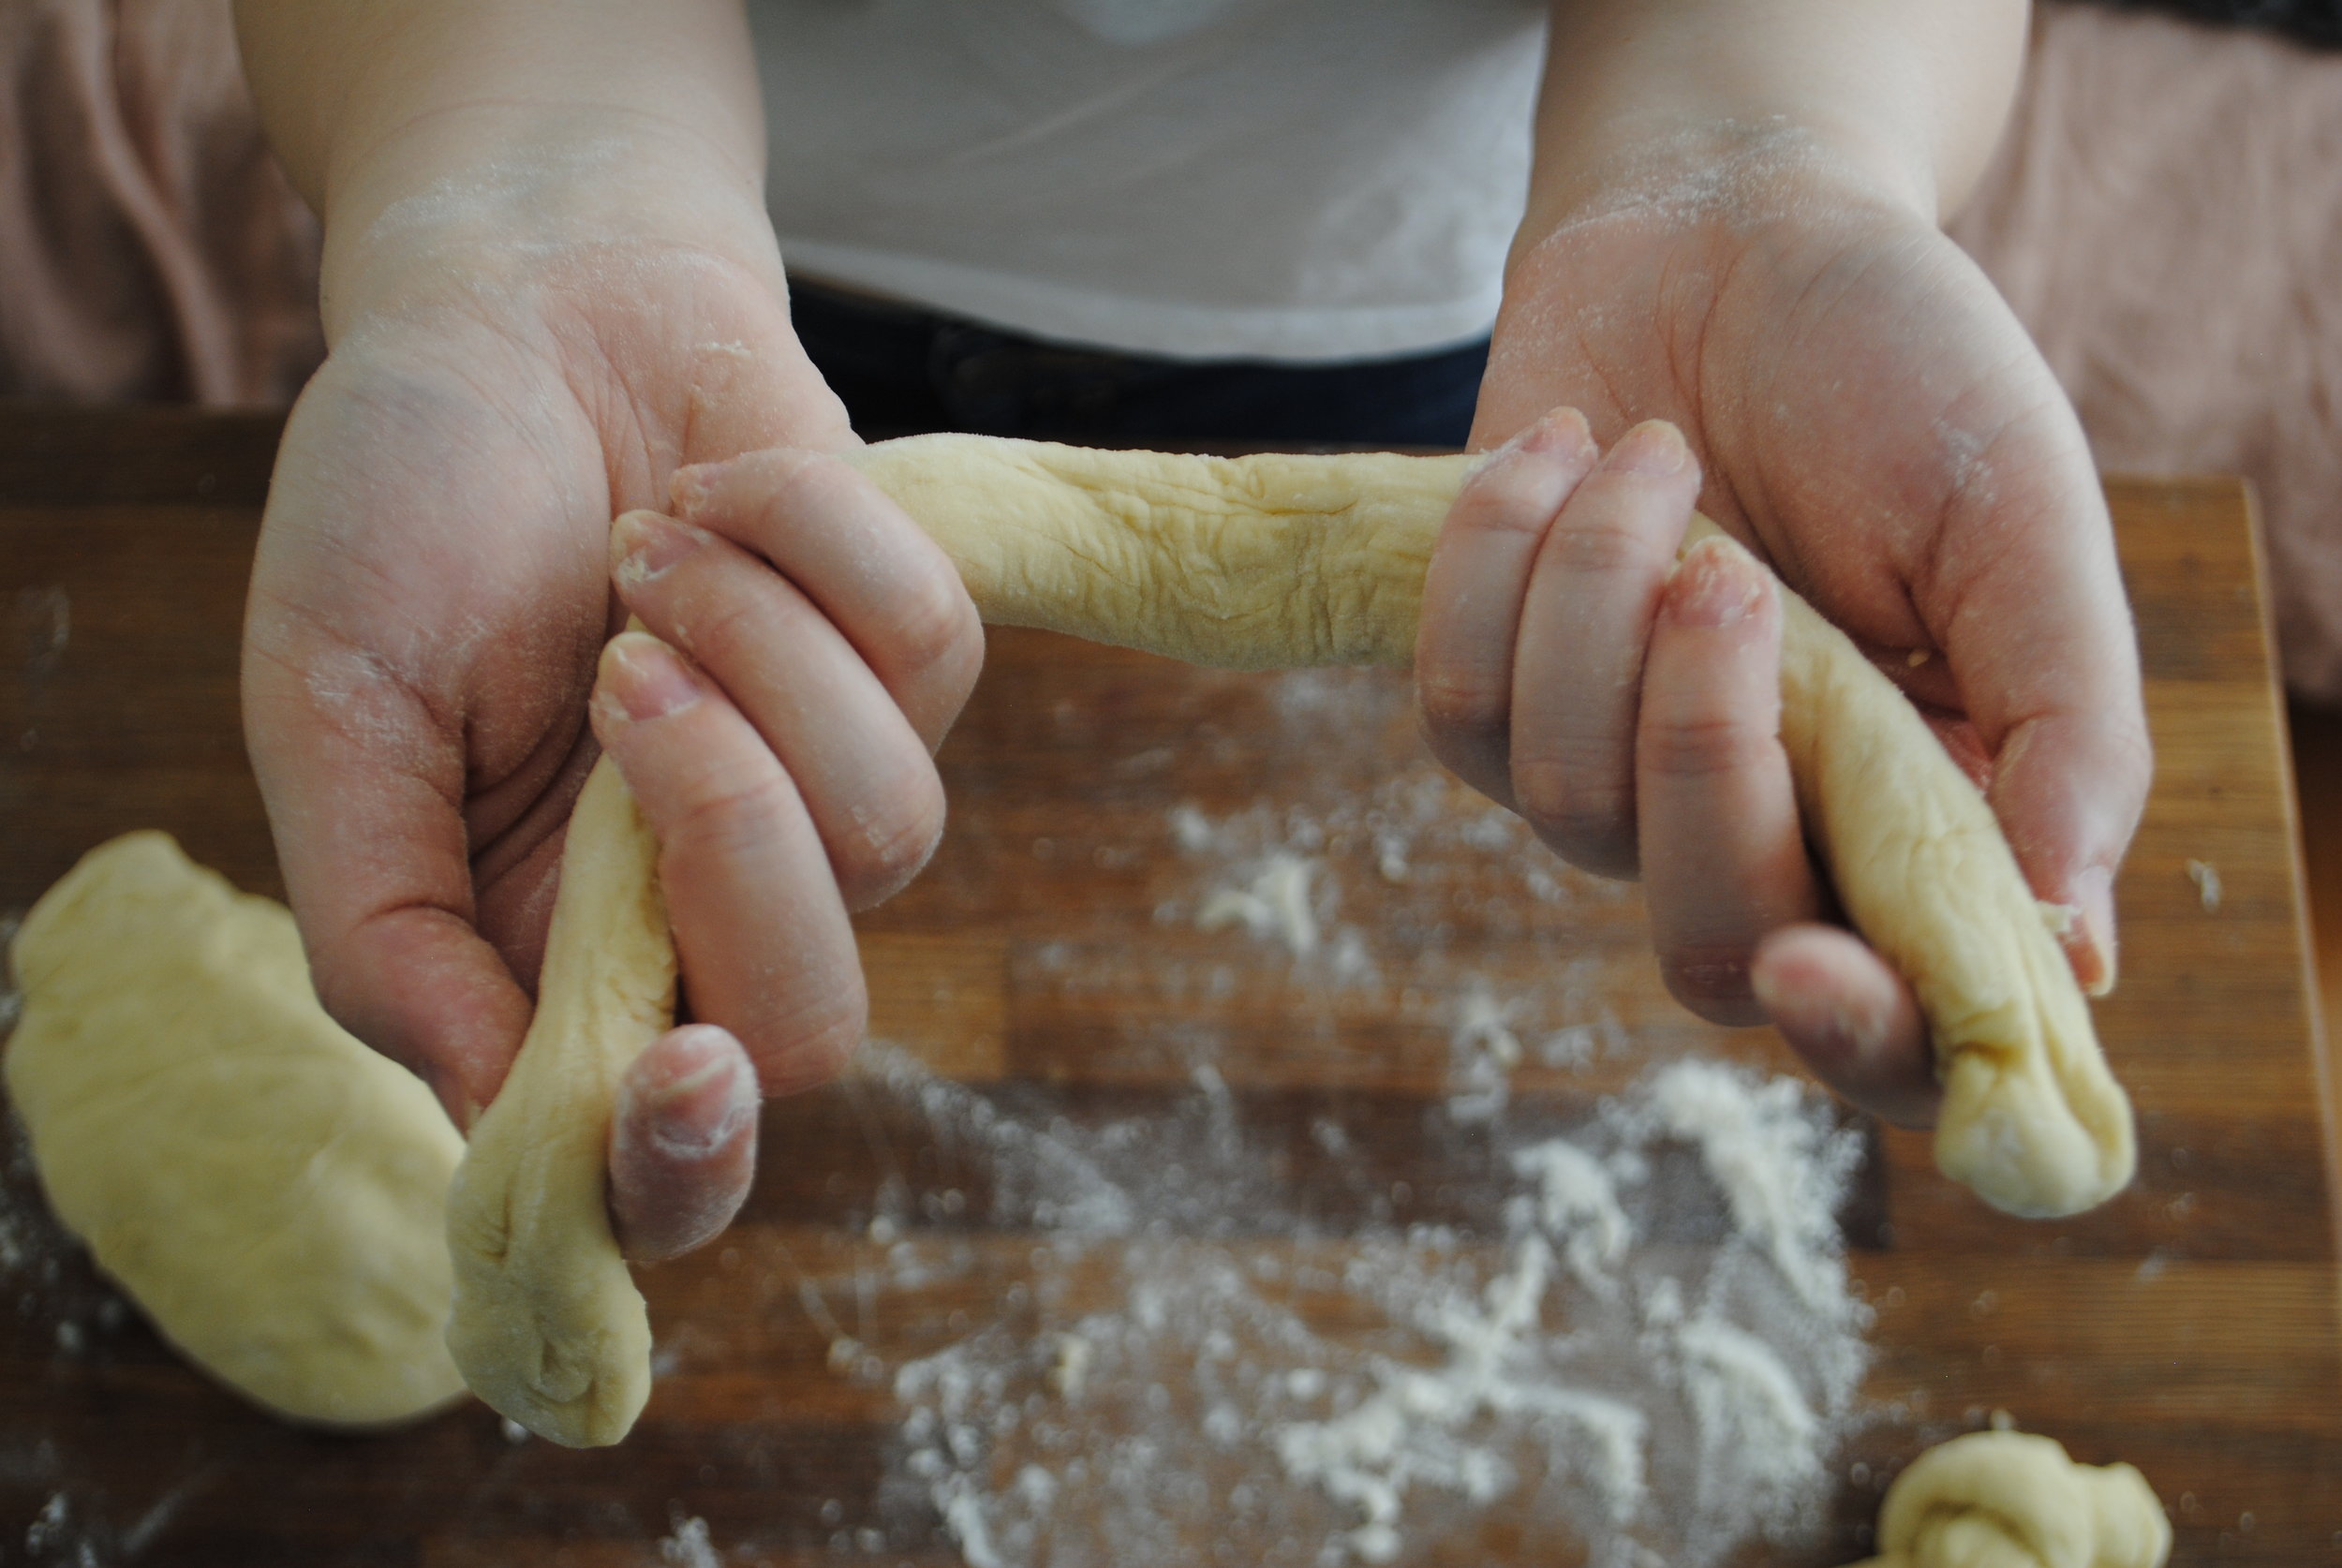
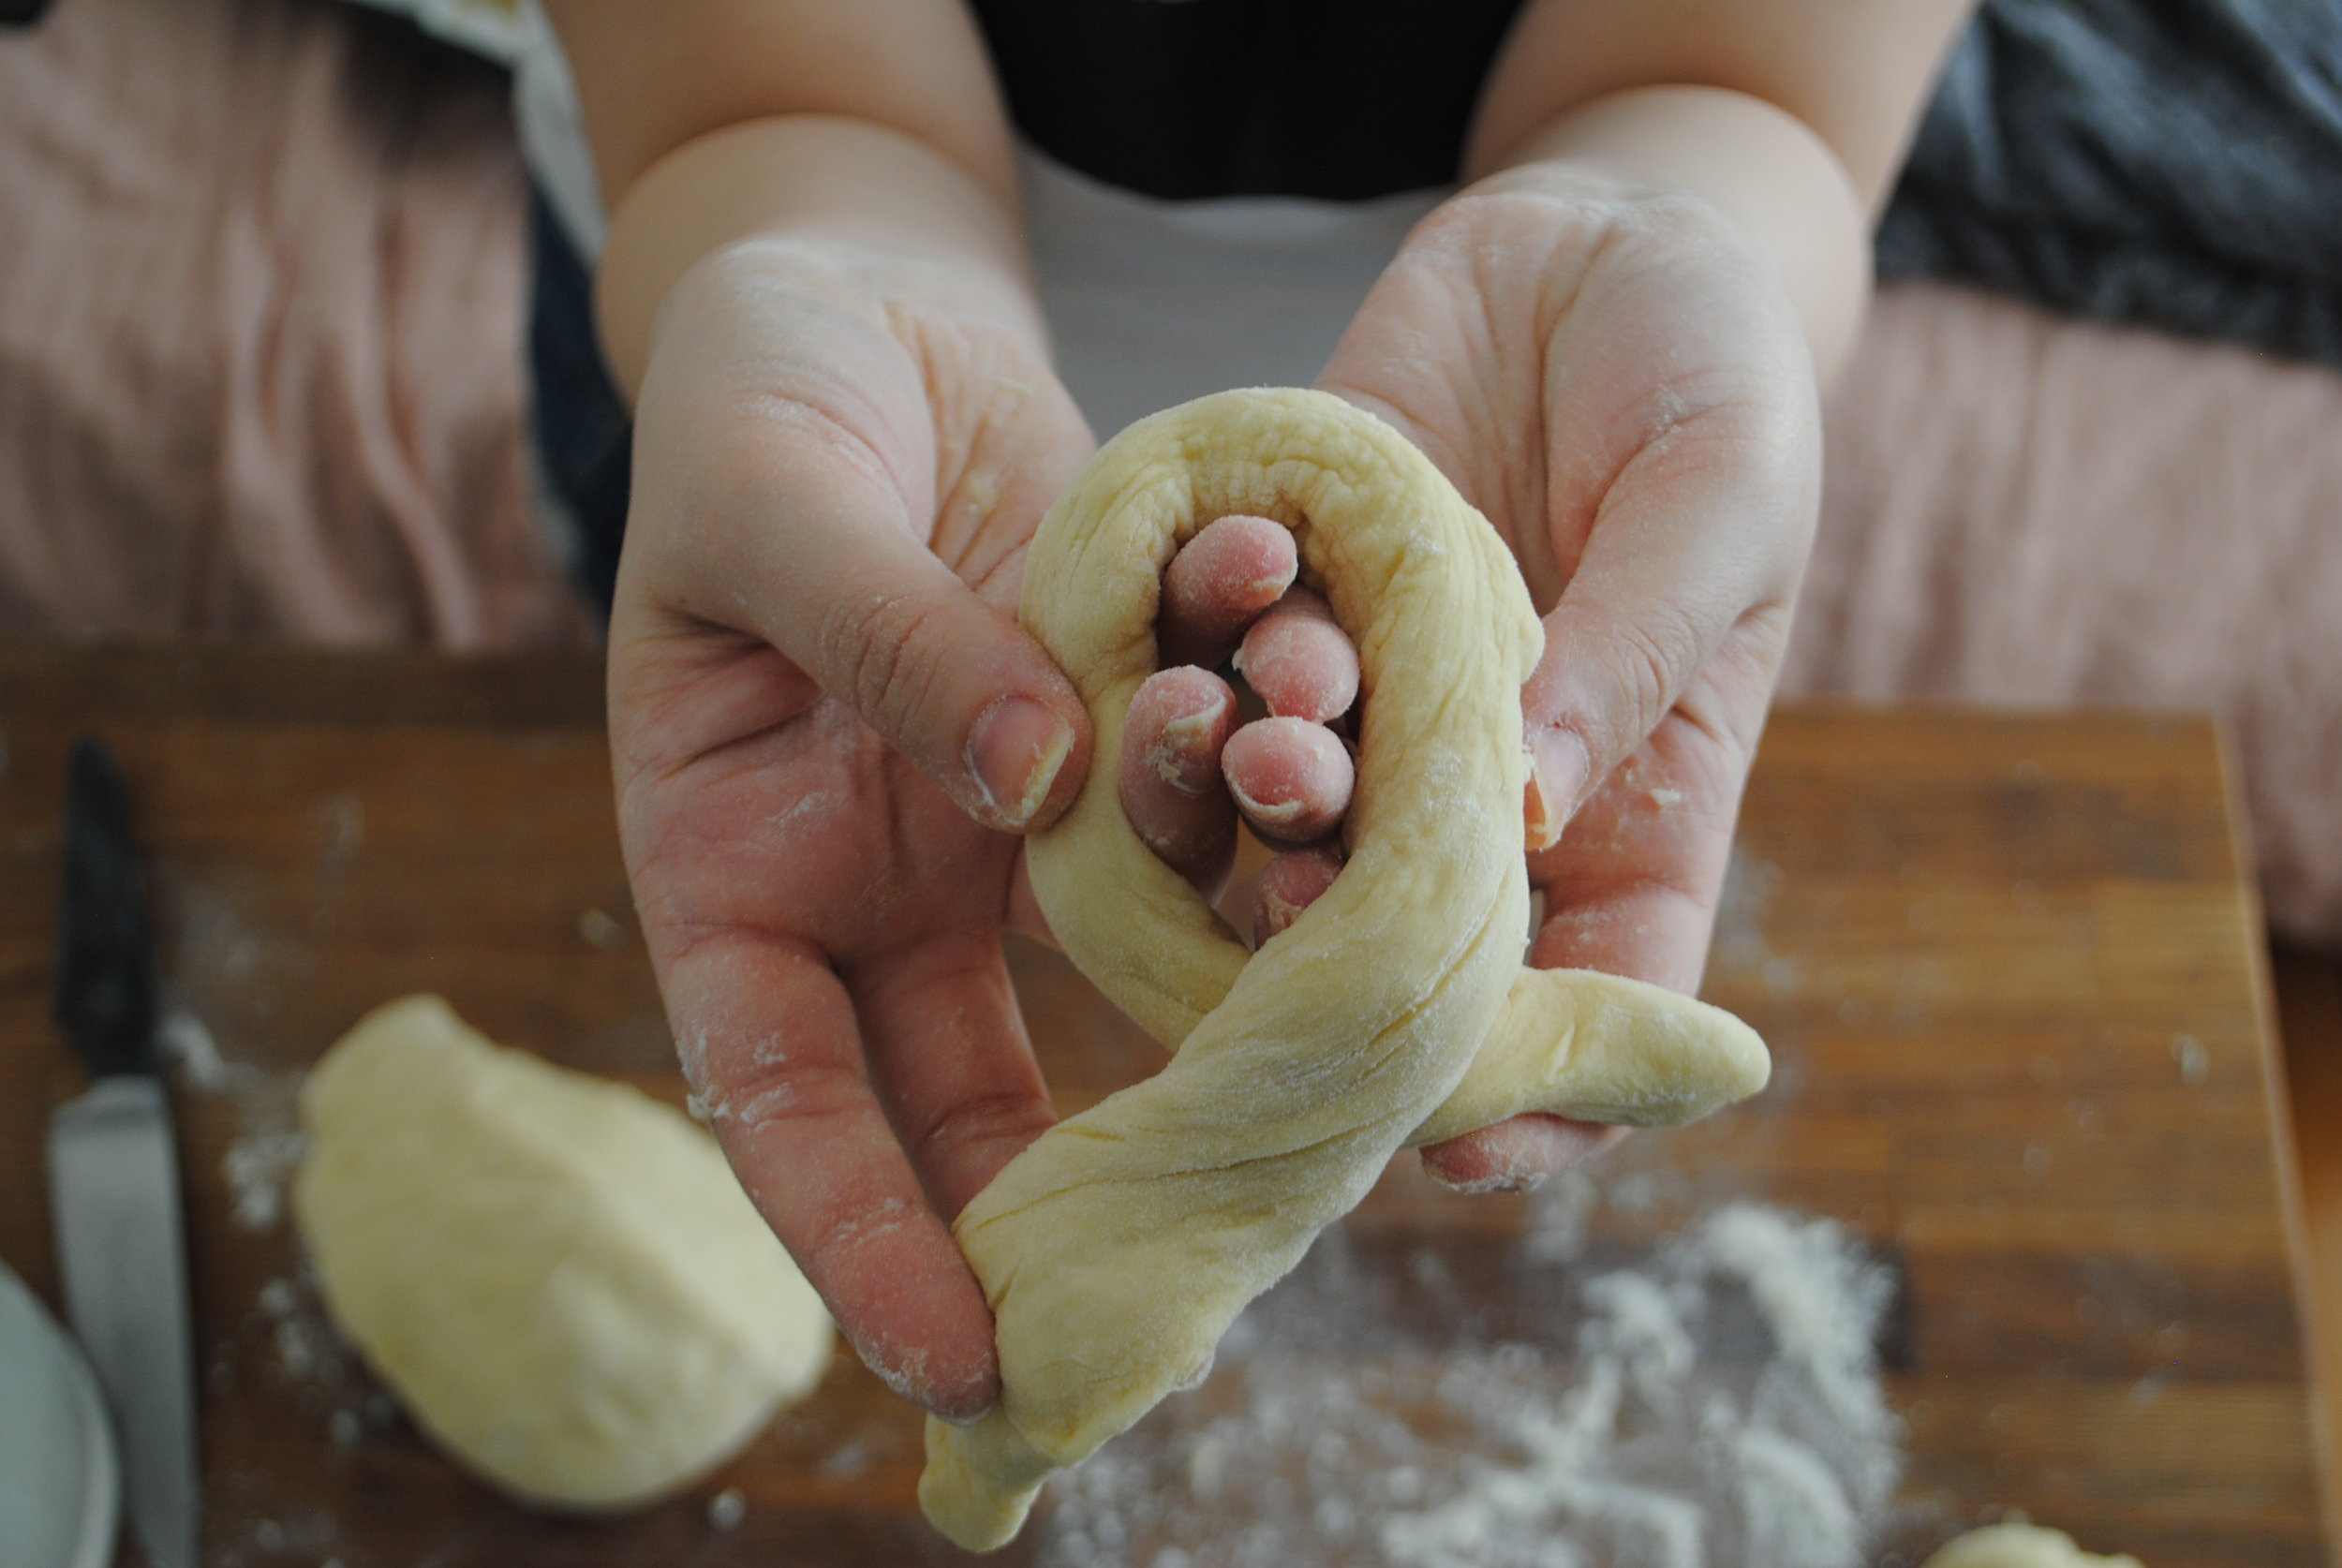
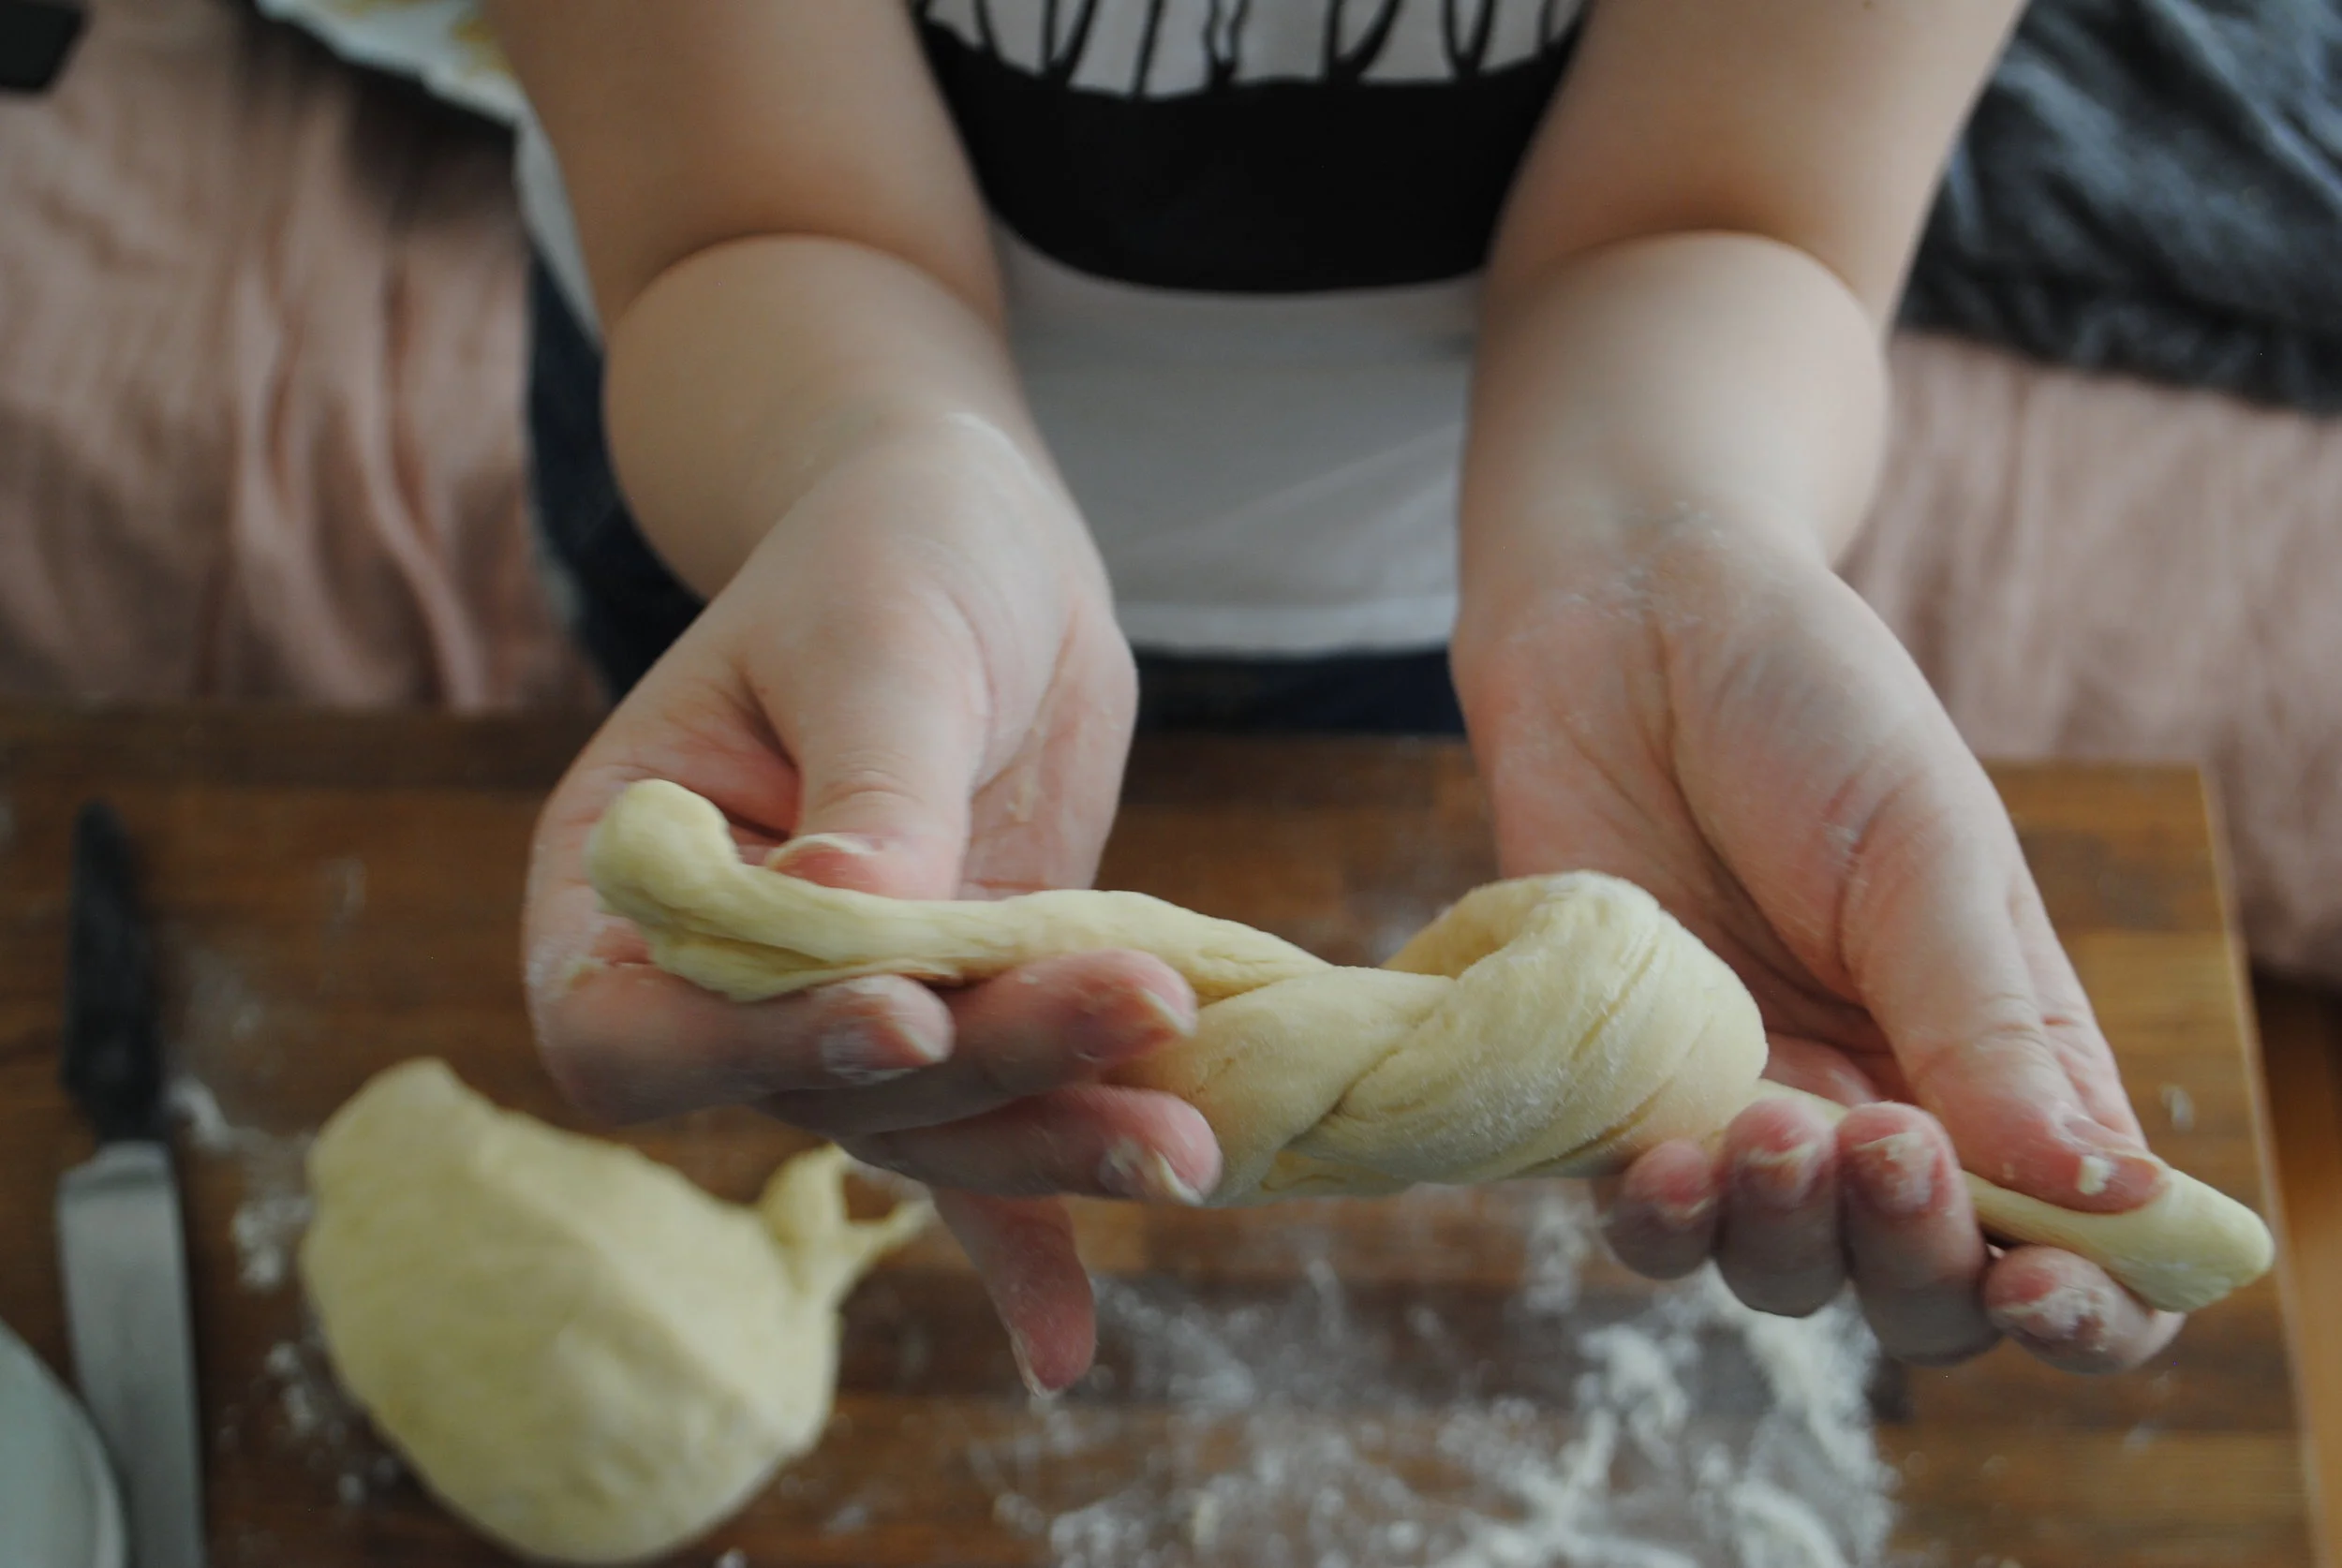
Divide the dough into half, or thirds for smaller challot. Braid challot and put onto a cookie sheet lined with parchment paper. Let rise another 1/2 hour.
Brush with almond or cashew milk to get a brown crust. At this point feel free to sprinkle the challah with seeds, minced, sautéed garlic, or coarse salt. You can also slit the ropes before you braid and sprinkle in the add-ins, then seal the ropes up again.
Bake on 350 for 30 minutes or even better, on convection at 325 for 26 minutes.
Cool on a wire rack and try not to eat it all before Shabbat!
*To be honest, I almost always forget to punch the dough, and I’m often not home anyway as the dough is rising, so don’t worry about it—this is a very forgiving recipe.
**There is also a quick-rise method, which works really well, especially if you are in a hurry or if the air in your kitchen is especially dry: Turn your oven on to 170 degrees and place an oven-proof bowl filled with hot water into it. When the oven is preheated and your dough is ready to rise (after step 5), put the dough in its bowl into the oven and TURN OFF THE OVEN (pleasedon’t forget that step!). Let the dough sit in this nice, warm steam room for one hour. Then you can go straight to step 7.